Earlier this month, I was thinking it was too soon to talk about pumpkin or anything #PSL (I'm looking at you, Starbucks). Yet one day, as I held a package of dainty porcini mushroom ravioli, I suddenly found myself craving a creamy pumpkin sauce to go with them. I don't know where this came from - I've never had pasta with a pumpkin sauce before - but I knew I had to make it. Did I know how? No, but that didn't stop me. Did I fall for all that pumpkin advertising? Yep, I sure did!
Creamy Pumpkin Sauce with Pancetta and Baby Greens
Olive oil
Two garlic cloves, minced
4-5 oz. diced pancetta
Ground nutmeg, to taste (optional)
Fresh or dried rosemary and sage, to taste (optional)
5 oz. baby greens (like spinach, Swiss chard, arugula)
1 can (15 oz.) pumpkin puree
4 oz. cream cheese, room temperature
8 oz. filled pasta (ravioli, tortellini, or other; gnocchi would also work here nicely)
In a large saucepan over medium heat, drizzle in about two Tablespoons of olive oil, and add minced garlic and pancetta. Saute for a few minutes, and add nutmeg and herbs, if using. Continue to saute gently, stirring often, until pancetta is crispy on the edges and has rendered most of its fat (cover pan with lid to help this process along). Add baby greens and cook until wilted, then stir in pumpkin puree and cream cheese. Keep stirring to combine and heat all the way through, then turn off heat.
In a medium pan, cook pasta according to package directions (omitting salt) until just done. Turn heat on low under sauce, then scoop out and add pasta to sauce, adding as much pasta water as needed to thin sauce to desired consistency (I like mine quite thick, but you may want a looser sauce). Stir to combine and remove from heat. Server and enjoy!
Notes: You could certainly substitute sliced mushrooms for the pancetta if you prefer not to have meat; likewise, you could substitute cooked cannellini beans or cooked diced/shredded chicken for the pasta. Butternut or acorn squash puree would also be lovely here instead of pumpkin. The cream cheese works really well, but I bet an herbed goat cheese would be fabulous!
>o<
Enjoying the comforts of home: Easy recipes, fun crafts, gardening tips, and inspiration for living the quiet life. Join me!
More to explore:
Showing posts with label Lunch. Show all posts
Friday, September 20, 2019
Fall for It: Creamy Pumpkin Sauce with Pancetta and Baby Greens
Labels:
Dinner,
Fall,
Kitchen Mouse,
Lunch,
Mouse at Home,
Sauce
Friday, September 02, 2016
Puttin' on the Dogs: Corndog Casserole
I really like good hot dogs—the kind that are natural, uncured, and free of nitrates and nitrites, just like the bacon I've mentioned previously. Yes, they're on the expensive side, but they taste exactly the way a hot dog should taste: delicious! So if you happen to be feeding a crowd, make life easy and serve them in a casserole. It's no coincidence this is easy to transport, too:
Corndog Casserole
Ingredients:
1/4 cup butter, softened
2 Tablespoons honey
2 large eggs, room temperature
1 cup all-purpose flour
1 cup stone ground cornmeal
3 teaspoons baking powder
1 teaspoon kosher salt
1 teaspoon ground mustard
1 teaspoon chopped fresh rosemary
1 cup sharp cheddar cheese, grated
Several grindings of black pepper
1 cup half and half (or whole milk)
8 hot dogs, chopped or cut into halves (natural, nitrate and nitrite free—local and organic if you can find them!)
Preheat oven to 375 degrees Fahrenheit. Grease a 9x13-inch baking pan and set aside.
In a large bowl, cream butter and honey together, then add eggs and stir. In a medium bowl, whisk together flour, cornmeal, baking powder, mustard, salt, rosemary, cheese and pepper. Stir half the dry ingredients into the butter mixture, blend in the half and half, then add the remaining dry ingredients and stir until just combined. Scrape batter into prepared pan, then scatter or place hot dogs across the top, pressing in slightly. Bake for about 30 minutes, or until golden around the edges and a toothpick inserted in the center comes out clean. Let cool slightly and serve with mustard, ketchup and relish—or whatever you like best with hot dogs!
Notes: Definitely include some kind of fresh herb in the mix, even if you don't have rosemary—chives or thyme would be excellent here, either on their own or in combination. For a more breakfast-themed casserole, substitute fully-cooked breakfast sausages for the hot dogs, and serve warm with real maple syrup.
>o<
Labels:
Brunch,
Casserole,
Dinner,
Kitchen Mouse,
Lunch,
Mouse at Home
Monday, March 16, 2015
Can-Can: Canned Salmon and White Bean Salad
This Winter has definitely been a challenge, including when it comes to food—not only did the endlessly bitter-cold days curb my appetite, I sometimes couldn't get out to the store even if I had been hungry. Thankfully, I try to keep some high-protein canned goods in my pantry, and one day I was able to pull together this tangy, filling salad to tempt my stomach:
Salmon and White Bean Salad
Ingredients:
1 can (6 oz.) boneless, skinless salmon, drained and flaked
1 can (15 oz.) cannellini beans, drained and rinsed
1/4 cup olive oil
2 Tablespoons champagne vinegar
1 Tablespoon Dijon mustard
1/2 teaspoon dried tarragon, crumbled
Salt and pepper to taste
In a large bowl, gently toss salmon and beans together with a sprinkling of salt and pepper. In a jar with a tight-fitting lid, combine olive oil, vinegar, mustard and tarragon; close tightly and shake until emulsified. Pour over salad and mix to combine—taste for seasoning and adjust if desired. Serve with veggie sticks, crackers, chips, or over baby greens. This will be great alongside a juicy, ripe tomato in the Summer!
Notes: Cannellini beans are my favorite, but use whatever beans you enjoy most. You can also substitute your favorite vinegar for the champagne vinegar, your favorite herb for the tarragon, and certainly canned tuna for the salmon. I wasn't fussy about measuring the ingredients for the dressing, so just go by eye—you can always add more of something if needed afterwards. Please do add some finely chopped onion/scallions, celery, or bell pepper for more flavor and crunch (I just didn't have any in the house that day).
>o<
Labels:
Dinner,
Gluten-Free,
Grain-Free,
Kitchen Mouse,
Lunch,
Mouse at Home
Thursday, January 15, 2015
Pantry Raid: Ham and Cheese Strata
Waste not, want not, as the saying goes—and (for the most part) it's very true. I try to save as much as possible, from decent-sized scraps from my latest craft project, to odds and ends in the kitchen. They may not seem like much in themselves, but eventually they can be used to help me make something greater than the sum of its parts.
Soups and stews are surefire ways to utilize leftover food, but a casserole often does the trick quite nicely. Since I always have milk and eggs in the fridge, my go-to dish is usually a strata. You may call it a breakfast casserole or an egg bake—for that matter, you might even call it Lady Jane Grey, because I guarantee it won't last long once you make it! By their very nature, my stratas differ from one to the next. When asked how I make them, I usually try to change the subject, because I don't really know the answer—they just kind of make themselves. However, I was sure to pay attention this time and take note of exactly what and how much I used.
The beauty of this "recipe" is the ease with which you can mix and match the ingredients. I used 8 eggs, but anything from 6 to 9 will work perfectly well. Whole milk was on hand, but half and half or heavy cream are excellent substitutes if you have some that needs using. Cheese is optional, but highly encouraged—up to two cups of your choice for this size pan. I had some bread in the freezer for the base, but leftover roasted potatoes or home fries are delicious. Have some leftover grilled or sauteed veggies? Chop them up and throw them in as well. In place of the ham I used here, crumbled bacon or chopped, cooked breakfast sausage are perfect—or leave the meat out altogether. Dried tarragon I had from my garden, but thyme or rosemary would also be lovely. The best part is that stratas are very easy to make, and don't take much time to cook. Savings all 'round!
Ham and Cheese Strata
Ingredients:
1/2 loaf sourdough bread (about 1/2 lb.), torn or cubed into 1-inch pieces
6 oz. black forest ham, diced into 1/2 inch pieces
1 cup grated parmesan cheese
8 large eggs
1 cup whole milk
1 Tablespoon Dijon mustard
1 teaspoon dried tarragon, crumbled (or dried thyme/rosemary)
Salt and pepper
Preheat oven to 350 degrees Fahrenheit.
Grease a 9 x 13-inch pan (I used some bacon fat I had saved) and spread the bread evenly over the bottom. Scatter the ham over it and then sprinkle on the cheese. In a large bowl, whisk together eggs, milk, mustard and tarragon. Add a few pinches of salt and several grinds of pepper (if using something very salty like bacon, you may want to omit adding any salt at this stage). Pour egg mixture over everything in the pan and let sit for 5-15 minutes so the bread can absorb some of the liquid, then bake for 25-30 minutes, or until the edges are golden and bubbly and the eggy custard is set. Let cool for 10-15 minutes or to room temperature before serving—with some homemade tomato jam, of course :-)
>o<
Labels:
Breakfast,
Brunch,
Kitchen Mouse,
Lunch,
Mouse at Home
Thursday, January 01, 2015
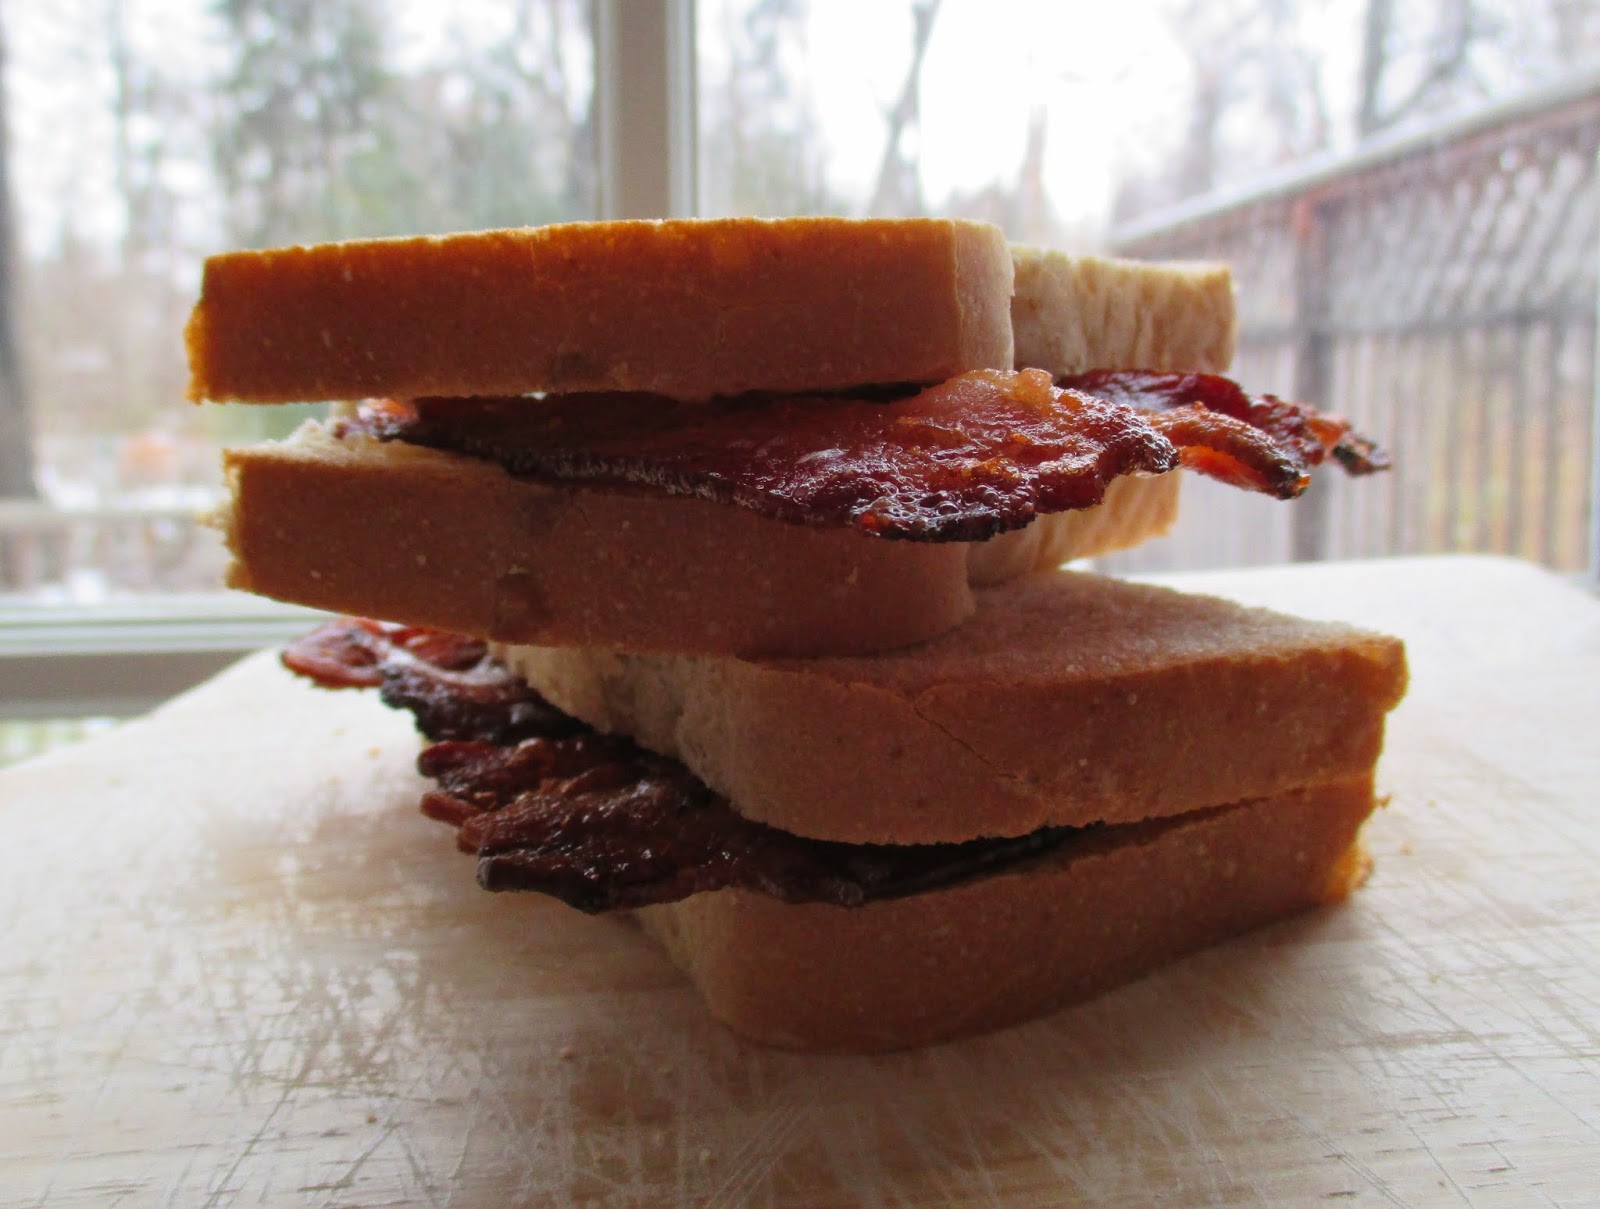
And A Bacon New Year!!! How to Make a Bacon Sandwich
Pork is traditional fare on New Year's Day, having to do with the symbolic way in which our porcine friends nose their way forward through life. And, let's be honest, there's no better way to enjoy pork than by eating bacon :-) Since you may also have need of some extra carbs and fat after the excesses of last night, this is just the sandwich for you:
Bacon Sandwich
For each sandwich:
3-4 slices pork bacon (preferably nitrate/nitrite free), cooked until crisp and lightly drained
2 slices good white bread
Softened butter
Generously butter both pieces of bread, then sandwich bacon between bread, close and cut in half. Enjoy!
Notes: The salty bacon is wonderful with the sweet, creamy butter, and the bread helps you hold it all together and soak up those flavors. Even so, this is a rich sandwich, so have it the traditional way with a big mug of steaming hot tea! And be sure to save that bacon fat—use it to sauté greens, grease a pan for baking cornbread, or sweating your veggies when making soups and stews :-)
>o<
Bacon Sandwich
For each sandwich:
3-4 slices pork bacon (preferably nitrate/nitrite free), cooked until crisp and lightly drained
2 slices good white bread
Softened butter
Generously butter both pieces of bread, then sandwich bacon between bread, close and cut in half. Enjoy!
Notes: The salty bacon is wonderful with the sweet, creamy butter, and the bread helps you hold it all together and soak up those flavors. Even so, this is a rich sandwich, so have it the traditional way with a big mug of steaming hot tea! And be sure to save that bacon fat—use it to sauté greens, grease a pan for baking cornbread, or sweating your veggies when making soups and stews :-)
![]() |
| Liquid gold. |
>o<
Labels:
Breakfast,
Brunch,
Kitchen Mouse,
Lunch,
Mouse at Home
Sunday, November 30, 2014
French Kiss: Grilled Turkey, Cranberry and Brie Sandwiches
The Thanksgiving holiday isn't quite over, so treat yourself to a hearty lunch with leftovers from the feast! We've all seen variations of this tasty sandwich at our favorite cafes and eateries, but it's always fun to try and replicate things at home. The French flavors found here are not only the brie, but the Dijon mustard and brioche bread:
Grilled Turkey, Cranberry and Brie Sandwiches
For each sandwich:
2 half-inch slices brioche, challah, or any good egg bread
2-3 slices roast turkey
Sliced brie cheese
Cranberry sauce
Dijon mustard
Softened butter
Assemble your sandwich by spreading some cranberry sauce on the inside of one slice of bread and some Dijon mustard on the other. Layer on the turkey and brie and close the sandwich. Heat a non-stick skillet or grill pan over medium heat; butter the top of the sandwich. Place top-side down in the skillet and grill until golden. Butter the side facing you and flip to grill on the other side. Remove, cut in half, and enjoy!
>o<
![]() |
Grilled Turkey, Cranberry and Brie Sandwiches
For each sandwich:
2 half-inch slices brioche, challah, or any good egg bread
2-3 slices roast turkey
Sliced brie cheese
Cranberry sauce
Dijon mustard
Softened butter
Assemble your sandwich by spreading some cranberry sauce on the inside of one slice of bread and some Dijon mustard on the other. Layer on the turkey and brie and close the sandwich. Heat a non-stick skillet or grill pan over medium heat; butter the top of the sandwich. Place top-side down in the skillet and grill until golden. Butter the side facing you and flip to grill on the other side. Remove, cut in half, and enjoy!
>o<
Labels:
Brunch,
Kitchen Mouse,
Lunch,
Mouse at Home,
Seasonal,
Thanksgiving