I cannot tell a lie: I was only using #CherryMonth as an excuse to make these "Bakewell Tart" bars! The idea for this recipe had been on the back burner for quite some time, so when I finally had all the ingredients together, I got to work.
And boy, was it work! Mixing the dough turned into a hands-on workout, but the end result was smooth and dreamy. The cherry spread I used for the filling was a bit tart, but only because I used a juice-sweetened brand. The glaze, however, was perfect: just a drizzle to hint at that flawless white pool so iconic of those miniature Bakewell Tarts you see stores:
Cherry-Almond "Bakewell Tart" Bars
Ingredients:
1 cup butter, softened
7 oz. (about 10 Tablespoons) almond paste
1/4 teaspoon kosher salt
2 cups all-purpose flour
10-13 oz. cherry jam, spread, or preserves
1/4 cup confectioner's sugar
1 teaspoon milk (half and half would also work)
Butter an 8x8- or 9x9-inch baking pan; set aside. Preheat oven to 350 degrees Fahrenheit.
In a large bowl, cream butter, salt, and almond paste together, breaking up the paste with the back of the spoon—it may be lumpy, but that's okay. Stir in one cup of the flour, then start stirring in the second cup. If the dough isn't coming together, scrape any bits off the spoon and get in there with your hands! Mix and knead everything together until there is nothing stuck to the side of the bowl, and you have a smooth dough. Reserve about a third, then flatten out and press the remaining dough evenly into the bottom of the pan. Bake for about 15 minutes, or until set and slightly golden around the edges. Remove from the oven and carefully (that pan is HOT) spread the cherry jam evenly over the base (if your jam isn't spreadable, give it a vigorous stir to loosen). Pinch off bits of the reserved dough and scatter over the jam, then return to the over and bake for another 20-25 minutes, or until the edges are a deep golden brown and the filling starts to bubble around the edges. Remove and let cool completely.
In a small bowl, stir together confectioner's sugar and milk until smooth. Drizzle the glaze diagonally across the entire surface of the cooled bars. Let the glaze set, then cut into 16 pieces.
Notes: Bakewell Tart is traditionally made with either cherry or raspberry jam, but I think blackberry, peach, or even plum jam would be great here. Almond paste can be quite expensive, so if you have some almond flour knocking around, you can try making your own! Store any leftover bars tightly covered at cool room temperature for up to three days, or in a airtight container in the fridge for up to a week.
>o<
Enjoying the comforts of home: Easy recipes, fun crafts, gardening tips, and inspiration for living the quiet life. Join me!
More to explore:
Showing posts with label Cookies. Show all posts
Monday, February 24, 2020
Nothing But the Truth: Cherry-Almond "Bakewell Tart" Bars
Labels:
Cookies,
Dessert,
Egg-Free,
Kitchen Mouse,
Vegetarian
Monday, December 09, 2019
Short and Sweet: Chai-Spiced Shortbread Cutout Cookies
Every year, I like to make a lightly-spiced shortbread cookie, cut into seasonal shapes for holiday gifting—and eating! In previous years, I've used cinnamon, cardamom, or ground ginger for the main flavoring. This year, I decided to make a thoroughly warming, comforting, chai-spiced version. These cookies are rich, delicious, and will last several weeks stored in an airtight container in a cool, dry place. Sprinkling the tops of the cookies with a little granulated sugar before baking allows them to twinkle in the light, and provides a little burst of crunch and sweetness as well. These are perfect for the holidays, or any day when you need a special treat!
Chai-Spiced Shortbread Cutout Cookies
Ingredients:
1 cup butter, softened
1/2 cup confectioner's sugar
1 teaspoon pure vanilla extract
1/4 teaspoon kosher salt
2 cups all-purpose flour
2 teaspoons chai spice mix (or see notes below)
2 Tablespoons (or so) granulated sugar, for sprinkling (optional)
In a small bowl, stir together flour, salt, and chai spice mix. In a large bowl, cream butter and sugar together until light and fluffy. Stir in vanilla, then blend in flour mixture until smooth. Divide dough in two and wrap each half tightly in plastic wrap, flattening into discs as you go. Chill dough for several hours, or overnight.
When ready to make cookies, remove one disc of dough from the fridge about 30 minutes beforehand, line baking sheets with foil or parchment paper, and preheat oven to 350 degrees Fahrenheit.
Unwrap and roll dough out on a lightly floured surface with a rolling pin (lightly flour the rolling pin and the dough as well). Roll out evenly to about 1/8" thick, then cut using shapes of your choice with cookie cutters dipped in flour. Transfer cutouts onto prepared sheets an inch or so apart, and sprinkle lightly with granulated sugar, if using. Bake for about 8-10 minutes, or until cookies are lightly golden around the edges (cookies will puff up during baking, but settle back down when close to being done). Re-roll scraps, flouring as needed, and keep cutting shapes until the dough is completely used. Repeat with the other disc of dough.
Notes: This recipe will yield about 4 dozen cookies when using two-inch cutters. If you don't like chai spice, use whatever spice mix you enjoy, like pumpkin or apple pie spice. Before starting, I like to scoop out some plain flour into a small dish for my "bench" flour, sprinkling where needed and for dusting the cookie cutters. I don't have a pastry board or any other special equipment, so I simply roll my dough out on a piece of wax or parchment paper. This actually makes it very easy to rotate the dough when rolling to achieve an even thickness!
>o<
Labels:
Christmas,
Cookies,
Egg-Free,
Food Gifts,
Holiday,
Kitchen Mouse,
Mouse at Home,
Seasonal
Friday, September 21, 2018
Fall in Love: Three Pumpkin Recipes Perfect for Fall
The changing of the seasons is nothing short of magical, and the foods we eat help us mark those transitions. Of course, pumpkin is the name of the game this time of year! As we move into Fall, you'll want to try these recipes in your own home, for the pleasure of making them as well as to share with friends and family. So gather your tribe, set the table, and enjoy the warmth of good food and great company!
Thai Pumpkin Soup: Easy, delicious, and a fantastic canvas for a variety of additions, it can be made vegan to accommodate guests of any food persuasion. It also freezes well, so definitely keep some on hand for a quick option at the end of a chilly day.
Individual Pumpkin Custards: Simple yet luscious, these are a gluten-free/grain-free treat, one that works equally well for breakfast as well as dessert! They're also fantastically easy to transport, and a welcome addition to any dessert table.
Pumpkin Butter Bars: Is it a bar cookie? A slab pie? Does it matter??? All you need to know is that these are out of this world, and deserve to be made as soon as possible. But be warned, they are just as easy to eat as they are to make!
What's your favorite pumpkin recipe? What do you look forward to making when the weather turns chilly and the leaves start to fall?
>o<
Labels:
Cookies,
Dessert,
Fall,
Kitchen Mouse,
Mouse at Home,
Seasonal,
Soup
Friday, August 24, 2018
Georgia on My Mind: Peach "Pie" Bars with Pecan Streusel
A few weeks ago, I was fairly obsessed with these oatmeal cookie bars—I couldn't stop thinking about them! I finally convinced myself it was okay to make them if I shared them with friends, but that didn't stop me from eating quite a few myself. Just before making them, I couldn't remember if there were nuts in the recipe or not. And when I thought about it some more, I wondered, "Why aren't there nuts in the recipe??? That would taste great!!!" So then it was August, and August reminds me of peaches, and peaches remind me of Georgia, and don't they just happen to specialize in pecans there, too? I'm sure you see where this is going!
Peach "Pie" Bars with Pecan Streusel
Ingredients:
1 cup very soft butter
1/2 teaspoon kosher salt
3 cups all-purpose flour
13 oz. peach preserves (homemade would be fabulous!)
1/2 cup chopped pecans
1/2 teaspoon ground cinnamon
1/4 cup firmly packed brown sugar
Preheat oven to 350 degrees Fahrenheit. Butter a 9x13-inch baking pan and set aside.
In a large bowl, cream butter and salt together, then add flour and stir to combine as much as you can. At that point, scrunch the mixture between your fingertips to ensure the butter is evenly distributed and there are no dry pockets of flour left. Remove 1 cup of the crumbs to a smaller bowl, and mix together with the pecans, cinnamon, and brown sugar. Set this aside, then spread the remainder of the plain crumbs evenly into your prepared pan and press firmly to form the base. Bake for 15 minutes to set, then remove and (carefully) spread the preserves over the base, and finally sprinkle with the pecan-cinnamon crumbs. Return to the oven and bake for another 25-30 minutes, or until just slightly golden and the edges of the filling start to bubble. Let cool completely before cutting into squares. Cover and store any unused portion in the fridge, but let the bars come to room temperature before trying to cut them again.
Notes: These bars are very sweet, but certainly cut back (or omit) the brown sugar in the streusel topping, if desired. As well, feel free to use any jam/preserves you enjoy, or any nuts you like! As is the case with many of my desserts, these travel well and can remain at room temperature until you're ready to put them away. Oh, and I don't need to tell you how great these would be with vanilla ice cream, right? :-)
>o<
Labels:
Cookies,
Dessert,
Egg-Free,
Kitchen Mouse,
Mouse at Home,
Seasonal,
Summer,
Vegetarian
Saturday, June 09, 2018
Double Trouble: Chocolate-Chocolate Chip Cookies
It's been an incredibly long time since my last blog post, and I have nothing to say for myself! I will, however, offer two rather large, furry excuses for my absence—their names are Bella and Pixie:
I took responsibility for these girls about 18 months ago, and they have been both a delight and a challenge! While incredibly fun and loving, they are also a bit like having toddlers that can climb just about anywhere and get into everything. Such a change from my older girl! Xena has spoiled me for nearly two decades with her calm, intelligent, sensible approach to life. As one friend noted, she's been more like a housemate than a pet:
Now that she has attained "little old lady" status, I try to keep Xena as safe and comfortable as possible, which also means keeping her separated from the younger two. It's been quite a learning curve, but we've (thankfully) reached a point of stasis that seems to suit everyone. Mind, all three would each prefer to be the only cat in the house and the center of all my attention, but they'll just have to go on sharing ;-)
[EDIT: Xena passed away in March, 2019. She was a unique, amazing creature, and I miss her every day.]
To celebrate my two younger ones, here's a recipe with twice the chocolate to keep you (and me!) going for the long haul:
Chocolate-Chocolate Chip Cookies
Inredients:
2 cups almond flour
1/4 cup unsweetened cocoa powder
1 teaspoon baking soda
1/2 teaspoon kosher salt
1/2 cup butter, room temperature
1/2 cup honey (local, if available!)
2 teaspoons vanilla extract
1/4 cup semisweet chocolate chips (mini chips work nicely)
Preheat oven to 350 degrees Fahrenheit. In a medium bowl, stir together almond flour, cocoa, baking soda and salt until combined. In a large bowl, cream butter, honey and vanilla together until smooth, then add dry ingredients and stir until completely incorporated. Gently stir in chips. Using a Tablespoon scoop or measure, drop onto lined cookie sheets and bake, one sheet at a time, for 10-12 minutes (you should get about 24 cookies total). Although they will puff while baking, the cookies will flatten as they cool. Transfer pans to racks and let cool completely before removing with a spatula (the cookies will still be very soft). Store in an airtight container at room temperature, or refrigerate for firmer cookies.
Notes: These cookies are a great choice for anyone with egg and/or wheat sensitivities. They will remain soft and chewy if stored properly, and also freeze well. Substitute any flavor chips for the chocolate chips, or replace with chopped dried fruit or nuts. And just three more words: ice cream sandwiches!
>o<
Labels:
Cookies,
Dessert,
Egg-Free,
Gluten-Free,
Grain-Free,
Kitchen Mouse,
Mouse at Home
Friday, September 16, 2016
Bar None: Pumpkin Butter Bars
The best part about pie is the contrast between that sweet, tangy filling and the flaky crust. My favorite part, especially with pumpkin pie, is where the filling meets the back corner of the pie, when there's just a bit of it left to go with the ever-so-slightly salty crust holding it up. It might not be for everyone, but thankfully, you get to choose—lots of filling, less filling, it's all up to you! I've experimented with these bars several times, and I had only one rule: the crust had to be sugarless, to mimic that pie-like flavor. But I must warn you, these bars are somewhat addictive, and frighteningly easy to make!
Pumpkin Butter Bars
Ingredients:
1/2 cup very soft butter
1/4 teaspoon kosher salt
1 1/2 cups all-purpose flour
1 1/2-2 cups pumpkin butter
Preheat oven to 350 degrees Fahrenheit. Butter an 8-inch square baking pan and set aside.
In a medium bowl, cream butter and salt together, then add flour and stir to combine as much as you can. At that point, scrunch the mixture between your fingertips to ensure the butter is evenly distributed and there are no dry pockets of flour left. Reserve 1/2 cup of the crumbs, then spread the remainder evenly into your prepared pan and press firmly to form the base. Bake for 15 minutes to set, then remove and (carefully) spread the pumpkin butter over the base, and sprinkle with the reserved crumbs. Return to the oven and bake for another 25-30 minutes, or until just slightly golden and the edges of the filling start to bubble. Let cool completely before cutting into squares. Cover and store any unused portion in the fridge, but let the bars come to room temperature before trying to cut them again.
Notes: Use whatever fruit butter, fruit spread or preserves you like best—and feel free to use half as much filling if you prefer, as the sweetness will still carry through quite well. You can easily double the recipe, reserving a full cup of crumbs for the top, and bake in a 9x13-inch pan for the same times as given above. What flavor will you try?
>o<
Labels:
Cookies,
Dessert,
Egg-Free,
Fall,
Kitchen Mouse,
Mouse at Home,
Seasonal
Friday, August 05, 2016
The Cookie Crumbles: Oatmeal Cookie Bars
I wanted to bring a sweet treat to a family picnic last month, but was also in the mood to try a new recipe (well, new for me, at least). At the same time, it had to be something that would last through several hours of driving AND be able to stand out in the heat of Summer after the trip. This was no time for a multi-layer cake with a delicate buttercream frosting! A handheld treat would be ideal as well, to nibble unencumbered while strolling—or sitting—as the case might be. Then I remembered I'd been wanting to try an oatmeal cookie bar recipe, and this one seemed to fit the bill. I immediately doubled it, and was very glad I did:
Oatmeal Cookie Bars
Ingredients:
1 cup packed light brown sugar
2 cups all-purpose flour
2 cups rolled oats
1/2 teaspoon baking soda
1/2 teaspoon kosher salt
1 cup very soft butter
10-12 oz. jam (I used a local triple-berry)
Preheat oven to 350 degrees Fahrenheit. Butter a 9x13-inch baking pan and set aside.
In a large bowl, stir brown sugar, flour, oats, baking soda and salt together with a fork until completely combined, making sure to break up any lumps. Add butter and continue to cut in with your fork, but switch to your hands towards the end to really work all the ingredients together and ensure the butter is evenly distributed (you don't need to be careful or have a "light" hand with this process). Evenly press about half to two-thirds of the mixture into your prepared pan, gently spread with jam to within 1/4 inch of the edges, and top with the remaining crumbs. Bake for about 30 minutes, or until the edges are golden, being careful not to overbake or burn as the oats will turn bitter. Let cool completely, cut into squares and serve!
Notes: Adapted with many thanks from the recipe noted above. These bars are rich and buttery, with a slight punch of fruit from the jam for balance. My family members all agreed these would be excellent paired with ice cream, but it was far too hot to attempt to get any and bring it back before it/we melted. As well, the bars are deliciously crumbly, and forks were requested all round to help with the eating. Even so, there will still be plenty of crumbs left on your plate, and how you handle them is entirely up to you...
>o<
Labels:
Cookies,
Dessert,
Egg-Free,
Kitchen Mouse,
Mouse at Home,
Vegetarian
Friday, February 05, 2016
All Thumbs: Cocoa-Cherry Cream Cheese Thumbprint Cookies
When I first made these thumbprint cookies last year, I almost immediately wondered if I could make a chocolate version. The easiest solution was substituting a portion of the flour with unsweetened cocoa. Since cocoa is drier than flour, I didn't want to use too much, but the result was still a good first step. The cookies have a nice hint of chocolate with the wonderful tang of cream cheese, and are still rich and tender like the originals. And if you don't finish them all in one sitting, no worries—they taste even better after a few days!
Cocoa-Cherry Cream Cheese Thumbprint Cookies
Ingredients:
2 cups all-purpose flour
1/4 cup unsweetened cocoa powder
1 cup butter, softened
8 oz. cream cheese, softened
1 1/4 cups granulated sugar
1 teaspoon pure vanilla extract
1/2 cup cherry preserves (stir to loosen if the preserves are very thick)
In a medium bowl, stir flour and cocoa together until combined. In a large bowl, cream butter, cream cheese and sugar together until light and fluffy. Stir in vanilla extract, then blend in flour mixture until smooth. Cover dough and chill in the fridge for 45 minutes (don't skip this step, the dough is very sticky).
Preheat oven to 350 degrees Fahrenheit, and line baking sheets with foil or parchment.
Using a one-Tablespoon scoop or measuring spoon, scoop dough and roll into balls, then place on lined sheets a few inches apart. Press down firmly in the middle of each with your thumb (I found that washing my hands with hot water, then drying them completely, made this easier as the residual heat helped reduce sticking). Fill each indentation with a scant 1/2 teaspoon of preserves, and bake for 12-16 minutes, or until slightly darker around the bottom edges, the tops of the cookies appear "dry" and the filling is bubbling a bit . Remove and let cool before moving. Once completely cooled, store cookies in an airtight container between sheets of waxed paper, either in the fridge or a very cool spot in your home.
Notes: Fill these cookies with any jam or preserves you like—I chose cherry this time since it's a classic with both chocolate and cream cheese, but I also wondered how a fine-cut orange marmalade or a lightly sweetened nut butter would work. Have a delicious variation of your own? Please share in the comments!
>o<
Labels:
Cookies,
Dessert,
Kitchen Mouse,
Mouse at Home,
Valentine's Day
Monday, February 09, 2015
Under My Thumb: Cream Cheese Thumbprint Cookies
A thumbprint cookie is a great treat to make, providing all the flavors of a sandwich cookie with just a fraction of the effort. The vibrant color of the jam also looks great against the creamy complexion of the cookie, and you can't have Valentine's Day without lots of red! Instead of just my thumb, though, I wanted to make heart-shaped cookies. There are various methods for creating the heart impression, and I would have used one, but then I remembered: I had decorative glass hearts that would do the work for me in just one go!
Cream Cheese Thumbprint Cookies
Ingredients:
1 cup butter, softened
8 oz. cream cheese, softened
1 1/4 cups granulated sugar
1 teaspoon pure vanilla extract
2 1/4 cups all-purpose flour
1/2 cup jam, stirred until smooth (I used seedless raspberry)
Cream butter, cream cheese and sugar together until light and fluffy. Stir in vanilla extract, then blend in flour until smooth. Cover dough and chill in the fridge for 45 minutes (the dough is very soft, so this step is important).
Preheat oven to 350 degrees Fahrenheit, and line baking sheets with foil or parchment.
Using a one-Tablespoon scoop or measuring spoon, scoop dough and roll into balls, then place on lined sheets a few inches apart. Press down in the middle with your floured thumb (or whatever you're using the make the indentation—see notes below). Fill each indentation with a scant 1/2 teaspoon of jam, and bake for 12-13 minutes, or until just golden. Remove and let cool on sheets before moving. Once completely cooled, store cookies in an airtight container between sheets of waxed paper.
Notes: These cookies are adapted from this recipe. The original calls for using two Tablespoons of dough per cookie, but one Tablespoon was perfect, and yielded exactly 56 cookies. It's better to underfill slightly than to overfill with jam—use the tip of your spoon to gently spread the jam evenly throughout the indentation before baking. Instead of your thumb for a round impression, you can try using your index finger to make a "V"-shaped impression to look like a heart :-)
>o<
Labels:
Cookies,
Dessert,
Egg-Free,
Kitchen Mouse,
Mouse at Home,
Valentine's Day
Monday, February 02, 2015
A Snowball's Chance: Mexican Snowball Cookies
Need a little something to melt your true love's heart this season? Give these Mexican Snowballs a try! Like a Russian Teacake's spicier cousin, these little devils go down well with a good cup of coffee (or a nice glass of red wine). The cayenne pepper adds a pleasant warmth, without being too hot to handle ;-)
Mexican Snowball Cookies
Ingredients:
1 cup butter, softened
1/2 cup powdered sugar
1 teaspoon pure vanilla extract
1 3/4 cups all-purpose flour
1/4 cup unsweetened cocoa
1/2 teaspoon ground cinnamon
1/4 teaspoon ground cayenne pepper
1/4 teaspoon kosher salt
3/4 cup finely chopped pecans
1 additional cup powdered sugar, for rolling
Preheat oven to 400 degrees Fahrenheit.
In a medium bowl, stir together flour, cocoa, cinnamon, cayenne pepper and salt. In a large bowl, cream butter and sugar together until fluffy, then blend in vanilla. Add flour mixture until combined, then stir in the pecans. Bring dough together with your hands (wrap tightly in plastic and chill for a few minutes if dough seems to soft at this stage). Roll dough into one-inch balls and place an inch apart on lined baking sheets. Bake until set and just barely colored, about 8-10 minutes. Let cool on baking sheets for two minutes, then roll immediately in powdered sugar and place on lined racks; once completely cooled, roll in powdered sugar again and store in an airtight container.
Notes: These are not overly sweet or chocolate-y, but you could certainly substitute 1/2 cup finely chopped chocolate (or mini chips) for the pecans to make them more decadent. If you have a favorite dried, ground chili, such as ancho or chipotle, use it in place of the cayenne.
>o<
Labels:
Cookies,
Dessert,
Egg-Free,
Kitchen Mouse,
Mouse at Home,
Valentine's Day
Monday, December 22, 2014
Santa, Baby: Candy Cane Kiss Cookies
Christmas Day is almost here, and that means having milk and cookies ready for the Big Guy on Christmas Eve! These kiss cookies just might be the ideal treat for Old St. Nick—plus, the kids can help you with mixing the dough and topping each cookie with a kiss. And don't worry, the Man in Red won't mind if you sneak a few before he gets there ;-)
Candy Cane Kiss Cookies
Ingredients:
One bag candy cane kisses
One box chocolate cake mix
1/3 cup flavorless oil
2 large eggs
Unwrap kisses and set aside in a bowl. Preheat oven to 375 degrees Fahrenheit. In a large bowl, stir together cake mix, oil and eggs until fully combined. Roll 1/2 Tablespoons of dough into balls and place about 2 inches apart on lined baking sheets (you will have about 60 cookies total). Bake until set, about 10-12 minutes. As soon as cookies come out of the oven, place a kiss firmly on top of each. Let cookies cool completely before storing (kisses will stay soft for quite a while).
Notes: Yes, you've seen something like this from me before, but these cookies are so cute and easy, it was worth repeating! The candy stripes on the kisses are particularly festive, and the combination of peppermint and chocolate is a holiday classic. Again, use any mini-sized chocolate candies you have on hand to top these cookies, or roll the dough in sprinkles for extra color and crunch. The cookies themselves are even great plain!
>o<
Labels:
Christmas,
Cookies,
Dessert,
Kitchen Mouse,
Mouse at Home,
Seasonal
Friday, December 12, 2014
When Irish Eyes Are Smiling: Orange-Currant Shortbread Buttons
While making my Christmas cookie list this year, I realized my mind had somehow wandered ahead to St. Patrick's Day. I started dreaming of things like chocolate-stout cake, and had visions of soda bread dancing in my head. Since I like making my soda bread with orange zest and currants, I decided to bake them into a cookie for this holiday, too:
Orange-Currant Shortbread Buttons
Ingredients:
1 cup butter, softened
1/2 cup powdered sugar
1 teaspoon pure vanilla extract
1/4 teaspoon kosher salt
Zest of one orange
2 cups all-purpose flour
1/4 cup dried currants
2 Tablespoons (or so) granulated sugar, for sprinkling (optional)
Preheat oven to 350 degrees Fahrenheit.
In a large bowl, cream butter and sugar together until light and fluffy. Stir in vanilla, salt, and orange zest, then blend in the flour. Add the currants and mix until combined. Take about 1/2 Tablespoonfuls of dough and roll into balls, then flatten gently between your hands (buttons should be about 1/4 inch thick and an inch in diameter). Place on lined baking sheets and prick once in the center with a knife or skewer. Sprinkle with granulated sugar, if using. Bake for about 12-15 minutes, or until the buttons are set and lightly golden around the edges. Remove, let cool completely, and store in an airtight container.
Notes: The orange zest smells (and tastes) heavenly in these cookies, and the currants add a mellow, chewy sweetness without being overly fruity. The basic dough can also be used as a starting point for your favorite flavors, or left plain for classic, buttery shortbread.
>o<
Labels:
Cookies,
Dessert,
Egg-Free,
Kitchen Mouse,
Mouse at Home
Monday, December 08, 2014
Chestnuts Roasting: Chestnut-Chocolate Wafers
Chestnuts are a decadent addition to both sweet and savory dishes during the holidays, and they even work in cookies, too! Sweetened chestnut puree gives these buttery, flaky wafers all the sugar they need, and bittersweet chocolate provides a nice balance:
Chestnut-Chocolate Wafers
Ingredients:
1 cup butter, softened
1/2 cup sweetened chestnut puree (creme de marrons)
1/4 teaspoon kosher salt
2 cups all-purpose flour
1/2 cup finely chopped bittersweet chocolate (about 4 oz.)
Preheat oven to 350 degrees Fahrenheit.
In a large bowl, cream butter and chestnut puree together until smooth, then stir in salt. Blend in flour, then add chopped chocolate and mix until combined. Divide the dough in half, flatten into discs and wrap tightly in plastic wrap. Chill for about 30 minutes, or until the dough is firm enough to work (but not chilled solid). Roll out dough on a floured surface to 1/4 inch thick and cut into shapes using 2-2 1/2 inch cutters. Re-roll scraps, dusting with flour as needed, and continue to cut shapes until the dough is gone. Place the wafers on lined baking sheets, prick them lightly with a fork a few times and chill 5-10 minutes, then bake for about 12 minutes, or until the wafers are evenly golden around the edges and along the bottoms. Remove and let wafers cool completely before storing in an airtight container.
Notes: Chestnut puree can be found in specialty food stores, purchased online, or made at home! If you prefer, use semi-sweet or milk chocolate in place of the bittersweet chocolate. You can also add a 1/2 teaspoon vanilla extract or a 1/4 teaspoon almond extract, if desired.
>o<
Labels:
Christmas,
Cookies,
Dessert,
Egg-Free,
Holiday,
Kitchen Mouse,
Mouse at Home,
Vegetarian,
Winter
Friday, December 05, 2014
From Russia, With Love: Russian Teacakes
Well, perhaps not :-) A quick web search revealed Russian Teacakes don't actually come from Russia, and only urban legends as to how Russia is associated with them in the first place. No matter their origins, this much is clear: they are incredibly delicious, and made in countries all over the world!
Russian Teacakes
Ingredients:
1 cup butter, softened
1/2 cup powdered sugar
1 teaspoon vanilla extract
1/4 teaspoon kosher salt
2 1/4 cups all-purpose flour
3/4 cup finely chopped walnuts
1 additional cup powdered sugar, for rolling
Preheat oven to 400 degrees Fahrenheit.
In a large bowl, cream butter and sugar together until fluffy; blend in vanilla and salt. Add flour until combined, then stir in walnuts. Bring dough together with your hands (wrap tightly in plastic and chill for a few minutes if dough seems to soft at this stage). Roll dough into one-inch balls and place an inch apart on lined baking sheets. Bake until set and just barely colored, about 8-10 minutes. Let cool on baking sheets for two minutes, then roll immediately in powdered sugar and place on lined racks; once completely cooled, roll in powdered sugar again and store in an airtight container.
Notes: These are the first things I make when I start my holiday baking. The rich, buttery dough makes for a long-lasting cookie, and the flavor only improves with time. The dough can be made ahead and stored in the fridge for a few days, wrapped tightly in plastic wrap and flattened into a disc. Allow to come up to room temperature and proceed as above.
>o<
Labels:
Christmas,
Cookies,
Dessert,
Egg-Free,
Kitchen Mouse,
Mouse at Home,
Seasonal
Friday, November 14, 2014
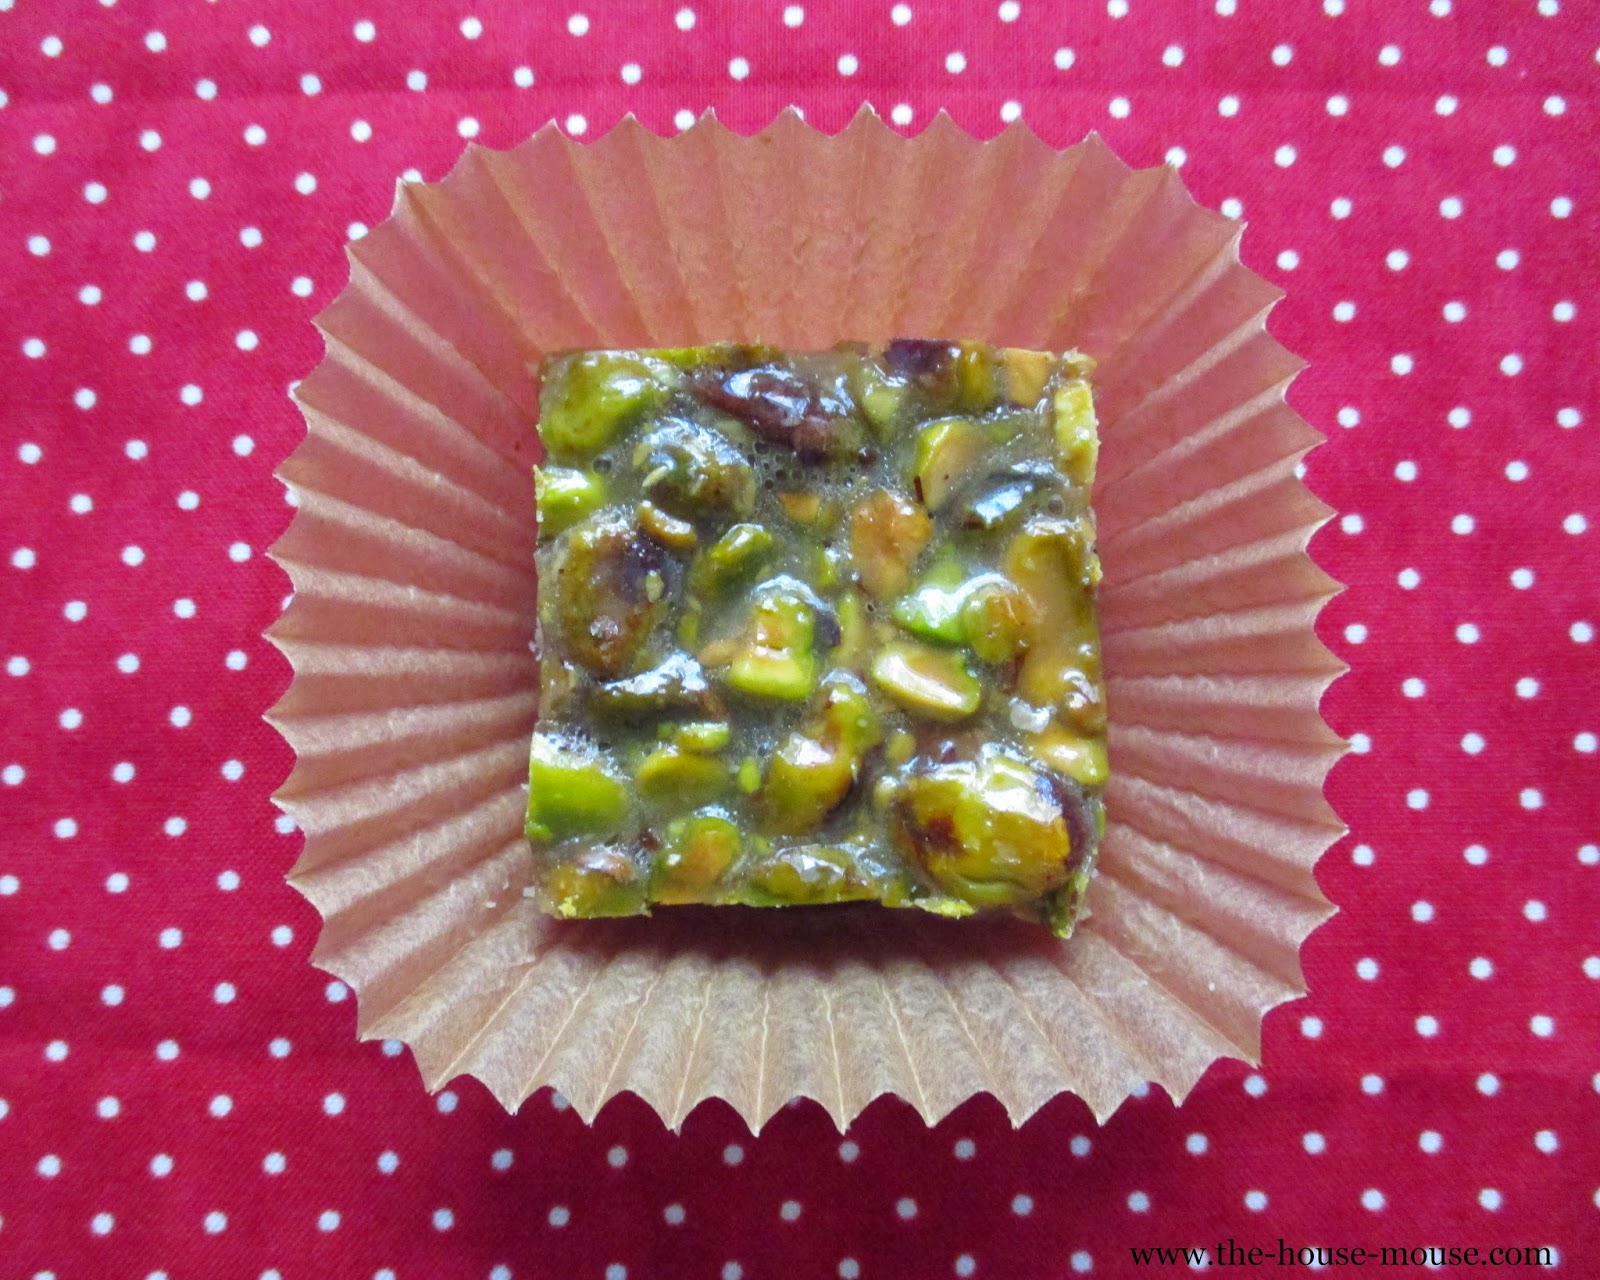
Raising the Bar: Salty-Sweet Pistachio Bar Recipe
I recently saw Martha make these pecan bars on TV, and they looked absolutely wonderful. I like pecans, and many other types of nuts, too. But above all others, I love pistachios, and immediately thought of trying them in this recipe. What intrigued me the most was the use of honey to make the ooey-gooey part of this bar, and I knew the pistachios would complement it perfectly:
Pistachio Bars
For the crust:
1/2 cup butter, softened
1/4 cup packed light brown sugar
1/2 teaspoon ground cardamom
1/2 teaspoon pure vanilla extract
1 cup all-purpose flour
For the filling:
1/4 cup butter
1/4 cup packed light brown sugar
1/4 cup honey
1 cup shelled, roasted and salted pistachios, roughly chopped
1/2 teaspoon pure vanilla extract
Thoroughly butter an 8-inch square pan; set aside.
In a large bowl, cream butter and sugar together until light and fluffy. Mix in cardamom and vanilla. Add flour and mix until combined—the dough will be crumbly. Press evenly into prepared pan and prick all over with a fork. Chill in the fridge until firm, about 15 minutes, while preheating the oven to 375 degrees Fahrenheit. Bake the crust for about 15 minutes, or until lightly golden. Move the pan to a wire rack and let cool completely.
Once crust has cooled, preheat oven to 325 degrees Fahrenheit.
Place butter, brown sugar and honey for the filling in a saucepan and melt over medium heat. Let mixture come to a boil and continue to boil, stirring constantly, for one minute—the mixture will thicken enough to coat the back of a spoon. Remove from heat and carefully stir in pistachios and vanilla extract. Quickly pour filling over cooled crust, spreading it out to the edges, and bake 15-20 minutes, or until the filling is bubbly. Let cool completely and cut into small squares or bars.
Notes: This recipe has been adapted from the original noted above. If you don't like cardamom, you can leave it out or replace with cinnamon. This is a salty-sweet treat, but unsalted pistachios would be equally delicious—just add a pinch of salt to the filling for balance. Cashews would work well in this recipe, too. For additional flair, drizzle melted white, milk or dark chocolate over the bars and let set before serving.
>o<
Labels:
Cookies,
Dessert,
Egg-Free,
Kitchen Mouse,
Mouse at Home,
Vegetarian
Friday, October 31, 2014
And Your Little Dog, Too! Wicked Witch of the West Hat Cookies
Just in case there's not enough sugar around today, here's an easy, sweet treat for your Munchkins when they're ready to click their heels and come home!
Wicked Witch of the West Hat Cookies
Ingredients:
One bag (12 oz.) dark chocolate kisses
One box chocolate cake mix
1/3 cup neutral-tasting oil (such as grapeseed oil)
2 large eggs
Unwrap kisses and set aside in a bowl (try not to eat too many, you'll need them later). Preheat oven to 375 degrees Fahrenheit.
In a large bowl, stir together cake mix, oil and eggs until fully combined. Roll 1/2 Tablespoons of dough into balls and place about 2 inches apart on lined baking sheets (you will have about 60 cookies total). Bake until set, about 10-12 minutes. As soon as cookies come out of the oven, place a kiss firmly on top of each. Let cookies cool completely before storing (kisses will stay soft for quite a while...they're melting, after all!). For the full Wicked Witch effect, place a "hat" on top of a scoop of your favorite green-colored ice cream, using small candies or mini chocolate chips for eyes, nose and mouth.
Notes: Roll balls of dough in colored sugar, sprinkles or jimmies before baking. Any flavor cake mix and kiss combination can be used—mix and match your favorites. Got leftover bite-sized chocolate candies? Try using in place of kisses.
Happy Halloween!
>o<
| Black hat required—ruby slippers optional. |
Wicked Witch of the West Hat Cookies
Ingredients:
One bag (12 oz.) dark chocolate kisses
One box chocolate cake mix
1/3 cup neutral-tasting oil (such as grapeseed oil)
2 large eggs
Unwrap kisses and set aside in a bowl (try not to eat too many, you'll need them later). Preheat oven to 375 degrees Fahrenheit.
In a large bowl, stir together cake mix, oil and eggs until fully combined. Roll 1/2 Tablespoons of dough into balls and place about 2 inches apart on lined baking sheets (you will have about 60 cookies total). Bake until set, about 10-12 minutes. As soon as cookies come out of the oven, place a kiss firmly on top of each. Let cookies cool completely before storing (kisses will stay soft for quite a while...they're melting, after all!). For the full Wicked Witch effect, place a "hat" on top of a scoop of your favorite green-colored ice cream, using small candies or mini chocolate chips for eyes, nose and mouth.
Notes: Roll balls of dough in colored sugar, sprinkles or jimmies before baking. Any flavor cake mix and kiss combination can be used—mix and match your favorites. Got leftover bite-sized chocolate candies? Try using in place of kisses.
Happy Halloween!
>o<
Labels:
Cookies,
Dessert,
Fall,
Halloween,
Kitchen Mouse,
Mouse at Home,
Seasonal,
Vegetarian