Every year, I like to make a lightly-spiced shortbread cookie, cut into seasonal shapes for holiday gifting—and eating! In previous years, I've used cinnamon, cardamom, or ground ginger for the main flavoring. This year, I decided to make a thoroughly warming, comforting, chai-spiced version. These cookies are rich, delicious, and will last several weeks stored in an airtight container in a cool, dry place. Sprinkling the tops of the cookies with a little granulated sugar before baking allows them to twinkle in the light, and provides a little burst of crunch and sweetness as well. These are perfect for the holidays, or any day when you need a special treat!
Chai-Spiced Shortbread Cutout Cookies
Ingredients:
1 cup butter, softened
1/2 cup confectioner's sugar
1 teaspoon pure vanilla extract
1/4 teaspoon kosher salt
2 cups all-purpose flour
2 teaspoons chai spice mix (or see notes below)
2 Tablespoons (or so) granulated sugar, for sprinkling (optional)
In a small bowl, stir together flour, salt, and chai spice mix. In a large bowl, cream butter and sugar together until light and fluffy. Stir in vanilla, then blend in flour mixture until smooth. Divide dough in two and wrap each half tightly in plastic wrap, flattening into discs as you go. Chill dough for several hours, or overnight.
When ready to make cookies, remove one disc of dough from the fridge about 30 minutes beforehand, line baking sheets with foil or parchment paper, and preheat oven to 350 degrees Fahrenheit.
Unwrap and roll dough out on a lightly floured surface with a rolling pin (lightly flour the rolling pin and the dough as well). Roll out evenly to about 1/8" thick, then cut using shapes of your choice with cookie cutters dipped in flour. Transfer cutouts onto prepared sheets an inch or so apart, and sprinkle lightly with granulated sugar, if using. Bake for about 8-10 minutes, or until cookies are lightly golden around the edges (cookies will puff up during baking, but settle back down when close to being done). Re-roll scraps, flouring as needed, and keep cutting shapes until the dough is completely used. Repeat with the other disc of dough.
Notes: This recipe will yield about 4 dozen cookies when using two-inch cutters. If you don't like chai spice, use whatever spice mix you enjoy, like pumpkin or apple pie spice. Before starting, I like to scoop out some plain flour into a small dish for my "bench" flour, sprinkling where needed and for dusting the cookie cutters. I don't have a pastry board or any other special equipment, so I simply roll my dough out on a piece of wax or parchment paper. This actually makes it very easy to rotate the dough when rolling to achieve an even thickness!
>o<
Enjoying the comforts of home: Easy recipes, fun crafts, gardening tips, and inspiration for living the quiet life. Join me!
More to explore:
Showing posts with label Seasonal. Show all posts
Monday, December 09, 2019
Short and Sweet: Chai-Spiced Shortbread Cutout Cookies
Labels:
Christmas,
Cookies,
Egg-Free,
Food Gifts,
Holiday,
Kitchen Mouse,
Mouse at Home,
Seasonal
Wednesday, December 19, 2018
THM Picks: Modern Holiday Classics
Some friends noted that, while my list of classic holiday films was all well and good, I was overlooking quite a few modern classics from my roundup! So to pick up where I left off, here are some modern holiday favorites that need to be on your viewing list this season:
Die Hard (1988)—How awkward could your estranged wife's office holiday party be?!?!?!?!?!
A Christmas Story (1983)—This quirky and endearing look at childhood in the 1940s initially bombed in theaters, but has become a cult classic ever since. Subtle and engaging performances make this film a timeless favorite.
National Lampoon's Christmas Vacation (1989)—Clark has worked hard all year, and just wants to give the entire Griswold family the Christmas they deserve! This is Chevy Chase at his best, with the kind of supporting cast you won't find anywhere else.
The Holiday (2006)—A gentle wink and nod to the craft of filmmaking, with an absolutely charming supporting performance by Eli Wallach, this movie shows us that sometimes we need to take a holiday from our comfort zones...and that it's definitely worth the trip!
Love Actually (2003)—An outstanding ensemble cast portrays a delightful array of characters with interconnected story lines, all leading up to the local school's Christmas Eve pageant. Love is found, love is lost, hearts are broken and mended again, and one thing remains clear through it all: love (not to mention Christmas) actually is all around!
Die Hard (1988)—How awkward could your estranged wife's office holiday party be?!?!?!?!?!
A Christmas Story (1983)—This quirky and endearing look at childhood in the 1940s initially bombed in theaters, but has become a cult classic ever since. Subtle and engaging performances make this film a timeless favorite.
National Lampoon's Christmas Vacation (1989)—Clark has worked hard all year, and just wants to give the entire Griswold family the Christmas they deserve! This is Chevy Chase at his best, with the kind of supporting cast you won't find anywhere else.
The Holiday (2006)—A gentle wink and nod to the craft of filmmaking, with an absolutely charming supporting performance by Eli Wallach, this movie shows us that sometimes we need to take a holiday from our comfort zones...and that it's definitely worth the trip!
Love Actually (2003)—An outstanding ensemble cast portrays a delightful array of characters with interconnected story lines, all leading up to the local school's Christmas Eve pageant. Love is found, love is lost, hearts are broken and mended again, and one thing remains clear through it all: love (not to mention Christmas) actually is all around!
Labels:
Christmas,
Mouse at Home,
Movies,
Seasonal,
THM Picks
Friday, September 21, 2018
Fall in Love: Three Pumpkin Recipes Perfect for Fall
The changing of the seasons is nothing short of magical, and the foods we eat help us mark those transitions. Of course, pumpkin is the name of the game this time of year! As we move into Fall, you'll want to try these recipes in your own home, for the pleasure of making them as well as to share with friends and family. So gather your tribe, set the table, and enjoy the warmth of good food and great company!
Thai Pumpkin Soup: Easy, delicious, and a fantastic canvas for a variety of additions, it can be made vegan to accommodate guests of any food persuasion. It also freezes well, so definitely keep some on hand for a quick option at the end of a chilly day.
Individual Pumpkin Custards: Simple yet luscious, these are a gluten-free/grain-free treat, one that works equally well for breakfast as well as dessert! They're also fantastically easy to transport, and a welcome addition to any dessert table.
Pumpkin Butter Bars: Is it a bar cookie? A slab pie? Does it matter??? All you need to know is that these are out of this world, and deserve to be made as soon as possible. But be warned, they are just as easy to eat as they are to make!
What's your favorite pumpkin recipe? What do you look forward to making when the weather turns chilly and the leaves start to fall?
>o<
Thai Pumpkin Soup: Easy, delicious, and a fantastic canvas for a variety of additions, it can be made vegan to accommodate guests of any food persuasion. It also freezes well, so definitely keep some on hand for a quick option at the end of a chilly day.
Individual Pumpkin Custards: Simple yet luscious, these are a gluten-free/grain-free treat, one that works equally well for breakfast as well as dessert! They're also fantastically easy to transport, and a welcome addition to any dessert table.
Pumpkin Butter Bars: Is it a bar cookie? A slab pie? Does it matter??? All you need to know is that these are out of this world, and deserve to be made as soon as possible. But be warned, they are just as easy to eat as they are to make!
What's your favorite pumpkin recipe? What do you look forward to making when the weather turns chilly and the leaves start to fall?
>o<
Labels:
Cookies,
Dessert,
Fall,
Kitchen Mouse,
Mouse at Home,
Seasonal,
Soup
Friday, August 24, 2018
Georgia on My Mind: Peach "Pie" Bars with Pecan Streusel
A few weeks ago, I was fairly obsessed with these oatmeal cookie bars—I couldn't stop thinking about them! I finally convinced myself it was okay to make them if I shared them with friends, but that didn't stop me from eating quite a few myself. Just before making them, I couldn't remember if there were nuts in the recipe or not. And when I thought about it some more, I wondered, "Why aren't there nuts in the recipe??? That would taste great!!!" So then it was August, and August reminds me of peaches, and peaches remind me of Georgia, and don't they just happen to specialize in pecans there, too? I'm sure you see where this is going!
Peach "Pie" Bars with Pecan Streusel
Ingredients:
1 cup very soft butter
1/2 teaspoon kosher salt
3 cups all-purpose flour
13 oz. peach preserves (homemade would be fabulous!)
1/2 cup chopped pecans
1/2 teaspoon ground cinnamon
1/4 cup firmly packed brown sugar
Preheat oven to 350 degrees Fahrenheit. Butter a 9x13-inch baking pan and set aside.
In a large bowl, cream butter and salt together, then add flour and stir to combine as much as you can. At that point, scrunch the mixture between your fingertips to ensure the butter is evenly distributed and there are no dry pockets of flour left. Remove 1 cup of the crumbs to a smaller bowl, and mix together with the pecans, cinnamon, and brown sugar. Set this aside, then spread the remainder of the plain crumbs evenly into your prepared pan and press firmly to form the base. Bake for 15 minutes to set, then remove and (carefully) spread the preserves over the base, and finally sprinkle with the pecan-cinnamon crumbs. Return to the oven and bake for another 25-30 minutes, or until just slightly golden and the edges of the filling start to bubble. Let cool completely before cutting into squares. Cover and store any unused portion in the fridge, but let the bars come to room temperature before trying to cut them again.
Notes: These bars are very sweet, but certainly cut back (or omit) the brown sugar in the streusel topping, if desired. As well, feel free to use any jam/preserves you enjoy, or any nuts you like! As is the case with many of my desserts, these travel well and can remain at room temperature until you're ready to put them away. Oh, and I don't need to tell you how great these would be with vanilla ice cream, right? :-)
>o<
Peach "Pie" Bars with Pecan Streusel
Ingredients:
1 cup very soft butter
1/2 teaspoon kosher salt
3 cups all-purpose flour
13 oz. peach preserves (homemade would be fabulous!)
1/2 cup chopped pecans
1/2 teaspoon ground cinnamon
1/4 cup firmly packed brown sugar
Preheat oven to 350 degrees Fahrenheit. Butter a 9x13-inch baking pan and set aside.
In a large bowl, cream butter and salt together, then add flour and stir to combine as much as you can. At that point, scrunch the mixture between your fingertips to ensure the butter is evenly distributed and there are no dry pockets of flour left. Remove 1 cup of the crumbs to a smaller bowl, and mix together with the pecans, cinnamon, and brown sugar. Set this aside, then spread the remainder of the plain crumbs evenly into your prepared pan and press firmly to form the base. Bake for 15 minutes to set, then remove and (carefully) spread the preserves over the base, and finally sprinkle with the pecan-cinnamon crumbs. Return to the oven and bake for another 25-30 minutes, or until just slightly golden and the edges of the filling start to bubble. Let cool completely before cutting into squares. Cover and store any unused portion in the fridge, but let the bars come to room temperature before trying to cut them again.
Notes: These bars are very sweet, but certainly cut back (or omit) the brown sugar in the streusel topping, if desired. As well, feel free to use any jam/preserves you enjoy, or any nuts you like! As is the case with many of my desserts, these travel well and can remain at room temperature until you're ready to put them away. Oh, and I don't need to tell you how great these would be with vanilla ice cream, right? :-)
>o<
Labels:
Cookies,
Dessert,
Egg-Free,
Kitchen Mouse,
Mouse at Home,
Seasonal,
Summer,
Vegetarian
Friday, June 29, 2018
Ave Maria: Fresh Strawberry Cheesecake Parfaits
It was cookbook club time again, and our selection was Mexican Made Easy by Marcela Valladolid. There were some very tasty-looking recipes in there, full of spice and heat! But I really wanted to make a dessert, so I focused on that chapter and selected something described as a trifle. It used things like sweetened condensed milk, evaporated milk, and fresh limes. Yum! Instead of something like pound cake, however, the recipe called for Maria cookies as the base, which are akin to tea biscuits and completely delightful. And the most wondrous things of all? After shopping for my ingredients, I actually FOLLOWED THE RECIPE to make the dish. Exactly. To the letter. Okay, I added a little splash of vanilla extract, but otherwise totally the same. And used some zest as well as the juice of the limes. BUT THAT WAS IT, I PROMISE. I layered and poured and layered again, and you know what? It was terrible! The flavors were excellent, but the consistency lacked...consistency.
It was like a baby had left their teething biscuits in all that milk and then you found this lime-zest-flecked montage-strosity the next day. I must have done something wrong, but I didn't have time to make anything else, so I suffered and brought my soupy mess to the meeting anyway. To everyone's credit, they dutifully tried it. Thankfully, there was a knockout dessert from another member, and all the other dishes were fantastic. But those Maria cookies haunted me. I knew they could be put to better use, and they had paired so well with the creamy milk and the sharp fruitiness of the lime. Heck, they were even delicious on their own! And I still yearned for a layered dessert, something to please the eye as well as the palate:
Fresh Strawberry Cheesecake Parfaits
Ingredients:
10 Maria cookies (or other plain tea biscuits), finely crushed (you should have about 1/2 cup crumbs)
2 Tablespoons butter
8 oz. cream cheese, room temperature
1/4 cup granulated sugar
1 teaspoon vanilla extract
3/4 lb. fresh strawberries, hulled and diced
Melt butter in a skillet over medium-low heat and add cookie crumbs. Stir to coat the crumbs with butter, then continue to toast the crumbs for another 3-5 minutes, stirring occasionally, until fragrant. Let cool completely.
In a small bowl, thoroughly combine cream cheese, sugar and vanilla extract until smooth. Using four glass dishes/containers/wine glasses (about a cup in capacity), place a quarter of the cooled crumbs in each. Carefully add a fourth of the cheese mixture to each dish, and spread slowly to cover the crumbs. Finally, add a fourth of the strawberries and serve!
Notes: The parfaits can be made 2-4 hours in advance and stored, covered, in the fridge until ready to serve. Absolutely use any kind of berry, fruit, or a combination to your taste. Can't be bothered to layer? Just make a double or triple batch of the cheese mixture and serve in a bowl as a dessert dip with sliced fruit and Maria cookies on the side (the cookies are also available in chocolate in many stores). I haven't tested it, but I bet the cookies would make excellent s'mores—if you try it, let us know in the comments!
>o<
It was like a baby had left their teething biscuits in all that milk and then you found this lime-zest-flecked montage-strosity the next day. I must have done something wrong, but I didn't have time to make anything else, so I suffered and brought my soupy mess to the meeting anyway. To everyone's credit, they dutifully tried it. Thankfully, there was a knockout dessert from another member, and all the other dishes were fantastic. But those Maria cookies haunted me. I knew they could be put to better use, and they had paired so well with the creamy milk and the sharp fruitiness of the lime. Heck, they were even delicious on their own! And I still yearned for a layered dessert, something to please the eye as well as the palate:
Fresh Strawberry Cheesecake Parfaits
Ingredients:
10 Maria cookies (or other plain tea biscuits), finely crushed (you should have about 1/2 cup crumbs)
2 Tablespoons butter
8 oz. cream cheese, room temperature
1/4 cup granulated sugar
1 teaspoon vanilla extract
3/4 lb. fresh strawberries, hulled and diced
Melt butter in a skillet over medium-low heat and add cookie crumbs. Stir to coat the crumbs with butter, then continue to toast the crumbs for another 3-5 minutes, stirring occasionally, until fragrant. Let cool completely.
In a small bowl, thoroughly combine cream cheese, sugar and vanilla extract until smooth. Using four glass dishes/containers/wine glasses (about a cup in capacity), place a quarter of the cooled crumbs in each. Carefully add a fourth of the cheese mixture to each dish, and spread slowly to cover the crumbs. Finally, add a fourth of the strawberries and serve!
Notes: The parfaits can be made 2-4 hours in advance and stored, covered, in the fridge until ready to serve. Absolutely use any kind of berry, fruit, or a combination to your taste. Can't be bothered to layer? Just make a double or triple batch of the cheese mixture and serve in a bowl as a dessert dip with sliced fruit and Maria cookies on the side (the cookies are also available in chocolate in many stores). I haven't tested it, but I bet the cookies would make excellent s'mores—if you try it, let us know in the comments!
>o<
Labels:
Dessert,
Egg-Free,
Kitchen Mouse,
Mouse at Home,
Pudding,
Seasonal,
Summer,
Vegetarian
Friday, September 16, 2016
Bar None: Pumpkin Butter Bars
The best part about pie is the contrast between that sweet, tangy filling and the flaky crust. My favorite part, especially with pumpkin pie, is where the filling meets the back corner of the pie, when there's just a bit of it left to go with the ever-so-slightly salty crust holding it up. It might not be for everyone, but thankfully, you get to choose—lots of filling, less filling, it's all up to you! I've experimented with these bars several times, and I had only one rule: the crust had to be sugarless, to mimic that pie-like flavor. But I must warn you, these bars are somewhat addictive, and frighteningly easy to make!
Pumpkin Butter Bars
Ingredients:
1/2 cup very soft butter
1/4 teaspoon kosher salt
1 1/2 cups all-purpose flour
1 1/2-2 cups pumpkin butter
Preheat oven to 350 degrees Fahrenheit. Butter an 8-inch square baking pan and set aside.
In a medium bowl, cream butter and salt together, then add flour and stir to combine as much as you can. At that point, scrunch the mixture between your fingertips to ensure the butter is evenly distributed and there are no dry pockets of flour left. Reserve 1/2 cup of the crumbs, then spread the remainder evenly into your prepared pan and press firmly to form the base. Bake for 15 minutes to set, then remove and (carefully) spread the pumpkin butter over the base, and sprinkle with the reserved crumbs. Return to the oven and bake for another 25-30 minutes, or until just slightly golden and the edges of the filling start to bubble. Let cool completely before cutting into squares. Cover and store any unused portion in the fridge, but let the bars come to room temperature before trying to cut them again.
Notes: Use whatever fruit butter, fruit spread or preserves you like best—and feel free to use half as much filling if you prefer, as the sweetness will still carry through quite well. You can easily double the recipe, reserving a full cup of crumbs for the top, and bake in a 9x13-inch pan for the same times as given above. What flavor will you try?
>o<
Pumpkin Butter Bars
Ingredients:
1/2 cup very soft butter
1/4 teaspoon kosher salt
1 1/2 cups all-purpose flour
1 1/2-2 cups pumpkin butter
Preheat oven to 350 degrees Fahrenheit. Butter an 8-inch square baking pan and set aside.
In a medium bowl, cream butter and salt together, then add flour and stir to combine as much as you can. At that point, scrunch the mixture between your fingertips to ensure the butter is evenly distributed and there are no dry pockets of flour left. Reserve 1/2 cup of the crumbs, then spread the remainder evenly into your prepared pan and press firmly to form the base. Bake for 15 minutes to set, then remove and (carefully) spread the pumpkin butter over the base, and sprinkle with the reserved crumbs. Return to the oven and bake for another 25-30 minutes, or until just slightly golden and the edges of the filling start to bubble. Let cool completely before cutting into squares. Cover and store any unused portion in the fridge, but let the bars come to room temperature before trying to cut them again.
Notes: Use whatever fruit butter, fruit spread or preserves you like best—and feel free to use half as much filling if you prefer, as the sweetness will still carry through quite well. You can easily double the recipe, reserving a full cup of crumbs for the top, and bake in a 9x13-inch pan for the same times as given above. What flavor will you try?
>o<
Labels:
Cookies,
Dessert,
Egg-Free,
Fall,
Kitchen Mouse,
Mouse at Home,
Seasonal
Sunday, June 26, 2016
Recipe Roundup: The Living Is Easy
Summer is finally, officially here - and while the days will be hot and full of activity, you'll still need to eat eventually, right? Thankfully, produce will be at its best over the coming months. You will want to enjoy most of it as fresh as possible, but here are some alternatives in case your crops runneth over :-)
Heirloom Tomato Cobbler: Yes, that's correct. After all, tomatoes are still a fruit! This is a great savory side dish, and an excellent use for tomatoes that may be a tad past their prime.
Lemon-Rosemary Zucchini Bread: Instead of heavy spices, this zucchini bread uses flavors you might associate with lots of sun, gentle breezes, and breathtaking views of the ocean.
Summer Fruit Cobbler: the sweet version of cobbler you grew up with, and the simplest version of cobbler I know.
Homemade Ice Cream: sinfully easy, and no special equipment needed!
Ginger Beer Highball: Crisp and refreshing, perfect at the end of a long Summer day.
>o<
Heirloom Tomato Cobbler: Yes, that's correct. After all, tomatoes are still a fruit! This is a great savory side dish, and an excellent use for tomatoes that may be a tad past their prime.
Lemon-Rosemary Zucchini Bread: Instead of heavy spices, this zucchini bread uses flavors you might associate with lots of sun, gentle breezes, and breathtaking views of the ocean.
Summer Fruit Cobbler: the sweet version of cobbler you grew up with, and the simplest version of cobbler I know.
Homemade Ice Cream: sinfully easy, and no special equipment needed!
Ginger Beer Highball: Crisp and refreshing, perfect at the end of a long Summer day.
>o<
Labels:
Entertaining,
Kitchen Mouse,
Mouse at Home,
Seasonal,
Summer
Monday, May 16, 2016
All in a Row
This Spring has been particularly cold and rainy, and the garden had a very late start. While I typically sow seeds in mid-March, I waited another full month after that - and even then I was worried they might not make it. Yet so far, everything is slowly, but surely, coming into its own. First on my list in the Spring are always snow peas, my favorite mangetout and an absolute pleasure to the eye as well:
A new packet of "Rainbow Lights" Swiss chard has provided dainty rows of these little darlings, who only need a while longer to be snackable:
My supply of nasturtium seeds is starting to dwindle, but I sowed a single row in any case - after all, how else would I be able to harvest and save more seeds? I was so relieved to see their lily-pad leaves standing proudly in the sun. Not only will the flowers be edible, but the leaves will make a spicy pesto one day:
Even better? Without my thought, planning, worry, or effort, both the chamomile and the borage reseeded themselves in abundance, taking up a whole bed of their own:
So, even if it's late in the game, even if you've never tried, get a few packets and plant some seeds - a little care, watering, and time will still give you results you never expected. And the reward of seeing things grow will far exceed your expectations, too :-)
>o<
A new packet of "Rainbow Lights" Swiss chard has provided dainty rows of these little darlings, who only need a while longer to be snackable:
My supply of nasturtium seeds is starting to dwindle, but I sowed a single row in any case - after all, how else would I be able to harvest and save more seeds? I was so relieved to see their lily-pad leaves standing proudly in the sun. Not only will the flowers be edible, but the leaves will make a spicy pesto one day:
Even better? Without my thought, planning, worry, or effort, both the chamomile and the borage reseeded themselves in abundance, taking up a whole bed of their own:
So, even if it's late in the game, even if you've never tried, get a few packets and plant some seeds - a little care, watering, and time will still give you results you never expected. And the reward of seeing things grow will far exceed your expectations, too :-)
>o<
Labels:
Garden Mouse,
Mouse at Home,
Seasonal,
Spring
Sunday, January 24, 2016
Winter White: Vanilla-Pear Cake
I have only just recently been introduced to Dorie Greenspan's amazing book, Around My French Table, and it's a such a treasure I can't believe I've managed this long without it. The writing is as enjoyable as the food, and she provides a story for every recipe, incorporating her experiences in France along with helpful tips and variations the reader might like to try. She also confirms what many of us already know intuitively—that good home cooks in France, like good home cooks around the world, use what's available and in season, combined with things they already have on hand, to create simple yet elegant dishes suitable for any occasion.
One such recipe is an apple cake a friend of hers makes, which Ms. Greenspan had to reverse-engineer since the friend does not use a recipe to make it. As a recovering not-writing-recipes-downer myself, I had to try it! But as wonderful as apples are, I associate them with Fall, and wanted something more wintry to match the season. The perfect solution was pears, their sweet perfume mixed with the heady aroma of vanilla, and a bit of cardamom and tangerine zest for balance. A little more tinkering with the mixing method, and I had a delicate, moist confection that will make any Winter day feel just that much warmer:
Vanilla-Pear Cake
Ingredients:
3/4 cup all-purpose flour
3/4 teaspoon baking powder
1/4 teaspoon ground cardamom
1/2 teaspoon tangerine zest
1/2 cup butter, softened
3/4 cup vanilla sugar
2 large eggs, room temperature
3 Tablespoons white rum
1/2 teaspoon vanilla extract
4 medium pears, ripe but still firm
Butter an 8x8-inch square (or similar capacity) baking pan and set aside.
In a small bowl, stir together flour, baking powder, cardamom and tangerine zest until combined. In a large bowl, cream butter and sugar together until light and fluffy; stir in eggs, rum and vanilla—the batter may look slightly curdled, but that's fine. Add the flour mixture all at once and stir until smooth.
Preheat oven to 350 degrees Fahrenheit.
Peel pears, cut off tops and bottoms, quarter, core, and cut into 1/2-inch chunks, adding them to the batter as you go. When done, carefully fold the pieces in, then pour and scrape the batter into your prepared pan. Bake for 50-60 minutes, or until a toothpick inserted in the middle of the cake comes out clean and the edges are a deep, crunchy golden-brown. Let cool; serve warm or at room temperate. If you have any leftover, let the cake cool completely, cover and refrigerate. Remove and let stand until the cake reaches room temperature again before serving—the flavors will be much more developed. This is a rich, sweet dessert, and a little unsweetened whipped cream or crème fraîche served alongside would be excellent.
Notes: A friend gave me a jar of vanilla sugar a few years ago, and I've been milking that vanilla bean for all it's worth ever since. I refill the jar with plain sugar while there is some vanilla sugar left in the bottom, then screw the lid back on and shake to distribute the vanilla-scented particles evenly. If you don't have vanilla sugar, you may certainly substitute regular granulated sugar for this recipe. The cardamom and zest are optional as well; any spices you like may be used (or omitted entirely), and the zest can just as easily be orange or clementine if you happen to have them. If you don't have or don't want to use the rum (or other spirit of your choice), simply leave it out. Your cake will likely be a bit more firm, but I'm sure just as delicious!
>o<
One such recipe is an apple cake a friend of hers makes, which Ms. Greenspan had to reverse-engineer since the friend does not use a recipe to make it. As a recovering not-writing-recipes-downer myself, I had to try it! But as wonderful as apples are, I associate them with Fall, and wanted something more wintry to match the season. The perfect solution was pears, their sweet perfume mixed with the heady aroma of vanilla, and a bit of cardamom and tangerine zest for balance. A little more tinkering with the mixing method, and I had a delicate, moist confection that will make any Winter day feel just that much warmer:
Vanilla-Pear Cake
Ingredients:
3/4 cup all-purpose flour
3/4 teaspoon baking powder
1/4 teaspoon ground cardamom
1/2 teaspoon tangerine zest
1/2 cup butter, softened
3/4 cup vanilla sugar
2 large eggs, room temperature
3 Tablespoons white rum
1/2 teaspoon vanilla extract
4 medium pears, ripe but still firm
Butter an 8x8-inch square (or similar capacity) baking pan and set aside.
In a small bowl, stir together flour, baking powder, cardamom and tangerine zest until combined. In a large bowl, cream butter and sugar together until light and fluffy; stir in eggs, rum and vanilla—the batter may look slightly curdled, but that's fine. Add the flour mixture all at once and stir until smooth.
Preheat oven to 350 degrees Fahrenheit.
Peel pears, cut off tops and bottoms, quarter, core, and cut into 1/2-inch chunks, adding them to the batter as you go. When done, carefully fold the pieces in, then pour and scrape the batter into your prepared pan. Bake for 50-60 minutes, or until a toothpick inserted in the middle of the cake comes out clean and the edges are a deep, crunchy golden-brown. Let cool; serve warm or at room temperate. If you have any leftover, let the cake cool completely, cover and refrigerate. Remove and let stand until the cake reaches room temperature again before serving—the flavors will be much more developed. This is a rich, sweet dessert, and a little unsweetened whipped cream or crème fraîche served alongside would be excellent.
Notes: A friend gave me a jar of vanilla sugar a few years ago, and I've been milking that vanilla bean for all it's worth ever since. I refill the jar with plain sugar while there is some vanilla sugar left in the bottom, then screw the lid back on and shake to distribute the vanilla-scented particles evenly. If you don't have vanilla sugar, you may certainly substitute regular granulated sugar for this recipe. The cardamom and zest are optional as well; any spices you like may be used (or omitted entirely), and the zest can just as easily be orange or clementine if you happen to have them. If you don't have or don't want to use the rum (or other spirit of your choice), simply leave it out. Your cake will likely be a bit more firm, but I'm sure just as delicious!
>o<
Labels:
Cake,
Dessert,
Kitchen Mouse,
Mouse at Home,
Seasonal,
Winter
Thursday, December 31, 2015
Line Upon Line
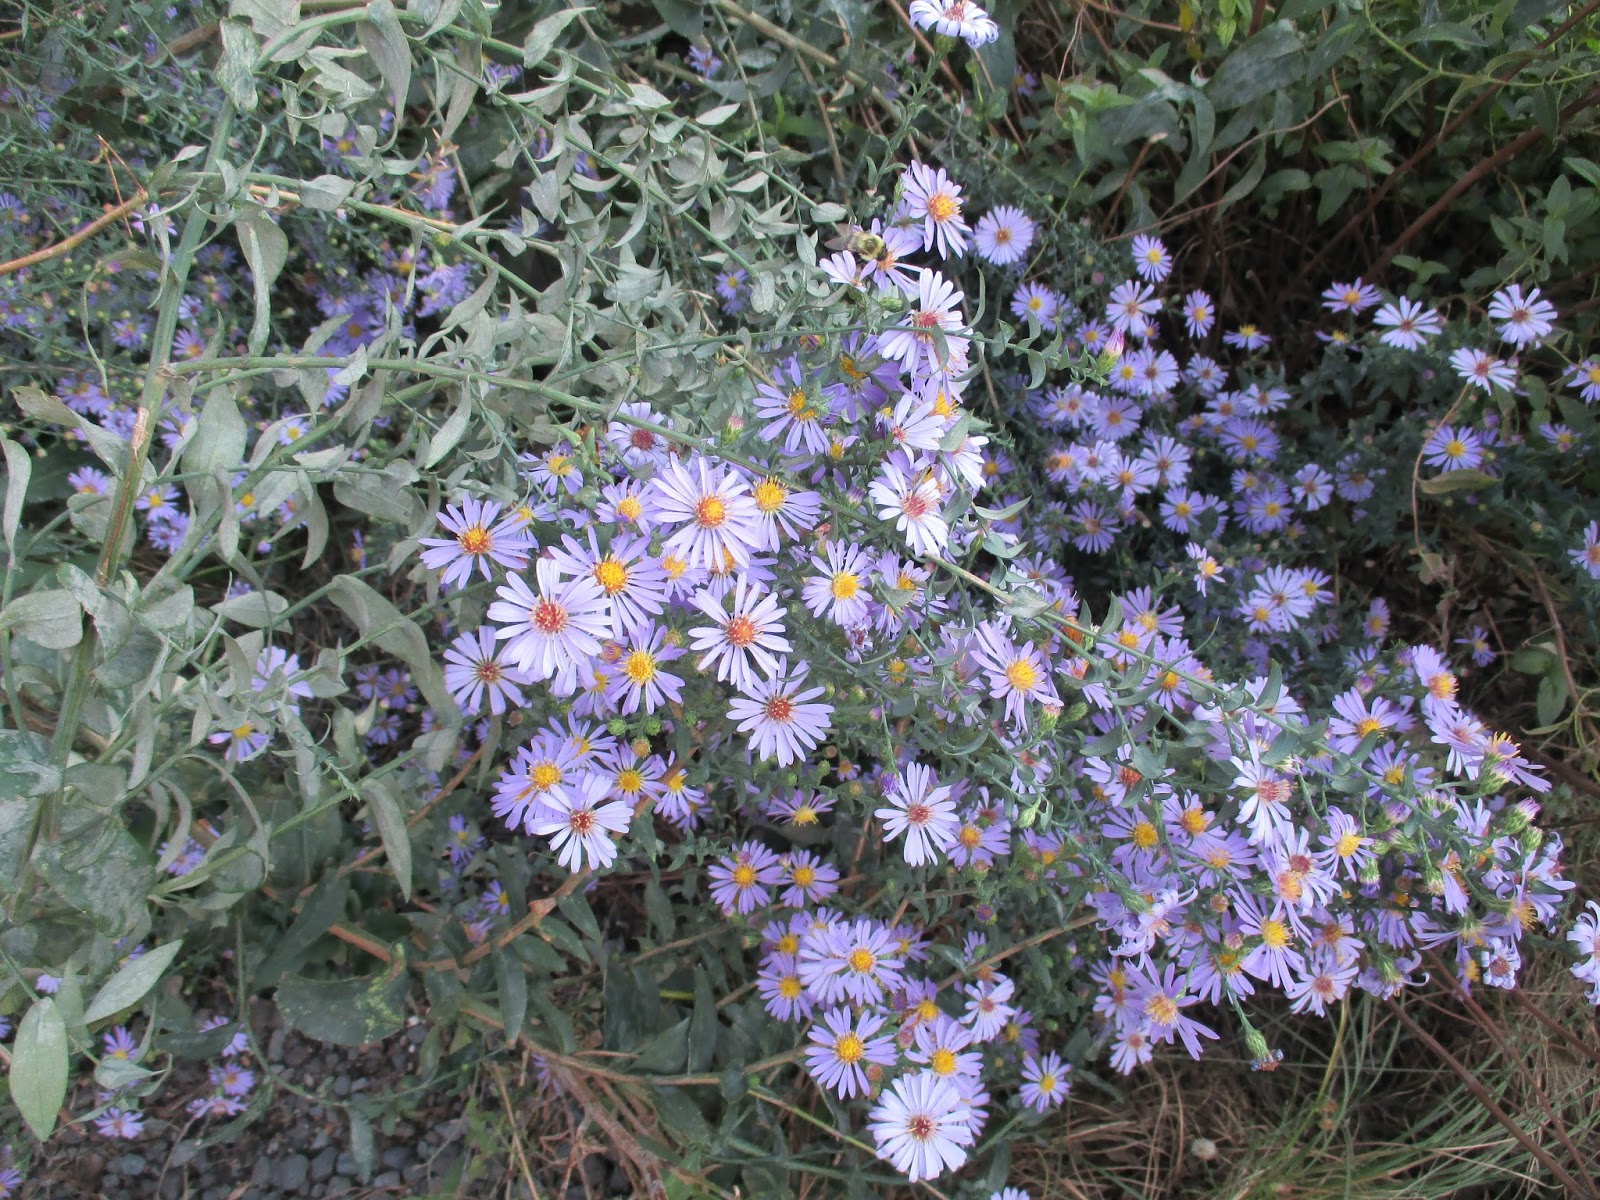
As I realized the year was drawing rapidly to a close, I remembered there was one thing I had to make sure to do: write a fourth and final installment in a year of seasons on The High Line. Having started with Winter, then Spring and Summer, I made the trip in October to see my favorite reclaimed space in Fall. I took a LOT of photos - some good, some interesting, and some that were not so great! In truth, I was expecting lots of golds, yellows, and reds; but what I noticed as I reviewed the images was a consistent palette of greens, with many blooms in purples and whites. Asters were everywhere as one might expect at that time of year, like these lilac-colored twilight asters:
The striking blooms on this chocolate white snakeroot were like miniature pom-poms, and another example of the wonderful variety of plantings in the park:
Although not titled as such, the setting sun gave a lovely purple glow to this stand of pink muhly grass:
I thought the little white flowers of the wild spurge were charming on their delicate stems - even though the name sounds rather harsh!
I was delighted to discover the petals on this ironweed end in curlicues, and their color provided excellent contrast to the spent blooms around them:
One plant I looked for in particular was the wild quinine with their oddly rounded flowers, both interesting and unusual. And yes, the plant does contain quinine - gin and tonic, anyone?
There were many others, and many that I missed according to the monthly bloom list. But one I hadn't expected to see was the purple hyacinth bean, abundant with blooms and pods, carelessly twined around a railing:
I can't seem to get enough of this wonderfully unique place, and although this is the last post of the series, this is certainly not the last visit. There is always more to see, more to learn, and more to enjoy - both at home and abroad - and I look forward to continuing the adventure with you! So, until next time (and hopefully not too long from now), I wish you a peaceful, safe, and very Happy New Year!!!
>o<
The striking blooms on this chocolate white snakeroot were like miniature pom-poms, and another example of the wonderful variety of plantings in the park:
Although not titled as such, the setting sun gave a lovely purple glow to this stand of pink muhly grass:
I thought the little white flowers of the wild spurge were charming on their delicate stems - even though the name sounds rather harsh!
I was delighted to discover the petals on this ironweed end in curlicues, and their color provided excellent contrast to the spent blooms around them:
One plant I looked for in particular was the wild quinine with their oddly rounded flowers, both interesting and unusual. And yes, the plant does contain quinine - gin and tonic, anyone?
There were many others, and many that I missed according to the monthly bloom list. But one I hadn't expected to see was the purple hyacinth bean, abundant with blooms and pods, carelessly twined around a railing:
I can't seem to get enough of this wonderfully unique place, and although this is the last post of the series, this is certainly not the last visit. There is always more to see, more to learn, and more to enjoy - both at home and abroad - and I look forward to continuing the adventure with you! So, until next time (and hopefully not too long from now), I wish you a peaceful, safe, and very Happy New Year!!!
>o<
Labels:
Fall,
Mouse About Town,
Musings,
New York City,
Seasonal
Friday, November 13, 2015
Easier Than Pie: Individual Pumpkin Custards
With the holidays fast approaching, we all need some go-to recipes that can be made quickly, store easily and, above all, taste wonderful. These little pumpkin custards meet all those demands, giving you a rich, not-to-sweet treat that can proudly be served after any meal—and they even make a great breakfast, too!
Individual Pumpkin Custards
Ingredients:
1 can (15 oz.) pumpkin puree
1/4 cup honey (or pure maple syrup)
2 large eggs, room temperature
1 cup (8 oz.) heavy cream
1 teaspoon vanilla extract
2 teaspoons ground ginger
1 teaspoon ground cinnamon
1/2 teaspoon ground cardamom
1/4 teaspoon ground cloves
Preheat oven to 350 degrees Fahrenheit. Line a standard 12-cup muffin tin with parchment liners and set aside.
In a medium bowl, stir all ingredients together until smooth and creamy. Divide batter evenly among liners in prepared pan (they will be fairly full) and bake for about 25-30 minutes, or until set and no longer wobbly in the center. Let custards cool completely in the pan, then carefully lift out and refrigerate in an airtight container. These are best made at least one day ahead to allow the flavors to develop. They can be served with whipped cream, ice cream, or simply garnished with a few chopped, toasted pecans.
Notes: The custards will hold their shape once refrigerated overnight, while still retaining their smooth interior. If you have some oranges on hand, a teaspoon of grated zest would be heavenly folded into the batter before baking. Feel free to use any combination/amounts of spices that you like best or would typically use in your favorite pumpkin pie recipe. Be sure to share your variations in the comments!
>o<
Individual Pumpkin Custards
Ingredients:
1 can (15 oz.) pumpkin puree
1/4 cup honey (or pure maple syrup)
2 large eggs, room temperature
1 cup (8 oz.) heavy cream
1 teaspoon vanilla extract
2 teaspoons ground ginger
1 teaspoon ground cinnamon
1/2 teaspoon ground cardamom
1/4 teaspoon ground cloves
Preheat oven to 350 degrees Fahrenheit. Line a standard 12-cup muffin tin with parchment liners and set aside.
In a medium bowl, stir all ingredients together until smooth and creamy. Divide batter evenly among liners in prepared pan (they will be fairly full) and bake for about 25-30 minutes, or until set and no longer wobbly in the center. Let custards cool completely in the pan, then carefully lift out and refrigerate in an airtight container. These are best made at least one day ahead to allow the flavors to develop. They can be served with whipped cream, ice cream, or simply garnished with a few chopped, toasted pecans.
Notes: The custards will hold their shape once refrigerated overnight, while still retaining their smooth interior. If you have some oranges on hand, a teaspoon of grated zest would be heavenly folded into the batter before baking. Feel free to use any combination/amounts of spices that you like best or would typically use in your favorite pumpkin pie recipe. Be sure to share your variations in the comments!
>o<
Labels:
Dessert,
Fall,
Gluten-Free,
Grain-Free,
Kitchen Mouse,
Mouse at Home,
Pudding,
Seasonal,
Thanksgiving
Monday, August 24, 2015
A Bushel and a Peck: Roasted Plum Tomatoes
Towards the end of the growing season, many farm stores will sell the final harvests of their crops in bulk at excellent prices, particularly those things that can be preserved easily by canning or freezing. This is a great way to have local produce on hand during the colder months, without ever having to leave your home. Freezing is the simplest method, and tomato products do wonderfully well this way. With very little time and effort, you can have roasted plum tomatoes ready and waiting for soups, stews and sauces.
Roasted Plum Tomatoes
You will need:
plum tomatoes
sea salt
bay leaves
Line a baking sheet (or two, if needed) with parchment paper (I line mine with foil first for easier cleanup). Sprinkle lightly all over with salt, and lay about six bay leaves around evenly. Preheat oven to 400 degrees Fahrenheit. Core and slice tomatoes in half lengthwise, laying them cut-side down in a single layer on baking sheet(s). Roast in the oven for about 45 minutes to an hour, depending on size. The skins should be completely shriveled and juices bubbling all around the tomatoes. Remove from oven and let cool to room temperature, about one hour. Gently remove skins from flesh (most will slip off easily). Pack into freezer containers, pressing out any air bubbles and leaving about an inch of space at the top to allow for expansion during freezing. Defrost before using.
Notes: I found that about 7-8 lbs. of plum tomatoes fit on two large baking sheets, and yielded about 8 cups of roasted tomatoes. I used bay leaves to provide a neutral flavor base, but certainly other herbs or aromatics could be included in the roasting process.
What are your favorite foods to preserve, and what method(s) do you use? How do you like to use them throughout the year?
>o<
Roasted Plum Tomatoes
You will need:
plum tomatoes
sea salt
bay leaves
Line a baking sheet (or two, if needed) with parchment paper (I line mine with foil first for easier cleanup). Sprinkle lightly all over with salt, and lay about six bay leaves around evenly. Preheat oven to 400 degrees Fahrenheit. Core and slice tomatoes in half lengthwise, laying them cut-side down in a single layer on baking sheet(s). Roast in the oven for about 45 minutes to an hour, depending on size. The skins should be completely shriveled and juices bubbling all around the tomatoes. Remove from oven and let cool to room temperature, about one hour. Gently remove skins from flesh (most will slip off easily). Pack into freezer containers, pressing out any air bubbles and leaving about an inch of space at the top to allow for expansion during freezing. Defrost before using.
Notes: I found that about 7-8 lbs. of plum tomatoes fit on two large baking sheets, and yielded about 8 cups of roasted tomatoes. I used bay leaves to provide a neutral flavor base, but certainly other herbs or aromatics could be included in the roasting process.
What are your favorite foods to preserve, and what method(s) do you use? How do you like to use them throughout the year?
>o<
Labels:
Condiment,
Egg-Free,
Gluten-Free,
Grain-Free,
Kitchen Mouse,
Mouse at Home,
Seasonal,
Vegan,
Vegetarian
Monday, August 17, 2015
In The Good Old Summertime
There is nothing like Summer, but it's a bit of a mixed blessing: on the one hand, it's SUMMER - the days are long, your spirit is free, and you're able to enjoy things you can only dream about doing the rest of the year. On the other hand, the weather can be so hot and humid, you may end up cowering in front of a fan or languishing in the cool embrace of your A/C, not daring to move at all.
The yard and garden experience this same conflict, and I'm struck by it every year. One minute, everything looks wonderful, but the next it's scorched and dry. Just a few weeks ago, the flowers in the edible garden were magnificent - the chamomile was sunny and bright, and made for a calming tea in the evenings:
The starry borage blossoms were striking on their tall, hairy stems:
And the nasturtiums were creamy and smooth, belying their peppery bite:
Then, somehow, things started to change, taking on a more barren and forlorn aspect. The echinacea in particular now looks like it was stuck in the oven too long. Even though it's painful to see, I won't cut them down until I'm sure the goldfinches have pecked every last seed out of those cones:
Conversely, weeds and other things seem to thrive and take over, like this luxurious pigweed by my deck. I can't help but admire how healthy it looks, and I almost (almost) hate to chop it down:
But there are some things that don't seem to care how hot it gets and, thankfully, they taste like sweet success. So I'm enjoying them while I can, because before I know it, these too will be just a delicious memory:
>o<
The yard and garden experience this same conflict, and I'm struck by it every year. One minute, everything looks wonderful, but the next it's scorched and dry. Just a few weeks ago, the flowers in the edible garden were magnificent - the chamomile was sunny and bright, and made for a calming tea in the evenings:
The starry borage blossoms were striking on their tall, hairy stems:
And the nasturtiums were creamy and smooth, belying their peppery bite:
Then, somehow, things started to change, taking on a more barren and forlorn aspect. The echinacea in particular now looks like it was stuck in the oven too long. Even though it's painful to see, I won't cut them down until I'm sure the goldfinches have pecked every last seed out of those cones:
Conversely, weeds and other things seem to thrive and take over, like this luxurious pigweed by my deck. I can't help but admire how healthy it looks, and I almost (almost) hate to chop it down:
But there are some things that don't seem to care how hot it gets and, thankfully, they taste like sweet success. So I'm enjoying them while I can, because before I know it, these too will be just a delicious memory:
>o<
Labels:
Garden Mouse,
Mouse at Home,
Musings,
Seasonal,
Summer
Monday, August 10, 2015
I Scream, You Scream: Homemade "No-Churn" Vanilla Ice Cream
Anyone who knows me can tell you I have an inordinate fondness for ice cream. It's my go-to, out-and-about treat—and many times the outing is premeditated to ensure that ice cream will be consumed at some point during the day. One might think I would own an ice cream maker, but I don't, and for good reason: I would never be seen again. The temptation to make ice cream ALL the time would be too great, and I would become one of those reclusive people who have unusually large quantities of milk, cream and sugar delivered at all hours of the day and night.
But never being able to make some kind of creamy, frozen confection is a little too unfair, especially in the hot months of Summer. I'd seen some recipes around boasting "no-churn" ice creams of various kinds, and searched online until, of course, Martha provided the perfect one. I streamlined the method a bit, and the results were more than spectacular for a mere ten minutes of work:
Homemade "No-Churn" Vanilla Ice Cream
Ingredients:
2 cups cold heavy cream
1 can (14 ounces) sweetened condensed milk
2 tablespoons bourbon (whiskey, cognac, or other—I used homemade vanilla extract made with rum)
OR
2 teaspoons pure vanilla extract
In a large, deep bowl, stir all ingredients together gently with a spoon until combined. Using an electric mixer, beat mixture until stiff peaks form, about 8-10 minutes (mine did splatter quite a bit until I was able to get enough air into it). Spoon ice cream into containers, cover tightly, and freeze until firm, about six hours. Serve as soon as you possibly can.
Notes: Slightly adapted from this recipe. As mentioned there, it's best to enjoy this kind of ice cream within a week—after that, the structure begins to break down, despite being frozen. I definitely plan to experiment with other flavors and ingredients, especially since dulce de leche is also available in a 14-ounce can :-)
>o<
But never being able to make some kind of creamy, frozen confection is a little too unfair, especially in the hot months of Summer. I'd seen some recipes around boasting "no-churn" ice creams of various kinds, and searched online until, of course, Martha provided the perfect one. I streamlined the method a bit, and the results were more than spectacular for a mere ten minutes of work:
Homemade "No-Churn" Vanilla Ice Cream
Ingredients:
2 cups cold heavy cream
1 can (14 ounces) sweetened condensed milk
2 tablespoons bourbon (whiskey, cognac, or other—I used homemade vanilla extract made with rum)
OR
2 teaspoons pure vanilla extract
In a large, deep bowl, stir all ingredients together gently with a spoon until combined. Using an electric mixer, beat mixture until stiff peaks form, about 8-10 minutes (mine did splatter quite a bit until I was able to get enough air into it). Spoon ice cream into containers, cover tightly, and freeze until firm, about six hours. Serve as soon as you possibly can.
Notes: Slightly adapted from this recipe. As mentioned there, it's best to enjoy this kind of ice cream within a week—after that, the structure begins to break down, despite being frozen. I definitely plan to experiment with other flavors and ingredients, especially since dulce de leche is also available in a 14-ounce can :-)
>o<
Labels:
Dessert,
Egg-Free,
Gluten-Free,
Grain-Free,
Ice Cream,
Kitchen Mouse,
Mouse at Home,
Seasonal,
Summer,
Vegetarian
Monday, August 03, 2015
Just Peachy: Summer Fruit Cobbler
Sometimes Summer's bounty is more robust than you can comfortably manage—that basket of peaches is starting to languish on the counter, berries are starting to shrivel in the fridge, and maybe even a fruit fly (or 20) are starting to eye your goods. Fret not: you can always convert these stragglers into something wonderful!
Summer Fruit Cobbler
Ingredients:
1/2 cup granulated sugar
1/2 cup all-purpose flour
1 teaspoon baking powder
1/4 teaspoon kosher salt
1/2 cup whole milk
About 2 cups fresh fruit, sliced or chopped (any soft fruit like peaches, nectarines, or berries)
Preheat oven to 350 degrees Fahrenheit. Butter an 8-inch square baking pan; set aside.
In a small bowl, stir together sugar, flour, baking powder and salt until combined. Add milk and mix until smooth (the batter will be quite thin). Scrape into prepared pan, top evenly with fruit, and bake for about 40 minutes, or until the cobbler is deeply golden all around the edges and the batter is completely cooked in the center. Serve warm or at room temperature.
Notes: Don't worry too much about the precise quantity of fruit—I happened to have just three wrinkly peaches when I made this cobbler, and it was delicious. You can certainly use more than one type of fruit, too. Definitely serve with ice cream or whipped cream, if desired!
>o<
Summer Fruit Cobbler
Ingredients:
1/2 cup granulated sugar
1/2 cup all-purpose flour
1 teaspoon baking powder
1/4 teaspoon kosher salt
1/2 cup whole milk
About 2 cups fresh fruit, sliced or chopped (any soft fruit like peaches, nectarines, or berries)
Preheat oven to 350 degrees Fahrenheit. Butter an 8-inch square baking pan; set aside.
In a small bowl, stir together sugar, flour, baking powder and salt until combined. Add milk and mix until smooth (the batter will be quite thin). Scrape into prepared pan, top evenly with fruit, and bake for about 40 minutes, or until the cobbler is deeply golden all around the edges and the batter is completely cooked in the center. Serve warm or at room temperature.
Notes: Don't worry too much about the precise quantity of fruit—I happened to have just three wrinkly peaches when I made this cobbler, and it was delicious. You can certainly use more than one type of fruit, too. Definitely serve with ice cream or whipped cream, if desired!
>o<
Labels:
Cobbler,
Dessert,
Kitchen Mouse,
Mouse at Home,
Seasonal,
Summer,
Vegetarian
Monday, July 27, 2015
High Summer
This is the third in what will hopefully be a four-part series on The High Line. The first part can be found here, and the second part here.
Summer is definitely here and, a few weeks ago, I knew it was time to get back up on The High Line. I was a little anxious - it was going to be fairly hot and sunny, with the potential of being very uncomfortable, to say the least! Thankfully, the humidity was low and there was even a slight breeze, which was just about perfect for this trip. And, as usual, there were beautiful things to see right from the beginning, like this tangerine-hued butterfly milkweed:
Among numerous varieties of aster, this large specimen was playing host to a hungry butterfly of its own:
There were a number of echinaceas to enjoy as well, and they looked handsome planted together in large groups:
The foliage had definitely grown and filled in since Spring, and tracks that were easily seen before looked like a more jaunty and colorful rendition of when they were still abandoned:
As with previous visits, there were things I had never seen before, like the pointed and somewhat alarming buds on this compass plant, which bloom into quite innocent-looking yellow flowers:
And this rattlesnake master, with its milky blooms and open growth habit:
One of the best things bout The High Line is precisely its elevation. It gives even the most mundane objects a new perspective, like this skybridge calmly basking in the sunset:
It was a wonderful day, but I'll tell you a secret: I have a feeling that Fall might turn out to be my favorite time on The High Line, even though the other seasons have been tremendously enjoyable, too. I'm already planning my next visit - after all, it's just a few months away. And, as always, I hope I've convinced you to give it a go yourself, no matter what the season :-)
>o<
Summer is definitely here and, a few weeks ago, I knew it was time to get back up on The High Line. I was a little anxious - it was going to be fairly hot and sunny, with the potential of being very uncomfortable, to say the least! Thankfully, the humidity was low and there was even a slight breeze, which was just about perfect for this trip. And, as usual, there were beautiful things to see right from the beginning, like this tangerine-hued butterfly milkweed:
Among numerous varieties of aster, this large specimen was playing host to a hungry butterfly of its own:
There were a number of echinaceas to enjoy as well, and they looked handsome planted together in large groups:
The foliage had definitely grown and filled in since Spring, and tracks that were easily seen before looked like a more jaunty and colorful rendition of when they were still abandoned:
As with previous visits, there were things I had never seen before, like the pointed and somewhat alarming buds on this compass plant, which bloom into quite innocent-looking yellow flowers:
And this rattlesnake master, with its milky blooms and open growth habit:
One of the best things bout The High Line is precisely its elevation. It gives even the most mundane objects a new perspective, like this skybridge calmly basking in the sunset:
It was a wonderful day, but I'll tell you a secret: I have a feeling that Fall might turn out to be my favorite time on The High Line, even though the other seasons have been tremendously enjoyable, too. I'm already planning my next visit - after all, it's just a few months away. And, as always, I hope I've convinced you to give it a go yourself, no matter what the season :-)
>o<
Labels:
Mouse About Town,
Musings,
New York City,
Seasonal,
Summer