Showing posts with label Grain-Free. Show all posts

Monday, April 20, 2020

Nice "Ketch": Easy Homemade Tomato Ketchup

I love ketchup, but I grew weary of buying it from the store—too much money, too much sugar, and another single-use plastic bottle to recycle. There had to be a better way! Thankfully, I found this recipe, and very happily tailored it for my very own! Although most ketchup recipes call for cooking on the stove for while, this no-cook version satisfies your ketchup craving in just minutes:

Easy Homemade Tomato Ketchup

Easy Homemade Tomato Ketchup
1 can (6 oz.) tomato paste
1/2 teaspoon kosher salt
1/2 teaspoon ground ginger
1/2 teaspoon dry mustard
1/2 teaspoon garlic and herb seasoning (salt-free, such as Mrs. Dash)
1 teaspoon granulated sugar (or honey)
2 Tablespoons apple cider vinegar (or vinegar of your choice)

Mix everything together in a small bowl, and enjoy! This will keep, tightly covered, in the fridge for several weeks. I love how little sugar is used here because, honestly, I'd rather save those sugary calories for dessert :-)

As mentioned above, all credit goes to this recipe by Served From Scratch, which also encourages you to season as you like and make this ketchup your own. As you may have guessed, there are many other scratch and homemade recipes on the site—be sure to visit and explore while you're there!

>o<

Friday, July 27, 2018

Flour Power: Not Your Usual Brownies, Plus Some Encouragement

True story: I've been working with alternatives to wheat flour for many years now. I do this to provide something a bit more nutritious for myself, as well as create options for friends and family who need to avoid grains, either out of desire or by necessity. I've made these coconut flour brownies in the past, and they're very good. And recently, I spotted this grain-free brownie recipe online, and definitely wanted to try it!

I already had almond flour on hand (you'll remember those grain-free/egg-free chocolate-chocolate chip cookies from last month), and just needed eggs and some chocolate hazelnut spread to pull the whole thing off. After all, with only three ingredients, how hard could it be??? Of course, when the day came and the time was right, I gathered my loot and reviewed the recipe, only to notice a few minor details:

* I had a little more than half the amount of chocolate hazelnut spread as called for, but no worries - I'd just make half a recipe in a smaller pan.
* I had, inexplicably, bought jumbo eggs.
* I remembered, also inexplicably, I had about a Tablespoon of coconut flour left rattling around in the pantry.

The first two anomalies gave me more liquid in proportion to the dry called for in the recipe, but the third gave me the ability to correct for it - not to mention, use it up without letting it go to waste! I was confident (and greedy) enough to proceed, and dumped my ingredients, plus a bit of salt for balance, into a bowl and began to stir:

bowl of grain-free brownie ingredients

The batter came together, I set it in the oven to bake, and you know what? It worked! Fudgy, gorgeous brownies - nutty, chocolatey, and divine. I was grateful I had some experience with these ingredients under my belt, and didn't need to scratch the project completely. So, even though I didn't really follow a recipe, or even develop a new one, I still wanted to encourage you with this thought: cooking and baking with alternate flours is like any other cooking and baking. Once you get to know the ingredients and how they behave, you will be able to adjust as needed if circumstances aren't going quite to plan. If being grain-free is something you'd like to explore for any reason, don't be afraid to do so. I've created a new tag here on the blog for "grain-free", so you can find those options quickly. As well, I wholeheartedly suggest browsing through some of my long-time favorite sites, including Elana's Pantry and Deliciously Organic - and, for more awesome treats like those brownies, The Big Man's World! Be open, be curious, and take full advantage of the resources available. Others have been generous in sharing their work so you can avoid disappointment in your own kitchen. And, most importantly, enjoy :-)

grain-free almond flour brownie

Notes: If you really want to make these exact brownies, here's what I did!

Grain-Free Brownies a la Oops

Ingredients:
13 oz. jar of chocolate hazelnut spread (you know the one, or an organic one!)
1/2 cup almond flour
1 Tablespoon coconut flour (alternately, increase the almond flour by two additional Tablespoons)
1/2 teaspoon kosher salt
2 jumbo eggs (large or extra-large will still be fine)

Preheat oven to 350 degrees Fahrenheit. Butter an 8x8-inch baking pan and set aside. In a medium bowl, stir together all the ingredients until fully combined, being sure to scrape the bottom frequently to catch and incorporate any dry bits. Let stand for a few minutes to allow the flours to absorb the liquid. Scrape the batter into your prepared pan and bake for 25-30 minutes, or until the edges are dry and a toothpick inserted in the center comes out with fudgy crumbs. Let cool for a while before trying to cut and serve (they will actually have more flavor the longer they are allowed to cool). Baked goods made with almond or coconut flour are more filling than their conventional counterparts - you may be pleasantly surprised by feeling satisfied after just one serving!


>o<

Saturday, June 09, 2018

Double Trouble: Chocolate-Chocolate Chip Cookies

It's been an incredibly long time since my last blog post, and I have nothing to say for myself! I will, however, offer two rather large, furry excuses for my absence—their names are Bella and Pixie:


I took responsibility for these girls about 18 months ago, and they have been both a delight and a challenge! While incredibly fun and loving, they are also a bit like having toddlers that can climb just about anywhere and get into everything. Such a change from my older girl! Xena has spoiled me for nearly two decades with her calm, intelligent, sensible approach to life. As one friend noted, she's been more like a housemate than a pet:


Now that she has attained "little old lady" status, I try to keep Xena as safe and comfortable as possible, which also means keeping her separated from the younger two. It's been quite a learning curve, but we've (thankfully) reached a point of stasis that seems to suit everyone. Mind, all three would each prefer to be the only cat in the house and the center of all my attention, but they'll just have to go on sharing ;-)

[EDIT: Xena passed away in March, 2019. She was a unique, amazing creature, and I miss her every day.]

To celebrate my two younger ones, here's a recipe with twice the chocolate to keep you (and me!) going for the long haul:

Almond Flour Chocolate-Chocolate Chip Cookies


Chocolate-Chocolate Chip Cookies

Inredients:
2 cups almond flour
1/4 cup unsweetened cocoa powder
1 teaspoon baking soda
1/2 teaspoon kosher salt
1/2 cup butter, room temperature
1/2 cup honey (local, if available!)
2 teaspoons vanilla extract
1/4 cup semisweet chocolate chips (mini chips work nicely)

Preheat oven to 350 degrees Fahrenheit. In a medium bowl, stir together almond flour, cocoa, baking soda and salt until combined. In a large bowl, cream butter, honey and vanilla together until smooth, then add dry ingredients and stir until completely incorporated. Gently stir in chips. Using a Tablespoon scoop or measure, drop onto lined cookie sheets and bake, one sheet at a time, for 10-12 minutes (you should get about 24 cookies total). Although they will puff while baking, the cookies will flatten as they cool. Transfer pans to racks and let cool completely before removing with a spatula (the cookies will still be very soft). Store in an airtight container at room temperature, or refrigerate for firmer cookies.

Notes: These cookies are a great choice for anyone with egg and/or wheat sensitivities. They will remain soft and chewy if stored properly, and also freeze well. Substitute any flavor chips for the chocolate chips, or replace with chopped dried fruit or nuts. And just three more words: ice cream sandwiches!

>o<

Friday, February 03, 2017

Double Dip: Baby Greens and White Bean Dip

Let's face it: sometimes a delicious, creamy dip makes all the difference when trying to eat your raw veggies. But what if that dip already had veggies in it? I'd call that brilliant! As a bonus, this dip just happens to be dairy-free, perfect for sharing with anyone who might need to avoid it. With beans for a boost of protein, and heart-healthy olive oil as well, go ahead—keep dipping!

Baby Greens and White Bean Dip with Mini Peppers


Baby Greens and White Bean Dip

Ingredients:
Extra-virgin olive oil
1-2 cloves garlic, sliced lengthwise (remove "sprout" in center if starting to turn green)
5 oz. baby spinach, baby kale, baby Swiss chard, or a combination
1 15-oz. can cannellini beans, drained and rinsed
Red wine vinegar (or fresh lemon juice, if you have it)
Salt and freshly ground pepper to taste

In a large saucepan over medium-low heat, gently sautee garlic in a few Tablespoons of oil until fragrant, then add beans and stir to coat and warm through, absorbing the garlicky oil. Add greens in batches and wilt, seasoning sparingly with salt and pepper with each batch, until all the greens are cooked (at this point, you actually have a nice little side dish of greens and beans - keep that in your back pocket for another time!). Let the mixture cool.

In a blender or food processor, blend greens and beans with a few more Tablespoons of olive oil, a splash or two of vinegar, and salt and pepper to taste. The dip should be creamy, but still retain some texture. Serve with veggie sticks, pita chips, or use as a spread on sandwiches!

Notes: Adapted from this recipe, which is extremely delicious in its own right :-)


>o<

Friday, March 04, 2016

Dazed and Infused: Herb-Infused Sugar and Salt

I sadly don't have an indoor rosemary plant, so during the Winter months I need to buy fresh rosemary if I want to use it. But the other week, after doing just that, I found myself with a surfeit of the fragrant stuff. I wanted to save it, store it, make it last forever!!! And then I had a scathingly brilliant idea: just like that vanilla sugar I keep going on about, I would make its savory counterpart—ROSEMARY INFUSED SALT. I was feeling exceptionally unique and amazing for quite a few seconds, but a quick Internet search revealed that it had been done, pinned, tweeted, posted, and pretty much plastered all over the place.

My bubble was somewhat deflated but not altogether burst, so I carried on and mixed my ingredients, using the proportions that seemed to be most common on the web. And while I was at it, I thought back to that vanilla sugar, and made a batch of rosemary sugar just for fun:

rosemary infused sugar and salt ingredients

Things started smelling like a Christmas tree farm after breaking apart all those rosemary sprigs, but I was pleased to be making the most of my purchase. I've been dutifully shaking the jars vigorously each day since then, to ensure the contents don't clump and to keep the rosemary evenly distributed. I definitely plan to start using them soon (in place of regular salt and sugar) wherever a touch of rosemary would go nicely!


Notes: I used roughly 1/4 cup rosemary sprigs to 2 cups kosher salt, and about 2 Tablespoons rosemary sprigs to 1 cup granulated sugar. I used very clean Mason jars with a larger capacity than required to ensure I had enough room to shake them thoroughly. I store the salt and sugar in a cool dark cabinet, right alongside the vanilla sugar.


>o<

Sunday, February 21, 2016

Lost in Translation: Lyonnaise Garlic and Chive Dip

Foods often acquire funny names based on their appearance, sometimes silly, sometimes merely descriptive—and while those names pass into acceptance in their native tongue, they are often hard to swallow when you need to explain them in a different language. In the Lyon region of France, there is a traditional (and extremely delicious) cheese mixture called cervelles de canut, which has the unfortunate and rather gruesome translation of "silk-worker's brains". What probably started as a tasteless joke has now been memorialized for all time. The reference shouldn't stop you from making this dish, however, which is great as a snack or an easy appetizer, and comes together in just a few minutes. And if you're still feeling bothered by that name? Don't worry—it's all in your head ;-)

Ricotta Cheese Garlic and Chive Dip on Bread


Garlic and Chive Dip

Ingredients:
15 oz. whole-milk ricotta cheese
2 cloves garlic
1/4 cup finely chopped chives (or scallions)
2-3 teaspoons champagne vinegar
2-3 Tablespoons extra-virgin olive oil
Salt and freshly ground pepper to taste

Grate or finely mince garlic into a medium bowl, then add ricotta and mix. Drizzle in about two teaspoons of vinegar, add the chives and stir again until combined—the consistency should be thick but spreadable. Season with salt and pepper, then add a few Tablespoons of oil. Mix until everything is incorporated, then taste and adjust seasonings, oil and vinegar to your liking. Serve with raw veggies or crusty bread. Store any unused portion in an airtight container in the fridge; give it a quick stir before serving again as the dip will separate a bit as it sits.


Notes: My simplified version of cervelles is adapted heavily from Rachel Khoo and Dorie Greenspan's excellent recipes. Red wine vinegar is traditional, but I found the champagne vinegar to be delicious, and of course fresh lemon juice would be wonderful, too. Don't be too concerned with exact quantities or measuring the liquid ingredients precisely—just eyeball and adjust as you go!

>o<

Friday, November 13, 2015

Easier Than Pie: Individual Pumpkin Custards

With the holidays fast approaching, we all need some go-to recipes that can be made quickly, store easily and, above all, taste wonderful. These little pumpkin custards meet all those demands, giving you a rich, not-to-sweet treat that can proudly be served after any meal—and they even make a great breakfast, too!

Individual Pumpkin Custard


Individual Pumpkin Custards

Ingredients:
1 can (15 oz.) pumpkin puree
1/4 cup honey (or pure maple syrup)
2 large eggs, room temperature
1 cup (8 oz.) heavy cream
1 teaspoon vanilla extract
2 teaspoons ground ginger
1 teaspoon ground cinnamon
1/2 teaspoon ground cardamom
1/4 teaspoon ground cloves

Preheat oven to 350 degrees Fahrenheit. Line a standard 12-cup muffin tin with parchment liners and set aside.

In a medium bowl, stir all ingredients together until smooth and creamy. Divide batter evenly among liners in prepared pan (they will be fairly full) and bake for about 25-30 minutes, or until set and no longer wobbly in the center. Let custards cool completely in the pan, then carefully lift out and refrigerate in an airtight container. These are best made at least one day ahead to allow the flavors to develop. They can be served with whipped cream, ice cream, or simply garnished with a few chopped, toasted pecans.


Notes: The custards will hold their shape once refrigerated overnight, while still retaining their smooth interior. If you have some oranges on hand, a teaspoon of grated zest would be heavenly folded into the batter before baking. Feel free to use any combination/amounts of spices that you like best or would typically use in your favorite pumpkin pie recipe. Be sure to share your variations in the comments!

>o<

Monday, August 24, 2015

A Bushel and a Peck: Roasted Plum Tomatoes

Towards the end of the growing season, many farm stores will sell the final harvests of their crops in bulk at excellent prices, particularly those things that can be preserved easily by canning or freezing. This is a great way to have local produce on hand during the colder months, without ever having to leave your home. Freezing is the simplest method, and tomato products do wonderfully well this way. With very little time and effort, you can have roasted plum tomatoes ready and waiting for soups, stews and sauces.

Roasted Plum Tomatoes


Roasted Plum Tomatoes

You will need:
plum tomatoes
sea salt
bay leaves

Line a baking sheet (or two, if needed) with parchment paper (I line mine with foil first for easier cleanup). Sprinkle lightly all over with salt, and lay about six bay leaves around evenly. Preheat oven to 400 degrees Fahrenheit. Core and slice tomatoes in half lengthwise, laying them cut-side down in a single layer on baking sheet(s). Roast in the oven for about 45 minutes to an hour, depending on size. The skins should be completely shriveled and juices bubbling all around the tomatoes. Remove from oven and let cool to room temperature, about one hour. Gently remove skins from flesh (most will slip off easily). Pack into freezer containers, pressing out any air bubbles and leaving about an inch of space at the top to allow for expansion during freezing. Defrost before using.

Notes: I found that about 7-8 lbs. of plum tomatoes fit on two large baking sheets, and yielded about 8 cups of roasted tomatoes. I used bay leaves to provide a neutral flavor base, but certainly other herbs or aromatics could be included in the roasting process.

What are your favorite foods to preserve, and what method(s) do you use? How do you like to use them throughout the year?

>o<

Monday, August 10, 2015

I Scream, You Scream: Homemade "No-Churn" Vanilla Ice Cream

Anyone who knows me can tell you I have an inordinate fondness for ice cream. It's my go-to, out-and-about treat—and many times the outing is premeditated to ensure that ice cream will be consumed at some point during the day. One might think I would own an ice cream maker, but I don't, and for good reason: I would never be seen again. The temptation to make ice cream ALL the time would be too great, and I would become one of those reclusive people who have unusually large quantities of milk, cream and sugar delivered at all hours of the day and night.

But never being able to make some kind of creamy, frozen confection is a little too unfair, especially in the hot months of Summer. I'd seen some recipes around boasting "no-churn" ice creams of various kinds, and searched online until, of course, Martha provided the perfect one. I streamlined the method a bit, and the results were more than spectacular for a mere ten minutes of work:

Dish of Homemade "No-Churn" Vanilla Ice Cream


Homemade "No-Churn" Vanilla Ice Cream

Ingredients:
2 cups cold heavy cream
1 can (14 ounces) sweetened condensed milk
2 tablespoons bourbon (whiskey, cognac, or other—I used homemade vanilla extract made with rum)
OR
2 teaspoons pure vanilla extract

In a large, deep bowl, stir all ingredients together gently with a spoon until combined. Using an electric mixer, beat mixture until stiff peaks form, about 8-10 minutes (mine did splatter quite a bit until I was able to get enough air into it). Spoon ice cream into containers, cover tightly, and freeze until firm, about six hours. Serve as soon as you possibly can.


Notes: Slightly adapted from this recipe. As mentioned there, it's best to enjoy this kind of ice cream within a week—after that, the structure begins to break down, despite being frozen. I definitely plan to experiment with other flavors and ingredients, especially since dulce de leche is also available in a 14-ounce can :-)

>o<

Friday, May 15, 2015

Gettin' Figgy With It: Basic Fig Compote

Around this same time last year, I made the fig compote of my dreams—tangy, sweet, and very well-balanced. The only problem? I wasn't really following a recipe, and never bothered to write anything down. OOPS! As a first attempt since then, I thought I'd try a more basic version, with just a few ingredients, and work my way up from there. I certainly have more work to do, but in the meantime I still have a lovely, rich condiment to enjoy!

Preparing to make fig compote with rosemary


Basic Fig Compote

Ingredients:
8 oz. dried figs, stems removed and finely diced (I used Mission "figlets")
1 teaspoon fresh rosemary, finely chopped
Juice of one orange (about 1/4 cup)
2-3 grinds of pepper
Water

Add all ingredients to a small pan, and pour in enough water to cover the figs. Cover and bring to a boil, then reduce to a simmer and cook until figs have absorbed the liquid, stirring occasionally. If figs are not soft enough to mash with the back of a spoon at this point, add more water and continue to cook. The whole process should take about 20-30 minutes. Once done, finish mashing with the back of a spoon, let cool completely, then store in an airtight container in the fridge for a week, or freeze for up to three months.

Notes: The consistency of this compote is ultimately up to you—I wanted mine on the softer side, and added water a few times before I considered it "done". You could also substitute a good red wine for some (or all) of the water used here. As with many things, this is best done at least one day in advance to let the flavors develop. Serve this with any meat of your choice, or for making a sweet/savory grilled cheese with your favorite, extra-sharp cheddar.


>o<

Friday, April 24, 2015

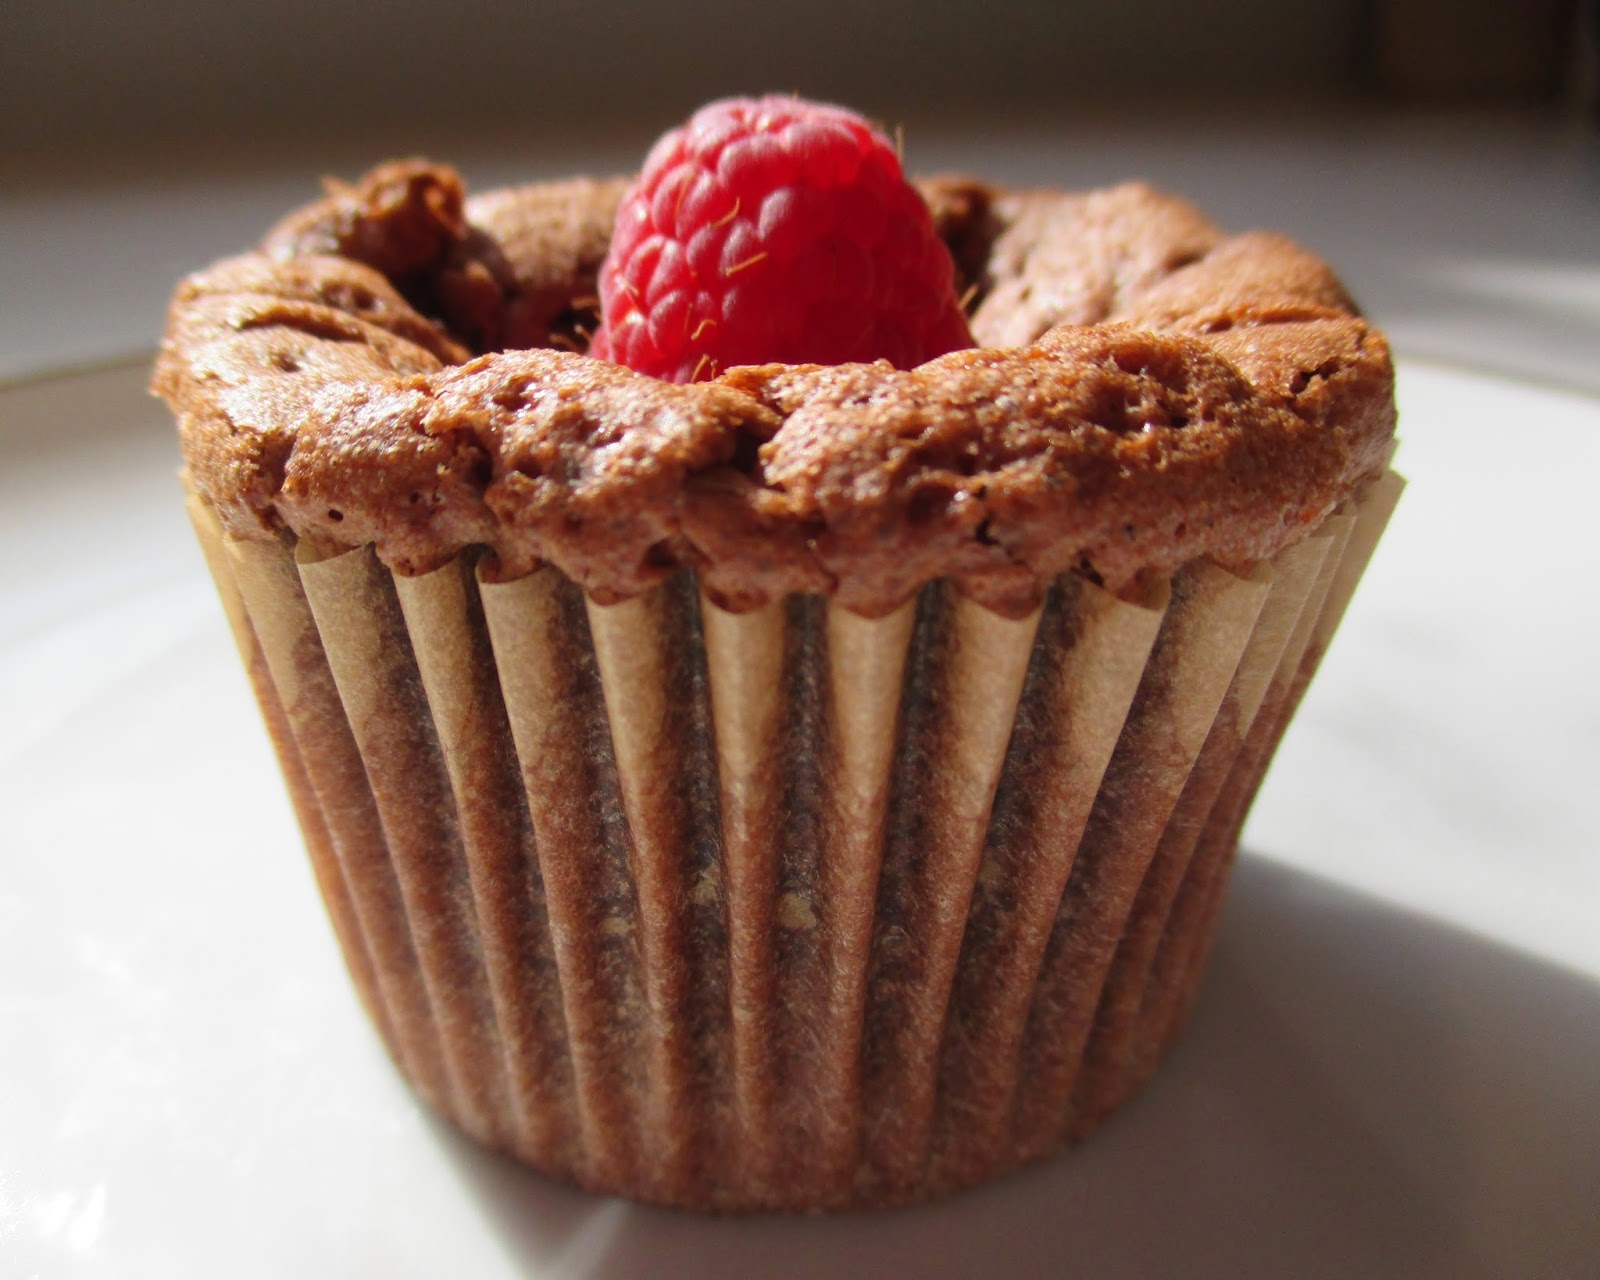
Opposites Attract: Individual Flourless Chocolate Cakes

Although I ultimately decided on this recipe to bring to cookbook club, the smitten kitchen cookbook's "tiny but intense chocolate cake" was a very close runner-up. It was everything the white chocolate pudding was not—deep, dark, rich, and unapologetically sinful. During the course of the cookbook club meeting, however, I learned that one of the other members had made that recipe to try at home. Not having the six-inch baking pan required, she very sensibly divided the batter into individual servings using a muffin tin, adjusting the baking time for the smaller size. She said it worked like a charm—and since I don't have that size pan, either, it definitely worked for me!

Grain-Free Individual Chocolate Cake


Individual Flourless Chocolate Cakes

Ingredients
6 Tablespoons butter
1/2 cup semisweet chocolate chips
3 large eggs, separated
1/4 cup vanilla sugar (or use regular sugar and 1/2 teaspoon vanilla extract)
1/4 teaspoon kosher salt
Berries for garnish, if desired

Preheat oven to 350 degrees Fahrenheit. Line a standard muffin tin with eight muffin liners, and fill each of the empty cavities with about 1/2 an inch of water. Set aside.

In a small pan, melt butter gently over low heat. Once melted, turn off heat and stir in chips until they are also melted and the mixture is smooth. Let cool slightly. In a medium bowl, beat the egg yolks and sugar together until very creamy and pale. Add the cooled chocolate mixture carefully, stirring to combine. In a large bowl, beat egg whites and salt together until firm peaks form (I used a hand-crank beater, but feel free to use an electric mixer!). Stir in 1/3 of the whites into the chocolate batter to lighten it, then gently fold in the remaining whites until just combined. Divide the batter evenly among the eight liners (about 3/4 full each) and bake for 20 minutes, or until a toothpick comes out fairly clean (there might be a few crumbs). Let cool for 10-15 minutes, or cool to room temperature and chill before serving.


Notes: Adapted from the smitten kitchen cookbook. The amount of sugar is reduced, and chocolate chips (instead of chopping a bar of chocolate) were used since that's what I had on hand. In the original recipe, the butter was not only melted, but browned as well. Even with my digressions, these are lovely little cakes, and pair perfectly with fresh berries—although I wouldn't say no to a scoop of ice cream :-)

>o<

Monday, April 20, 2015

Join the Club: White Chocolate Pudding

I'd heard of cookbook clubs before, but had never seen one in my area. It also never occurred to me to initiate one myself! But, as very good fortune would have it, my own local library started one recently, and I was thrilled. The first book on the list: the smitten kitchen cookbook. I signed up to bring a dessert, brought my copy home, and started reading.

Although I was certainly interested in Deb Perelman's personal story, and the reasons why she cooks and blogs, I confess I mostly had eyes for the recipes themselves. The book was nicely broken down into seven main sections, with other smaller sections offering tips, techniques, and suggestions. Each recipe was accompanied by a story of what prompted their creation, and all were mouth-watering while being extremely easy to follow. The book club meeting itself was incredibly festive and fun. There was a good cross-section of recipes represented, including a mixed beverage which definitely helped add to the holiday feel :-) Best of all, everything was delicious.

Although there had been several desserts that caught my eye, the one I kept returning to and finally decided to bring was the White Chocolate Pudding. But I was nervous—I'd never made pudding from scratch before, and couldn't remember ever having used white chocolate in the kitchen. I was also willfully adapting the recipe from the original (which I happily found out most of my fellow participants had done with their recipes as well). There were a few lumps in the end product, but it tasted just fine, and was much easier to make than I thought it would be. I was happy to learn a new technique, engage with like-minded home cooks, left feeling wonderfully full and very excited for our next meeting!

White Chocolate Pudding


White Chocolate Pudding

Ingredients:
3 Tablespoons tapioca flour (also sold as tapioca starch)
1 Tablespoon granulated sugar (I used vanilla sugar)
1/4 teaspoon kosher salt
2 1/4 cups whole milk
4 1/2 ounces white chocolate, broken into small pieces
1 teaspoon vanilla extract

Whisk tapioca flour, sugar, salt and milk together in large, heat-proof bowl. Place in a pan over gently simmering water and cook for about 15-20 minutes, whisking to avoid lumps, until the mixture coats the back of a spoon. Add chocolate and whisk until melted and smooth, another 2-4 minutes. Remove from heat and stir in vanilla; let cool 5 minutes, then spoon into serving dishes. Cool to room temperature, then chill in the fridge for at least one hour before serving. Garnish with fresh fruit or other toppings, if desired.

Notes: As mentioned, this is adapted from the original recipe in the cookbook, which used cornstarch instead of tapioca flour for thickening. I also used a bit more vanilla in my version. The original had a quick blackberry curd as a topping; although the two contrasting layers were visually striking (and I'm sure would taste fabulous), I wanted to be able to isolate the flavor of just the pudding this first time around.

>o<

Monday, April 13, 2015

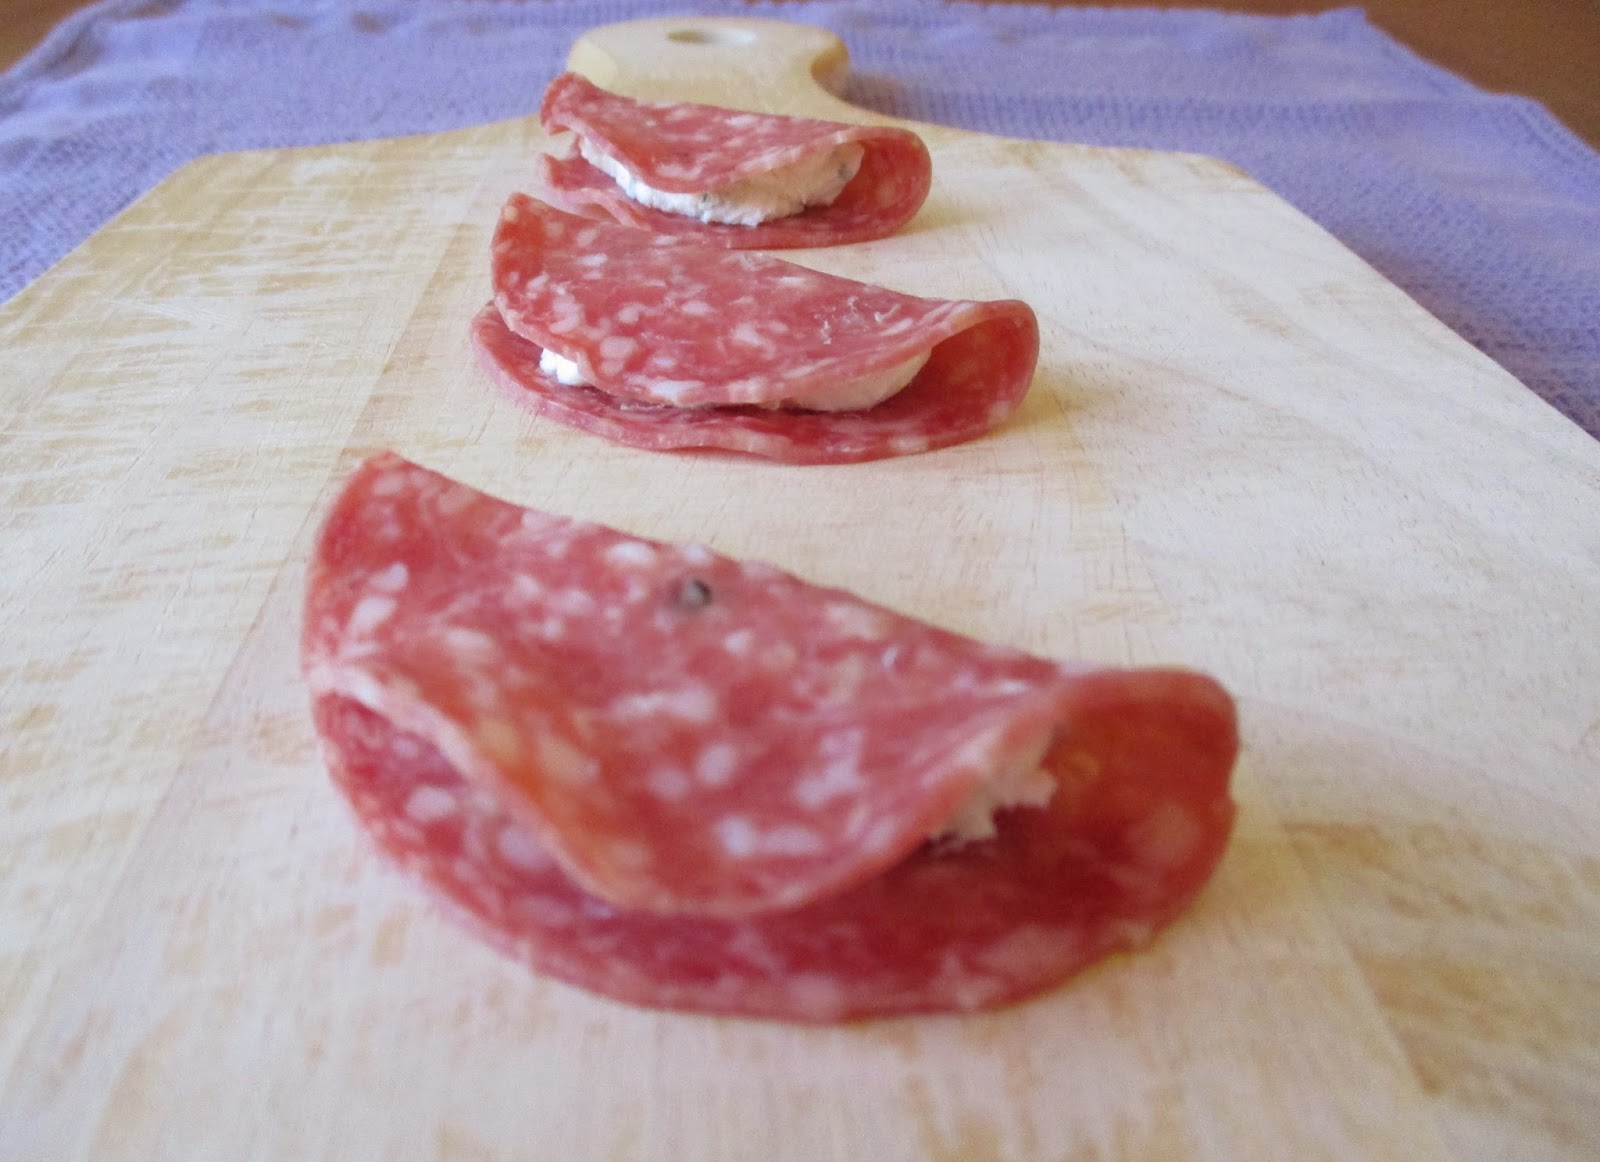
There's an App for That: Salami and Cream Cheese Appetizers

When I was little, my mother used to take slices of cream cheese and swaddle them lovingly in blankets of salami, arranging them neatly on a plate as she went. The resulting tidbits made a fantastic snack, and I know I enjoyed quite a few myself in the process! Unfortunately, when something is so simple, it's often easily forgotten—certainly, I don't think I've ever made them in the ensuing (ahem) decades. Thankfully, I was reminded of this fantastic combination very recently, and knew they would be just as welcome in this digital age as they were all those years ago:

Salami and Cream Cheese Appetizers


Salami and Cream Cheese Appetizers

Ingredients:
Sliced salami, preferably nitrate/nitrite-free (local, if available!)
Cream cheese, softened

Dollop a small amount of cream cheese in the center of each slice of salami (my slices were only two inches across, so a 1/2 teaspoonful was enough). Fold salami over cream cheese and repeat until you have as many as you need!

Notes: My store happened to have cream cheese mixed with scallions, and this worked very well. Other good additions to the cream cheese would be finely chopped chives, olives, or cornichons. For more contrast with the rich, salty salami, add some finely chopped dried figs, walnuts, and a pinch of cinnamon to your cream cheese.


>o<

Monday, April 06, 2015

Easy Being Green: Catalan Spinach

My favorite way to eat greens is simply sauteed in a bit of olive oil or butter, seasoned lightly with salt and pepper. In recent years, I've enjoyed the classic Mediterranean greens often described as Catalan Spinach at various eateries, but for some reason never thought to make it at home. I could see there were only a few ingredients needed, resulting in those wonderful sweet-savory flavors for which this dish is known. However, I felt sure there was some underlying technique or finesse which I wouldn't be able to replicate in my kitchen. I pictured myself being disappointed and discouraged, with nothing but some wilted greens to ease my troubled mind. Thankfully, I finally did try it—not only was it extremely easy to make, it was extremely fast as well!

Catalan Spinach with Dried Currants and Garlic

Catalan Spinach

Ingredients:
2-3 Tablespoons olive oil
2-3 cloves garlic, sliced
3-4 Tablespoons dried currants
11 oz. baby spinach
Salt and pepper to taste

In a large, wide saucepan over medium-low heat, gently simmer olive oil and garlic, stirring frequently, for 3-5 minutes. Add currants and continue to simmer for another few minutes, until all the currants are soft and coated with the garlicky oil. Add spinach and wilt, covered, turning the leaves over as needed (you may need to add the spinach in batches depending on the size and depth of your pan). Season with salt and pepper to taste. Serve hot or warm.

Notes: Substitute baby Swiss chard or baby kale for the baby spinach, or use regular spinach (removing any tough stems and veins). In place of the currants, use regular or golden raisins. For added flavor and crunch, sprinkle with toasted pine nuts or slivered almonds before serving. Adjust quantities of oil, garlic and currants to taste, or as needed for larger/smaller quantities of greens. Adapted from the always helpful Joy of Cooking.

>o<

Monday, March 16, 2015

Can-Can: Canned Salmon and White Bean Salad

This Winter has definitely been a challenge, including when it comes to food—not only did the endlessly bitter-cold days curb my appetite, I sometimes couldn't get out to the store even if I had been hungry. Thankfully, I try to keep some high-protein canned goods in my pantry, and one day I was able to pull together this tangy, filling salad to tempt my stomach:

Salmon and White Bean Salad


Salmon and White Bean Salad

Ingredients:
1 can (6 oz.) boneless, skinless salmon, drained and flaked
1 can (15 oz.) cannellini beans, drained and rinsed
1/4 cup olive oil
2 Tablespoons champagne vinegar
1 Tablespoon Dijon mustard
1/2 teaspoon dried tarragon, crumbled
Salt and pepper to taste

In a large bowl, gently toss salmon and beans together with a sprinkling of salt and pepper. In a jar with a tight-fitting lid, combine olive oil, vinegar, mustard and tarragon; close tightly and shake until emulsified. Pour over salad and mix to combine—taste for seasoning and adjust if desired. Serve with veggie sticks, crackers, chips, or over baby greens. This will be great alongside a juicy, ripe tomato in the Summer!


Notes: Cannellini beans are my favorite, but use whatever beans you enjoy most. You can also substitute your favorite vinegar for the champagne vinegar, your favorite herb for the tarragon, and certainly canned tuna for the salmon. I wasn't fussy about measuring the ingredients for the dressing, so just go by eye—you can always add more of something if needed afterwards. Please do add some finely chopped onion/scallions, celery, or bell pepper for more flavor and crunch (I just didn't have any in the house that day).


>o<

Friday, March 06, 2015

Peas on Earth: Mashed Peas with Butter and Lemon

I must say, peas are not a favorite among most of my family members, but I quite enjoy them. I'm not sure what the others have against them—but even liking them myself, I still need to breathe new life into them every once in a while. This is my version of "mushy peas", a traditional side dish in Northern England, typically served with fried fish. With their heavily-lemoned accent, I think mine go well with chicken and pork, too. Now, I won't lie: they're not the most photogenic item in the world, but they'll give you something different to try while you're waiting for fresh peas from the garden!

Mashed Peas with Butter and Lemon


Mashed Peas with Butter and Lemon

Ingredients:
2 bags (about 10-12 oz. each) frozen "petite" or "baby" peas
4 Tablespoons butter
Juice of one lemon
1 teaspoon dried tarragon, crumbled (or your favorite herb, such as thyme or rosemary)
Salt and pepper

In a large saucepan, simmer peas with some water (about 1/4 cup), covered, until hot, then continue to simmer uncovered until almost all the excess moisture has evaporated. Turn off heat and smash with a potato masher (they will hold together, but still have plenty of texture). Stir in butter, lemon juice and tarragon, and season with salt and pepper to taste. Serve hot!

>o<

Monday, January 05, 2015

In a Jam: Easy Tomato Jam

Once again, fruit is in the eye of the beholder, and as I beheld the various tomato products in my pantry, I thought about making some tomato jam. As I searched through recipes online, I found they all called for fresh tomatoes—and lots of them! But it's the middle of winter, so what's a mouse to do? Why, use those shelf-stable tomatoes, of course :-)

Tomato Jam on Toast

Easy Tomato Jam

Ingredients:
3 cups canned plum tomatoes, "strained", "crushed", "chopped", or "diced" (if you have tomatoes you've processed yourself at home, even better!)
1/4 cup light brown sugar, firmly packed
2 Tablespoons gin
1 teaspoon dried rosemary
1/4 teaspoon kosher salt

Stir all ingredients together in a heavy-bottomed saucepan and bring to a simmer over medium heat. Reduce heat to medium-low and continue to simmer, stirring frequently, for about 90 minutes, or until the volume has reduced by about half (you may need to increase the heat for the final 15 minutes and stir constantly to drive off the last of the excess moisture). Let cool, uncovered, to room temperature and store in an airtight container. Refrigerate for up to a week, or freeze for up to 3 months.

Notes: Dollop jam on burgers, spread on sandwiches, or serve with chicken, fish, or eggs. For a fun party nibble, spread 4 Tablespoons jam on a sheet of puff pastry, sprinkle with grated parmesan cheese, roll into a log and slice into 1/2-inch rounds; bake at 400 degrees Fahrenheit on a lined baking sheet for about 15 minutes or until golden and crisp.

>o<

tomato and cheese pinwheels with a glass of red wine

Monday, December 29, 2014

Just One More Thing: Cheese and Date Cocktail Nibbles

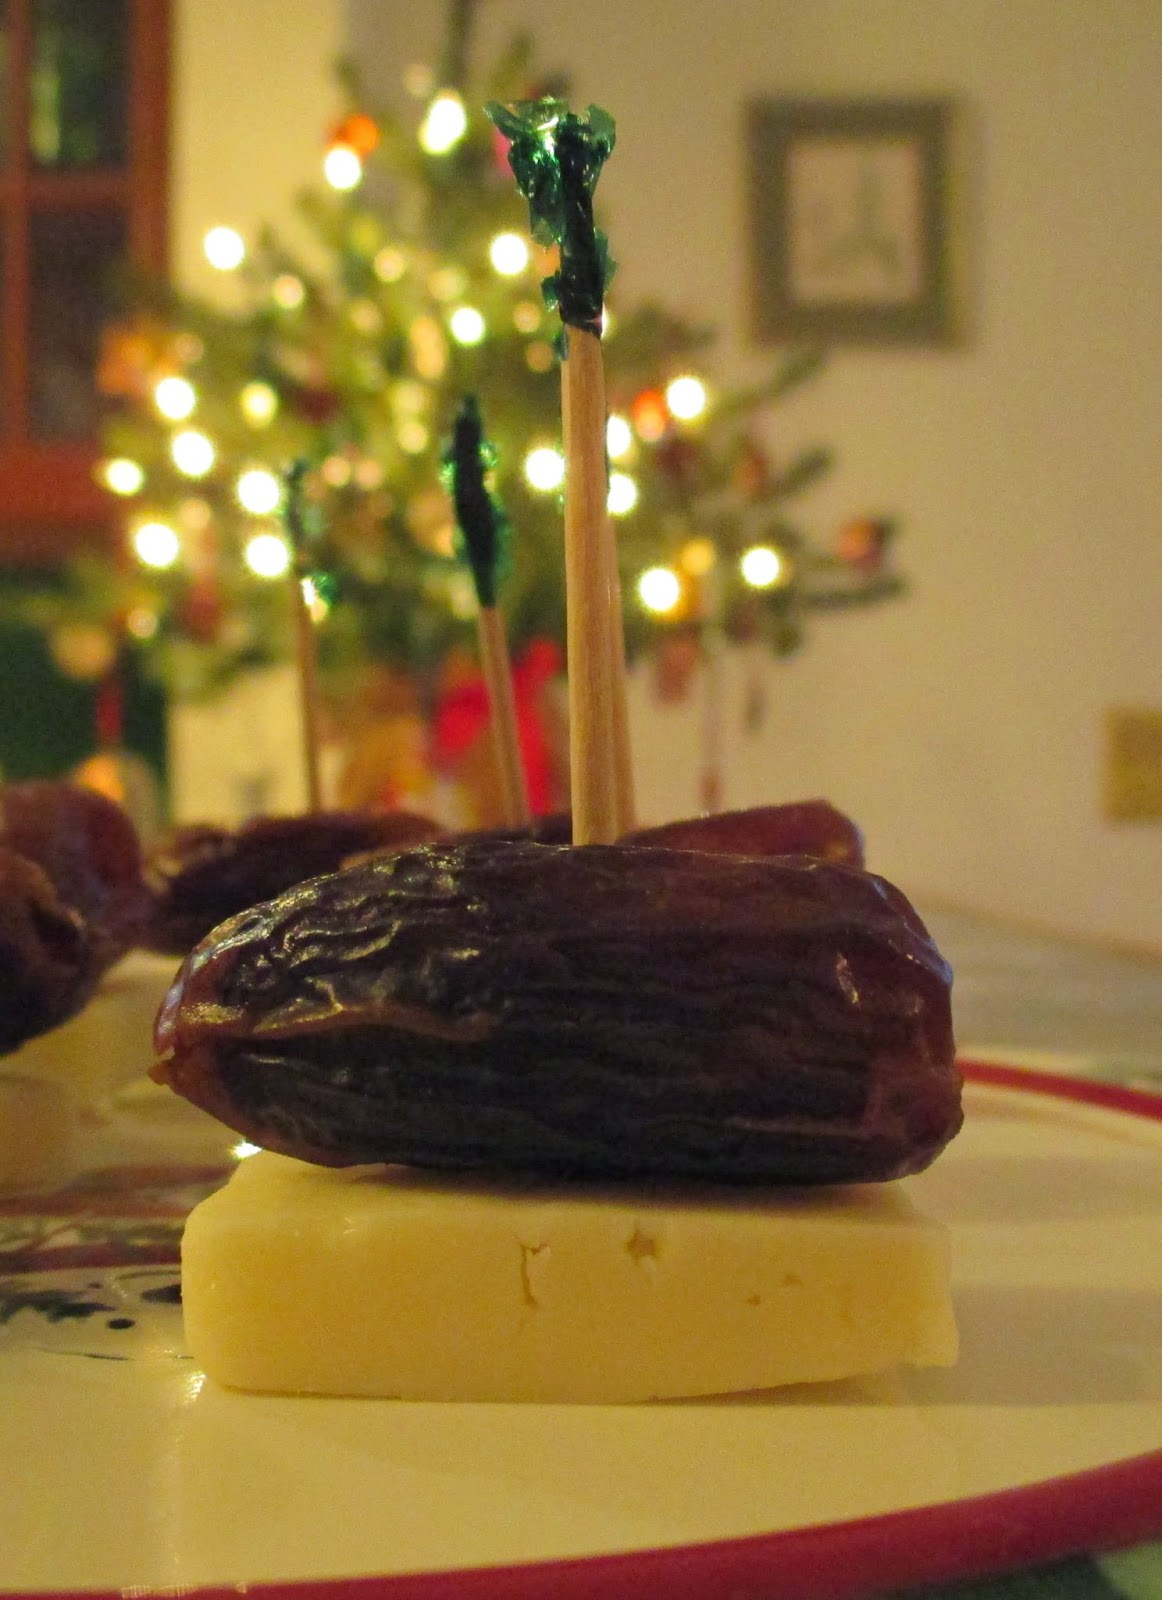
It's been a busy year: you've worked hard, the holidays have been hectic, and all you want to do now is relax. Still, you may yet have more guests to feed, more family to entertain, and possibly another party or two before the year is out—and the thought of making just one more thing is enough to tip you over the edge! But I'm here to help, with a simple, quick, and very tasty little nibble that can be thrown together in no time:

cheese date snack appetizer


Cheese and Date Cocktail Nibbles

Ingredients:
Cheese
Dates (pitted)

Slice cheese into pieces roughly the length and width of your dates, and about 1/4 inch thick. Skewer a date onto a toothpick, followed by a piece of cheese. Repeat until you have as many as you need, or until you run out of cheese and dates :-)

Notes: You can certainly stuff the cheese inside the dates by slicing the dates open along one side, and even add a pecan or walnut half as well. Use your favorite cheese for these, or try a variety—a good extra sharp cheddar goes extremely well with the sticky sweetness of the dates. If you don't like dates, use another kind of dried fruit like apricots or plums.

>o<

Monday, November 24, 2014

Go Nuts: The Union Square Cafe's Bar Nuts

I think almost every celebrity chef has their own version of the Union Square Cafe's bar nuts. In fact, I've been making my own adaptation of Ina Garten's version for many years, and they've always been quite a hit. But I realized it was finally time to take a step back and try the original recipe - no interpretations, no substitutions, just the real deal as printed in the Cafe's own cookbook:

bar nuts snack appetizer
Belly up.


The Union Square Cafe's Bar Nuts

Ingredients:
1 1/4 lbs. mixed, unsalted nuts (about 20 oz.)
1 Tablespoon butter, melted
2 Tablespoons fresh rosemary, coarsely chopped
2 teaspoons kosher salt
2 teaspoons dark brown sugar
1/2 teaspoon cayenne pepper

Preheat oven to 350 degrees Fahrenheit.

Spread nuts evenly on a baking sheet and toast in the oven until fragrant, about 10 minutes. Combine the remaining ingredients in a large bowl, then add the nuts as soon as they come out of the oven and toss to coat. Serve warm and enjoy!

Notes: I think I would have liked a little more butter and rosemary, and maybe a bit less salt. However, I'll have to reserve judgement until I visit the Cafe and try these straight from the source :-) You can certainly use a single type of nut instead of a mix—pecans and cashews work extremely well with the other flavors here.

>o<

Wednesday, October 15, 2014

When Life Gives You Cranberries: Homemade Cranberry-Orange Sauce

Another Fall favorite is now available fresh at local markets and grocery stores. The most common use for cranberries is cranberry sauce for the Thanksgiving table, which of course can be served at any time since cranberries freeze well for up to a year. I can't take full credit for this recipe, as I've adapted it from various other cranberry sauce recipes I've seen over the years. However, it's easy, delicious, and makes any meal feel like a holiday :-)

The basic recipe below makes for a great sauce, but I also think it lends itself well to the addition of herbs/spices, or substitutions using different preserves or fruit. So be adventurous, experiment away, and note your favorite creations in the comments!

cranberry orange sauce thanksgiving


Cranberry-Orange Sauce

Ingredients:
One bag (12 oz., about 3 cups) fresh or frozen cranberries, rinsed well and picked over
One jar (12 oz., about 1 1/2 cups) sweet orange marmalade
1/4 cup liquid (water, fresh orange juice, orange liqueur, bourbon)

Stir ingredients together in a large saucepan, cover and bring to a bubble over medium heat. Reduce heat to low, and simmer (gently!) until all the cranberries have burst, about 30-45 minutes, stirring occasionally and being very careful when removing the lid. Let cool slightly and serve warm with poultry, pork, game, or even ice cream! Store remaining sauce tightly covered in the fridge for up to two weeks, or freeze for up to three months.

Notes: Don't worry if your jar of preserves is an ounce or two over/under what's listed, it will work out just fine. When using a fruit-juice sweetened brand of preserves (which are less sweet), you may want to adjust by adding a few tablespoons of sugar, honey, or maple syrup to taste. Don't like cranberry sauce? Pack into jars and give away as gifts!

>o<