Showing posts with label Egg-Free. Show all posts

Monday, April 20, 2020

Nice "Ketch": Easy Homemade Tomato Ketchup

I love ketchup, but I grew weary of buying it from the store—too much money, too much sugar, and another single-use plastic bottle to recycle. There had to be a better way! Thankfully, I found this recipe, and very happily tailored it for my very own! Although most ketchup recipes call for cooking on the stove for while, this no-cook version satisfies your ketchup craving in just minutes:

Easy Homemade Tomato Ketchup

Easy Homemade Tomato Ketchup
1 can (6 oz.) tomato paste
1/2 teaspoon kosher salt
1/2 teaspoon ground ginger
1/2 teaspoon dry mustard
1/2 teaspoon garlic and herb seasoning (salt-free, such as Mrs. Dash)
1 teaspoon granulated sugar (or honey)
2 Tablespoons apple cider vinegar (or vinegar of your choice)

Mix everything together in a small bowl, and enjoy! This will keep, tightly covered, in the fridge for several weeks. I love how little sugar is used here because, honestly, I'd rather save those sugary calories for dessert :-)

As mentioned above, all credit goes to this recipe by Served From Scratch, which also encourages you to season as you like and make this ketchup your own. As you may have guessed, there are many other scratch and homemade recipes on the site—be sure to visit and explore while you're there!

>o<

Monday, February 24, 2020

Nothing But the Truth: Cherry-Almond "Bakewell Tart" Bars

I cannot tell a lie: I was only using #CherryMonth as an excuse to make these "Bakewell Tart" bars! The idea for this recipe had been on the back burner for quite some time, so when I finally had all the ingredients together, I got to work.

And boy, was it work! Mixing the dough turned into a hands-on workout, but the end result was smooth and dreamy. The cherry spread I used for the filling was a bit tart, but only because I used a juice-sweetened brand. The glaze, however, was perfect: just a drizzle to hint at that flawless white pool so iconic of those miniature Bakewell Tarts you see stores:

cherry-almond bars


Cherry-Almond "Bakewell Tart" Bars

Ingredients:
1 cup butter, softened
7 oz. (about 10 Tablespoons) almond paste
1/4 teaspoon kosher salt
2 cups all-purpose flour
10-13 oz. cherry jam, spread, or preserves
1/4 cup confectioner's sugar
1 teaspoon milk (half and half would also work)

Butter an 8x8- or 9x9-inch baking pan; set aside. Preheat oven to 350 degrees Fahrenheit.

In a large bowl, cream butter, salt, and almond paste together, breaking up the paste with the back of the spoon—it may be lumpy, but that's okay. Stir in one cup of the flour, then start stirring in the second cup. If the dough isn't coming together, scrape any bits off the spoon and get in there with your hands! Mix and knead everything together until there is nothing stuck to the side of the bowl, and you have a smooth dough. Reserve about a third, then flatten out and press the remaining dough evenly into the bottom of the pan. Bake for about 15 minutes, or until set and slightly golden around the edges. Remove from the oven and carefully (that pan is HOT) spread the cherry jam evenly over the base (if your jam isn't spreadable, give it a vigorous stir to loosen). Pinch off bits of the reserved dough and scatter over the jam, then return to the over and bake for another 20-25 minutes, or until the edges are a deep golden brown and the filling starts to bubble around the edges. Remove and let cool completely.

In a small bowl, stir together confectioner's sugar and milk until smooth. Drizzle the glaze diagonally across the entire surface of the cooled bars. Let the glaze set, then cut into 16 pieces.

cherry-almond bar

Notes: Bakewell Tart is traditionally made with either cherry or raspberry jam, but I think blackberry, peach, or even plum jam would be great here. Almond paste can be quite expensive, so if you have some almond flour knocking around, you can try making your own! Store any leftover bars tightly covered at cool room temperature for up to three days, or in a airtight container in the fridge for up to a week.

>o<

Monday, December 09, 2019

Short and Sweet: Chai-Spiced Shortbread Cutout Cookies

Every year, I like to make a lightly-spiced shortbread cookie, cut into seasonal shapes for holiday gifting—and eating! In previous years, I've used cinnamon, cardamom, or ground ginger for the main flavoring. This year, I decided to make a thoroughly warming, comforting, chai-spiced version. These cookies are rich, delicious, and will last several weeks stored in an airtight container in a cool, dry place. Sprinkling the tops of the cookies with a little granulated sugar before baking allows them to twinkle in the light, and provides a little burst of crunch and sweetness as well. These are perfect for the holidays, or any day when you need a special treat!

Chai-Spiced Shortbread Cutout Cookies


Chai-Spiced Shortbread Cutout Cookies

Ingredients:
1 cup butter, softened
1/2 cup confectioner's sugar
1 teaspoon pure vanilla extract
1/4 teaspoon kosher salt
2 cups all-purpose flour
2 teaspoons chai spice mix (or see notes below)
2 Tablespoons (or so) granulated sugar, for sprinkling (optional)

In a small bowl, stir together flour, salt, and chai spice mix. In a large bowl, cream butter and sugar together until light and fluffy. Stir in vanilla, then blend in flour mixture until smooth. Divide dough in two and wrap each half tightly in plastic wrap, flattening into discs as you go. Chill dough for several hours, or overnight.

When ready to make cookies, remove one disc of dough from the fridge about 30 minutes beforehand, line baking sheets with foil or parchment paper, and preheat oven to 350 degrees Fahrenheit.

Unwrap and roll dough out on a lightly floured surface with a rolling pin (lightly flour the rolling pin and the dough as well). Roll out evenly to about 1/8" thick, then cut using shapes of your choice with cookie cutters dipped in flour. Transfer cutouts onto prepared sheets an inch or so apart, and sprinkle lightly with granulated sugar, if using. Bake for about 8-10 minutes, or until cookies are lightly golden around the edges (cookies will puff up during baking, but settle back down when close to being done). Re-roll scraps, flouring as needed, and keep cutting shapes until the dough is completely used. Repeat with the other disc of dough.

Chai-Spiced Shortbread Cutout Cookies

Notes: This recipe will yield about 4 dozen cookies when using two-inch cutters. If you don't like chai spice, use whatever spice mix you enjoy, like pumpkin or apple pie spice. Before starting, I like to scoop out some plain flour into a small dish for my "bench" flour, sprinkling where needed and for dusting the cookie cutters. I don't have a pastry board or any other special equipment, so I simply roll my dough out on a piece of wax or parchment paper. This actually makes it very easy to rotate the dough when rolling to achieve an even thickness!

>o<

Friday, August 24, 2018

Georgia on My Mind: Peach "Pie" Bars with Pecan Streusel

A few weeks ago, I was fairly obsessed with these oatmeal cookie bars—I couldn't stop thinking about them! I finally convinced myself it was okay to make them if I shared them with friends, but that didn't stop me from eating quite a few myself. Just before making them, I couldn't remember if there were nuts in the recipe or not. And when I thought about it some more, I wondered, "Why aren't there nuts in the recipe??? That would taste great!!!" So then it was August, and August reminds me of peaches, and peaches remind me of Georgia, and don't they just happen to specialize in pecans there, too? I'm sure you see where this is going!

Peach Pie Bars with Pecan Streusel


Peach "Pie" Bars with Pecan Streusel

Ingredients:
1 cup very soft butter
1/2 teaspoon kosher salt
3 cups all-purpose flour
13 oz. peach preserves (homemade would be fabulous!)
1/2 cup chopped pecans
1/2 teaspoon ground cinnamon
1/4 cup firmly packed brown sugar

Preheat oven to 350 degrees Fahrenheit. Butter a 9x13-inch baking pan and set aside.

In a large bowl, cream butter and salt together, then add flour and stir to combine as much as you can. At that point, scrunch the mixture between your fingertips to ensure the butter is evenly distributed and there are no dry pockets of flour left. Remove 1 cup of the crumbs to a smaller bowl, and mix together with the pecans, cinnamon, and brown sugar. Set this aside, then spread the remainder of the plain crumbs evenly into your prepared pan and press firmly to form the base. Bake for 15 minutes to set, then remove and (carefully) spread the preserves over the base, and finally sprinkle with the pecan-cinnamon crumbs. Return to the oven and bake for another 25-30 minutes, or until just slightly golden and the edges of the filling start to bubble. Let cool completely before cutting into squares. Cover and store any unused portion in the fridge, but let the bars come to room temperature before trying to cut them again.

Peach Pie Bars with Pecan Streusel

Notes: These bars are very sweet, but certainly cut back (or omit) the brown sugar in the streusel topping, if desired. As well, feel free to use any jam/preserves you enjoy, or any nuts you like! As is the case with many of my desserts, these travel well and can remain at room temperature until you're ready to put them away. Oh, and I don't need to tell you how great these would be with vanilla ice cream, right? :-)

>o<

Friday, June 29, 2018

Ave Maria: Fresh Strawberry Cheesecake Parfaits

It was cookbook club time again, and our selection was Mexican Made Easy by Marcela Valladolid. There were some very tasty-looking recipes in there, full of spice and heat! But I really wanted to make a dessert, so I focused on that chapter and selected something described as a trifle. It used things like sweetened condensed milk, evaporated milk, and fresh limes. Yum! Instead of something like pound cake, however, the recipe called for Maria cookies as the base, which are akin to tea biscuits and completely delightful. And the most wondrous things of all? After shopping for my ingredients, I actually FOLLOWED THE RECIPE to make the dish. Exactly. To the letter. Okay, I added a little splash of vanilla extract, but otherwise totally the same. And used some zest as well as the juice of the limes. BUT THAT WAS IT, I PROMISE. I layered and poured and layered again, and you know what? It was terrible! The flavors were excellent, but the consistency lacked...consistency.

It was like a baby had left their teething biscuits in all that milk and then you found this lime-zest-flecked montage-strosity the next day. I must have done something wrong, but I didn't have time to make anything else, so I suffered and brought my soupy mess to the meeting anyway. To everyone's credit, they dutifully tried it. Thankfully, there was a knockout dessert from another member, and all the other dishes were fantastic. But those Maria cookies haunted me. I knew they could be put to better use, and they had paired so well with the creamy milk and the sharp fruitiness of the lime. Heck, they were even delicious on their own! And I still yearned for a layered dessert, something to please the eye as well as the palate:

Fresh Strawberry Cheesecake Parfaits


Fresh Strawberry Cheesecake Parfaits

Ingredients:
10 Maria cookies (or other plain tea biscuits), finely crushed (you should have about 1/2 cup crumbs)
2 Tablespoons butter
8 oz. cream cheese, room temperature
1/4 cup granulated sugar
1 teaspoon vanilla extract
3/4 lb. fresh strawberries, hulled and diced

Melt butter in a skillet over medium-low heat and add cookie crumbs. Stir to coat the crumbs with butter, then continue to toast the crumbs for another 3-5 minutes, stirring occasionally, until fragrant. Let cool completely.

In a small bowl, thoroughly combine cream cheese, sugar and vanilla extract until smooth. Using four glass dishes/containers/wine glasses (about a cup in capacity), place a quarter of the cooled crumbs in each. Carefully add a fourth of the cheese mixture to each dish, and spread slowly to cover the crumbs. Finally, add a fourth of the strawberries and serve!


Notes: The parfaits can be made 2-4 hours in advance and stored, covered, in the fridge until ready to serve. Absolutely use any kind of berry, fruit, or a combination to your taste. Can't be bothered to layer? Just make a double or triple batch of the cheese mixture and serve in a bowl as a dessert dip with sliced fruit and Maria cookies on the side (the cookies are also available in chocolate in many stores). I haven't tested it, but I bet the cookies would make excellent s'mores—if you try it, let us know in the comments!

>o<

Saturday, June 09, 2018

Double Trouble: Chocolate-Chocolate Chip Cookies

It's been an incredibly long time since my last blog post, and I have nothing to say for myself! I will, however, offer two rather large, furry excuses for my absence—their names are Bella and Pixie:


I took responsibility for these girls about 18 months ago, and they have been both a delight and a challenge! While incredibly fun and loving, they are also a bit like having toddlers that can climb just about anywhere and get into everything. Such a change from my older girl! Xena has spoiled me for nearly two decades with her calm, intelligent, sensible approach to life. As one friend noted, she's been more like a housemate than a pet:


Now that she has attained "little old lady" status, I try to keep Xena as safe and comfortable as possible, which also means keeping her separated from the younger two. It's been quite a learning curve, but we've (thankfully) reached a point of stasis that seems to suit everyone. Mind, all three would each prefer to be the only cat in the house and the center of all my attention, but they'll just have to go on sharing ;-)

[EDIT: Xena passed away in March, 2019. She was a unique, amazing creature, and I miss her every day.]

To celebrate my two younger ones, here's a recipe with twice the chocolate to keep you (and me!) going for the long haul:

Almond Flour Chocolate-Chocolate Chip Cookies


Chocolate-Chocolate Chip Cookies

Inredients:
2 cups almond flour
1/4 cup unsweetened cocoa powder
1 teaspoon baking soda
1/2 teaspoon kosher salt
1/2 cup butter, room temperature
1/2 cup honey (local, if available!)
2 teaspoons vanilla extract
1/4 cup semisweet chocolate chips (mini chips work nicely)

Preheat oven to 350 degrees Fahrenheit. In a medium bowl, stir together almond flour, cocoa, baking soda and salt until combined. In a large bowl, cream butter, honey and vanilla together until smooth, then add dry ingredients and stir until completely incorporated. Gently stir in chips. Using a Tablespoon scoop or measure, drop onto lined cookie sheets and bake, one sheet at a time, for 10-12 minutes (you should get about 24 cookies total). Although they will puff while baking, the cookies will flatten as they cool. Transfer pans to racks and let cool completely before removing with a spatula (the cookies will still be very soft). Store in an airtight container at room temperature, or refrigerate for firmer cookies.

Notes: These cookies are a great choice for anyone with egg and/or wheat sensitivities. They will remain soft and chewy if stored properly, and also freeze well. Substitute any flavor chips for the chocolate chips, or replace with chopped dried fruit or nuts. And just three more words: ice cream sandwiches!

>o<

Friday, September 16, 2016

Bar None: Pumpkin Butter Bars

The best part about pie is the contrast between that sweet, tangy filling and the flaky crust. My favorite part, especially with pumpkin pie, is where the filling meets the back corner of the pie, when there's just a bit of it left to go with the ever-so-slightly salty crust holding it up. It might not be for everyone, but thankfully, you get to choose—lots of filling, less filling, it's all up to you! I've experimented with these bars several times, and I had only one rule: the crust had to be sugarless, to mimic that pie-like flavor. But I must warn you, these bars are somewhat addictive, and frighteningly easy to make!

Pumpkin Butter Cookie Bar


Pumpkin Butter Bars

Ingredients:
1/2 cup very soft butter
1/4 teaspoon kosher salt
1 1/2 cups all-purpose flour
1 1/2-2 cups pumpkin butter

Preheat oven to 350 degrees Fahrenheit. Butter an 8-inch square baking pan and set aside.

In a medium bowl, cream butter and salt together, then add flour and stir to combine as much as you can. At that point, scrunch the mixture between your fingertips to ensure the butter is evenly distributed and there are no dry pockets of flour left. Reserve 1/2 cup of the crumbs, then spread the remainder evenly into your prepared pan and press firmly to form the base. Bake for 15 minutes to set, then remove and (carefully) spread the pumpkin butter over the base, and sprinkle with the reserved crumbs. Return to the oven and bake for another 25-30 minutes, or until just slightly golden and the edges of the filling start to bubble. Let cool completely before cutting into squares. Cover and store any unused portion in the fridge, but let the bars come to room temperature before trying to cut them again.


Notes: Use whatever fruit butter, fruit spread or preserves you like best—and feel free to use half as much filling if you prefer, as the sweetness will still carry through quite well. You can easily double the recipe, reserving a full cup of crumbs for the top, and bake in a 9x13-inch pan for the same times as given above. What flavor will you try?


>o<

Friday, August 05, 2016

The Cookie Crumbles: Oatmeal Cookie Bars

I wanted to bring a sweet treat to a family picnic last month, but was also in the mood to try a new recipe (well, new for me, at least). At the same time, it had to be something that would last through several hours of driving AND be able to stand out in the heat of Summer after the trip. This was no time for a multi-layer cake with a delicate buttercream frosting! A handheld treat would be ideal as well, to nibble unencumbered while strolling—or sitting—as the case might be. Then I remembered I'd been wanting to try an oatmeal cookie bar recipe, and this one seemed to fit the bill. I immediately doubled it, and was very glad I did:

Oatmeal Cookie Bar Layered with Jam


Oatmeal Cookie Bars

Ingredients:
1 cup packed light brown sugar
2 cups all-purpose flour
2 cups rolled oats
1/2 teaspoon baking soda
1/2 teaspoon kosher salt
1 cup very soft butter
10-12 oz. jam (I used a local triple-berry)

Preheat oven to 350 degrees Fahrenheit. Butter a 9x13-inch baking pan and set aside.

In a large bowl, stir brown sugar, flour, oats, baking soda and salt together with a fork until completely combined, making sure to break up any lumps. Add butter and continue to cut in with your fork, but switch to your hands towards the end to really work all the ingredients together and ensure the butter is evenly distributed (you don't need to be careful or have a "light" hand with this process). Evenly press about half to two-thirds of the mixture into your prepared pan, gently spread with jam to within 1/4 inch of the edges, and top with the remaining crumbs. Bake for about 30 minutes, or until the edges are golden, being careful not to overbake or burn as the oats will turn bitter. Let cool completely, cut into squares and serve!

Notes: Adapted with many thanks from the recipe noted above. These bars are rich and buttery, with a slight punch of fruit from the jam for balance. My family members all agreed these would be excellent paired with ice cream, but it was far too hot to attempt to get any and bring it back before it/we melted. As well, the bars are deliciously crumbly, and forks were requested all round to help with the eating. Even so, there will still be plenty of crumbs left on your plate, and how you handle them is entirely up to you...


>o<

Friday, February 26, 2016

Fairy Tales: Chocolate-Lager Cake with Tangerine Dream Frosting

We all have fairies in our lives, people who do things for us that make life that much sweeter, richer, and enjoyable—and, if we're lucky, we're able to do the same for them in return. With just a bit of thought and effort, even the simplest things become a special treat. A little everyday magic definitely goes a long way.

Now, it's true I don't drink beer often, but when the Beer Fairy delivered a six-pack of Brooklyn Lager one day, I was thrilled—it reminded me that I'd been wanting to experiment with just such a brew in my cooking and baking. It was perfect, and I couldn't wait to get started. The first thing I tried was adapting this cupcake recipe, and here's how it went:

Chocolate-Lager Cake with Tangerine Dream Frosting Slice


Chocolate-Lager Cake with Tangerine Dream Frosting

For the cake:
1 cup all-purpose flour
1/4 cup unsweetened cocoa
2 teaspoons baking powder
1/2 teaspoon kosher salt
4 Tablespoons butter, softened
4 Tablespoons brown sugar
1/2 cup granulated sugar
2 teaspoons pure vanilla extract
3/4 cup Brooklyn Lager or other amber-style beer

For the frosting:
4 Tablespoons butter, softened
4 oz. cream cheese, softened
1 cup powdered sugar
1 teaspoon vanilla extract
Zest of one tangerine (or a small orange)

Preheat oven to 350 degrees Fahrenheit. Butter an 8 or 9-inch round cake pan or deep-dish pie plate and set aside.

In a small bowl, mix together flour, cocoa, baking powder and salt until combined. In a large bowl, cream butter and sugars together until light and fluffy, then stir in vanilla extract. Starting and ending with flour mixture, blend in batches alternately with beer until you have a smooth batter. Scrape batter into prepared pan, spread out evenly and bake for about 25 minutes, or until a toothpick inserted in the center comes out clean. Let cool completely before frosting.

In a medium bowl, combine frosting ingredients and stir until completely smooth. Frost the top of the cake, spreading evenly out to the edges. You can serve right away, but the cake will slice more cleanly if you allow it to chill in the fridge for an hour. Cover and store any leftovers in the fridge as well.


Notes: The sweet, creamy frosting pairs wonderfully with the bitter tang of the cake. However, I felt the cake's texture was a bit dry, so in future I might try using a neutral-tasting oil like grapeseed or extra light olive oil in place of the butter. Use any flavorings you like in the frosting, or simply leave it plain. If you don't have or don't like beer, substitute with freshly brewed (and cooled) black coffee or tea.

Have you been doing any everyday magic in your kitchen? Please share in the comments!

>o<

Sunday, January 17, 2016

It's Gran-Tastic!: Maple-Pecan Granola with Cranberries

The New Year is a time when people make resolutions and set goals for themselves, many of which are health-related. And no wonder, after a few months of decadence and indulgence! As you might guess, my definition of healthy includes making as much as possible at home, the better to know what goes into my food and where it was made and grown. Now, you know me, and I don't shrink from fat and calories, but I want to be sure my ingredients are the best quality I can find and afford, minimally processed and locally sourced if at all possible. This makes things healthier for me, my community, and the environment—the ultimate win-win-win!

All the same, sometimes you want your food to "feel" healthy, and granola is often what jumps to mind as you look for something to start your day. Thankfully, it's also wonderfully easy to make, with very few ingredients and some time in a slow oven. The best part? It simply tastes great, too :-)

Maple-Pecan Granola with Cranberries


Maple-Pecan Granola with Cranberries

Ingredients:
5 cups rolled oats (regular, "old-fashioned" oats)
1 cup chopped pecans
1 teaspoon ground cinnamon
1/2 teaspoon kosher salt
1/2 cup pure maple syrup
1/4 cup neutral-tasting oil (such as grapeseed or extra light olive oil)
1/2 cup dried cranberries

Preheat oven to 250 degrees Fahrenheit. Line a large baking sheet with foil or parchment paper and set aside.

In a large bowl, combine oats, pecans, cinnamon and salt, stirring until everything is fully combined. Measure out syrup and oil into the same measuring cup and pour all at once over the oat mixture. Stir again until all the oats and pecans are completely coated. Pour onto prepared sheet and spread the granola into an even layer. Bake for about 45 minutes to an hour, stirring gently every 10-15 minutes, until the granola is dried and toasty. Remove and let cool completely; mix in the cranberries and store in an airtight container. Serve as a cereal with milk, sprinkle over yogurt, eat out of hand as a snack, or (so much for healthy) enjoy with a bowl of ice cream ;-)

Notes: This recipe is adapted from Bob's Red Mill. My version is not super-sweet, but just enough so to satisfy. You can definitely use whatever nuts, spices, and dried fruits you would like to suit your taste—anything goes!


>o<

Monday, August 24, 2015

A Bushel and a Peck: Roasted Plum Tomatoes

Towards the end of the growing season, many farm stores will sell the final harvests of their crops in bulk at excellent prices, particularly those things that can be preserved easily by canning or freezing. This is a great way to have local produce on hand during the colder months, without ever having to leave your home. Freezing is the simplest method, and tomato products do wonderfully well this way. With very little time and effort, you can have roasted plum tomatoes ready and waiting for soups, stews and sauces.

Roasted Plum Tomatoes


Roasted Plum Tomatoes

You will need:
plum tomatoes
sea salt
bay leaves

Line a baking sheet (or two, if needed) with parchment paper (I line mine with foil first for easier cleanup). Sprinkle lightly all over with salt, and lay about six bay leaves around evenly. Preheat oven to 400 degrees Fahrenheit. Core and slice tomatoes in half lengthwise, laying them cut-side down in a single layer on baking sheet(s). Roast in the oven for about 45 minutes to an hour, depending on size. The skins should be completely shriveled and juices bubbling all around the tomatoes. Remove from oven and let cool to room temperature, about one hour. Gently remove skins from flesh (most will slip off easily). Pack into freezer containers, pressing out any air bubbles and leaving about an inch of space at the top to allow for expansion during freezing. Defrost before using.

Notes: I found that about 7-8 lbs. of plum tomatoes fit on two large baking sheets, and yielded about 8 cups of roasted tomatoes. I used bay leaves to provide a neutral flavor base, but certainly other herbs or aromatics could be included in the roasting process.

What are your favorite foods to preserve, and what method(s) do you use? How do you like to use them throughout the year?

>o<

Monday, August 10, 2015

I Scream, You Scream: Homemade "No-Churn" Vanilla Ice Cream

Anyone who knows me can tell you I have an inordinate fondness for ice cream. It's my go-to, out-and-about treat—and many times the outing is premeditated to ensure that ice cream will be consumed at some point during the day. One might think I would own an ice cream maker, but I don't, and for good reason: I would never be seen again. The temptation to make ice cream ALL the time would be too great, and I would become one of those reclusive people who have unusually large quantities of milk, cream and sugar delivered at all hours of the day and night.

But never being able to make some kind of creamy, frozen confection is a little too unfair, especially in the hot months of Summer. I'd seen some recipes around boasting "no-churn" ice creams of various kinds, and searched online until, of course, Martha provided the perfect one. I streamlined the method a bit, and the results were more than spectacular for a mere ten minutes of work:

Dish of Homemade "No-Churn" Vanilla Ice Cream


Homemade "No-Churn" Vanilla Ice Cream

Ingredients:
2 cups cold heavy cream
1 can (14 ounces) sweetened condensed milk
2 tablespoons bourbon (whiskey, cognac, or other—I used homemade vanilla extract made with rum)
OR
2 teaspoons pure vanilla extract

In a large, deep bowl, stir all ingredients together gently with a spoon until combined. Using an electric mixer, beat mixture until stiff peaks form, about 8-10 minutes (mine did splatter quite a bit until I was able to get enough air into it). Spoon ice cream into containers, cover tightly, and freeze until firm, about six hours. Serve as soon as you possibly can.


Notes: Slightly adapted from this recipe. As mentioned there, it's best to enjoy this kind of ice cream within a week—after that, the structure begins to break down, despite being frozen. I definitely plan to experiment with other flavors and ingredients, especially since dulce de leche is also available in a 14-ounce can :-)

>o<

Friday, May 15, 2015

Gettin' Figgy With It: Basic Fig Compote

Around this same time last year, I made the fig compote of my dreams—tangy, sweet, and very well-balanced. The only problem? I wasn't really following a recipe, and never bothered to write anything down. OOPS! As a first attempt since then, I thought I'd try a more basic version, with just a few ingredients, and work my way up from there. I certainly have more work to do, but in the meantime I still have a lovely, rich condiment to enjoy!

Preparing to make fig compote with rosemary


Basic Fig Compote

Ingredients:
8 oz. dried figs, stems removed and finely diced (I used Mission "figlets")
1 teaspoon fresh rosemary, finely chopped
Juice of one orange (about 1/4 cup)
2-3 grinds of pepper
Water

Add all ingredients to a small pan, and pour in enough water to cover the figs. Cover and bring to a boil, then reduce to a simmer and cook until figs have absorbed the liquid, stirring occasionally. If figs are not soft enough to mash with the back of a spoon at this point, add more water and continue to cook. The whole process should take about 20-30 minutes. Once done, finish mashing with the back of a spoon, let cool completely, then store in an airtight container in the fridge for a week, or freeze for up to three months.

Notes: The consistency of this compote is ultimately up to you—I wanted mine on the softer side, and added water a few times before I considered it "done". You could also substitute a good red wine for some (or all) of the water used here. As with many things, this is best done at least one day in advance to let the flavors develop. Serve this with any meat of your choice, or for making a sweet/savory grilled cheese with your favorite, extra-sharp cheddar.


>o<

Monday, April 20, 2015

Join the Club: White Chocolate Pudding

I'd heard of cookbook clubs before, but had never seen one in my area. It also never occurred to me to initiate one myself! But, as very good fortune would have it, my own local library started one recently, and I was thrilled. The first book on the list: the smitten kitchen cookbook. I signed up to bring a dessert, brought my copy home, and started reading.

Although I was certainly interested in Deb Perelman's personal story, and the reasons why she cooks and blogs, I confess I mostly had eyes for the recipes themselves. The book was nicely broken down into seven main sections, with other smaller sections offering tips, techniques, and suggestions. Each recipe was accompanied by a story of what prompted their creation, and all were mouth-watering while being extremely easy to follow. The book club meeting itself was incredibly festive and fun. There was a good cross-section of recipes represented, including a mixed beverage which definitely helped add to the holiday feel :-) Best of all, everything was delicious.

Although there had been several desserts that caught my eye, the one I kept returning to and finally decided to bring was the White Chocolate Pudding. But I was nervous—I'd never made pudding from scratch before, and couldn't remember ever having used white chocolate in the kitchen. I was also willfully adapting the recipe from the original (which I happily found out most of my fellow participants had done with their recipes as well). There were a few lumps in the end product, but it tasted just fine, and was much easier to make than I thought it would be. I was happy to learn a new technique, engage with like-minded home cooks, left feeling wonderfully full and very excited for our next meeting!

White Chocolate Pudding


White Chocolate Pudding

Ingredients:
3 Tablespoons tapioca flour (also sold as tapioca starch)
1 Tablespoon granulated sugar (I used vanilla sugar)
1/4 teaspoon kosher salt
2 1/4 cups whole milk
4 1/2 ounces white chocolate, broken into small pieces
1 teaspoon vanilla extract

Whisk tapioca flour, sugar, salt and milk together in large, heat-proof bowl. Place in a pan over gently simmering water and cook for about 15-20 minutes, whisking to avoid lumps, until the mixture coats the back of a spoon. Add chocolate and whisk until melted and smooth, another 2-4 minutes. Remove from heat and stir in vanilla; let cool 5 minutes, then spoon into serving dishes. Cool to room temperature, then chill in the fridge for at least one hour before serving. Garnish with fresh fruit or other toppings, if desired.

Notes: As mentioned, this is adapted from the original recipe in the cookbook, which used cornstarch instead of tapioca flour for thickening. I also used a bit more vanilla in my version. The original had a quick blackberry curd as a topping; although the two contrasting layers were visually striking (and I'm sure would taste fabulous), I wanted to be able to isolate the flavor of just the pudding this first time around.

>o<

Monday, March 09, 2015

The Mother of Invention: Devil's Food Cupcakes with Baileys Buttercream Frosting

I had an English teacher in high school who admonished her students not to use absolutes in their writing—and she was, in fact, absolutely right. Because when I said I always had eggs in my fridge, I now realize this can't be true. There was at least one time where I had none, when at the same time I had an overwhelming need for chocolate cake. I also had no intention of leaving the house to get eggs. I quickly studied some recipes, calculated the ratio of liquid needed to make up for the missing eggs, and created these cupcakes. And they worked! The frosting, of course, is in honor of St. Paddy's being just around the corner, but I've listed some alternate suggestions below in the Notes. So, if you're egg-free, or just don't have any on hand, this is absolutely the cupcake for you :-) Enjoy!

Chocolate Devil's Food Cupcakes with Baileys Buttercream Frosting


Devil's Food Cupcakes with Baileys Buttercream Frosting

For the cupcakes:
1 cup all-purpose flour
1/4 cup unsweetened cocoa powder
2 teaspoons baking powder
1/2 teaspoon salt
4 Tablespoons butter, softened
4 Tablespoons brown sugar
1/2 cup granulated sugar
2 teaspoons pure vanilla extract
1 cup plain, whole-milk yogurt (or 1 cup whole milk with a splash of vinegar added to sour it)

For the frosting:
4 Tablespoons butter, softened
1 cup powdered sugar
1 Tablespoon Baileys (or other) Irish Cream Whiskey
Chocolate sprinkles or chocolate for grating (optional)

Preheat oven to 350 degrees Fahrenheit. Line a 12-cup muffin pan with cupcake liners and set aside.

In a medium bowl, mix together flour, cocoa, baking powder and salt until combined. In a large bowl, cream butter and sugars together until light and fluffy, then stir in vanilla extract. Starting and ending with flour mixture, blend in batches alternately with yogurt/sour milk until you have a smooth batter. Divide batter evenly among cupcake liners (about 2/3 full each) and bake for 18-20 minutes, or until a toothpick comes out clean. Let cool completely before frosting.

In a small bowl, combine frosting ingredients and blend until completely smooth. Frost using roughly a heaping teaspoon for each cupcake. Top with chocolate sprinkles or grated chocolate, if desired.

Notes: Instead of Irish Cream in the frosting, use any liqueur you enjoy that pairs well with chocolate, such as Grand Marnier, Chambord, Creme de Menthe, or Kahlua. If you prefer not to use liqueur, simply substitute vanilla extract. This amount of frosting is enough for a thin layer on each cupcake, which is plenty for me—however, if you like to pile it on, go ahead and double the amount!

>o<

Monday, February 09, 2015

Under My Thumb: Cream Cheese Thumbprint Cookies

A thumbprint cookie is a great treat to make, providing all the flavors of a sandwich cookie with just a fraction of the effort. The vibrant color of the jam also looks great against the creamy complexion of the cookie, and you can't have Valentine's Day without lots of red! Instead of just my thumb, though, I wanted to make heart-shaped cookies. There are various methods for creating the heart impression, and I would have used one, but then I remembered: I had decorative glass hearts that would do the work for me in just one go!

Cream Cheese Thumbprint Cookies jam hearts valentine's day


Cream Cheese Thumbprint Cookies

Ingredients:
1 cup butter, softened
8 oz. cream cheese, softened
1 1/4 cups granulated sugar
1 teaspoon pure vanilla extract
2 1/4 cups all-purpose flour
1/2 cup jam, stirred until smooth (I used seedless raspberry)

Cream butter, cream cheese and sugar together until light and fluffy. Stir in vanilla extract, then blend in flour until smooth. Cover dough and chill in the fridge for 45 minutes (the dough is very soft, so this step is important).

Preheat oven to 350 degrees Fahrenheit, and line baking sheets with foil or parchment.

Using a one-Tablespoon scoop or measuring spoon, scoop dough and roll into balls, then place on lined sheets a few inches apart. Press down in the middle with your floured thumb (or whatever you're using the make the indentation—see notes below). Fill each indentation with a scant 1/2 teaspoon of jam, and bake for 12-13 minutes, or until just golden. Remove and let cool on sheets before moving. Once completely cooled, store cookies in an airtight container between sheets of waxed paper.


Notes: These cookies are adapted from this recipe. The original calls for using two Tablespoons of dough per cookie, but one Tablespoon was perfect, and yielded exactly 56 cookies. It's better to underfill slightly than to overfill with jam—use the tip of your spoon to gently spread the jam evenly throughout the indentation before baking. Instead of your thumb for a round impression, you can try using your index finger to make a "V"-shaped impression to look like a heart :-)

>o<

Monday, February 02, 2015

A Snowball's Chance: Mexican Snowball Cookies

Need a little something to melt your true love's heart this season? Give these Mexican Snowballs a try! Like a Russian Teacake's spicier cousin, these little devils go down well with a good cup of coffee (or a nice glass of red wine). The cayenne pepper adds a pleasant warmth, without being too hot to handle ;-)

Mexican Snowball Spicy Cookies


Mexican Snowball Cookies

Ingredients:
1 cup butter, softened
1/2 cup powdered sugar
1 teaspoon pure vanilla extract
1 3/4 cups all-purpose flour
1/4 cup unsweetened cocoa
1/2 teaspoon ground cinnamon
1/4 teaspoon ground cayenne pepper
1/4 teaspoon kosher salt
3/4 cup finely chopped pecans
1 additional cup powdered sugar, for rolling

Preheat oven to 400 degrees Fahrenheit.

In a medium bowl, stir together flour, cocoa, cinnamon, cayenne pepper and salt. In a large bowl, cream butter and sugar together until fluffy, then blend in vanilla. Add flour mixture until combined, then stir in the pecans. Bring dough together with your hands (wrap tightly in plastic and chill for a few minutes if dough seems to soft at this stage).  Roll dough into one-inch balls and place an inch apart on lined baking sheets. Bake until set and just barely colored, about 8-10 minutes. Let cool on baking sheets for two minutes, then roll immediately in powdered sugar and place on lined racks; once completely cooled, roll in powdered sugar again and store in an airtight container.

Notes: These are not overly sweet or chocolate-y, but you could certainly substitute 1/2 cup finely chopped chocolate (or mini chips) for the pecans to make them more decadent. If you have a favorite dried, ground chili, such as ancho or chipotle, use it in place of the cayenne.


>o<
Thursday, January 29, 2015

Recipe Roundup: Nibbles and Bits

Whether you're putting out a huge spread for the big game, hosting a cocktail party, or just having a few friends over for drinks, make sure you have a few tasty morsels on hand to round out the rest of your menu!

The Union Square Cafe's Bar Nuts: You can't go wrong with this little nibble—easy to make, and even easier to eat, these will please your guests to no end (or at least until the end of the evening).


Cheddar Buttons: Who says you can't make your own cheesy crackers? Customize these by using your favorite cheese, and add herbs and spices to suit your palate (pepper jack would be a great cheese option here).


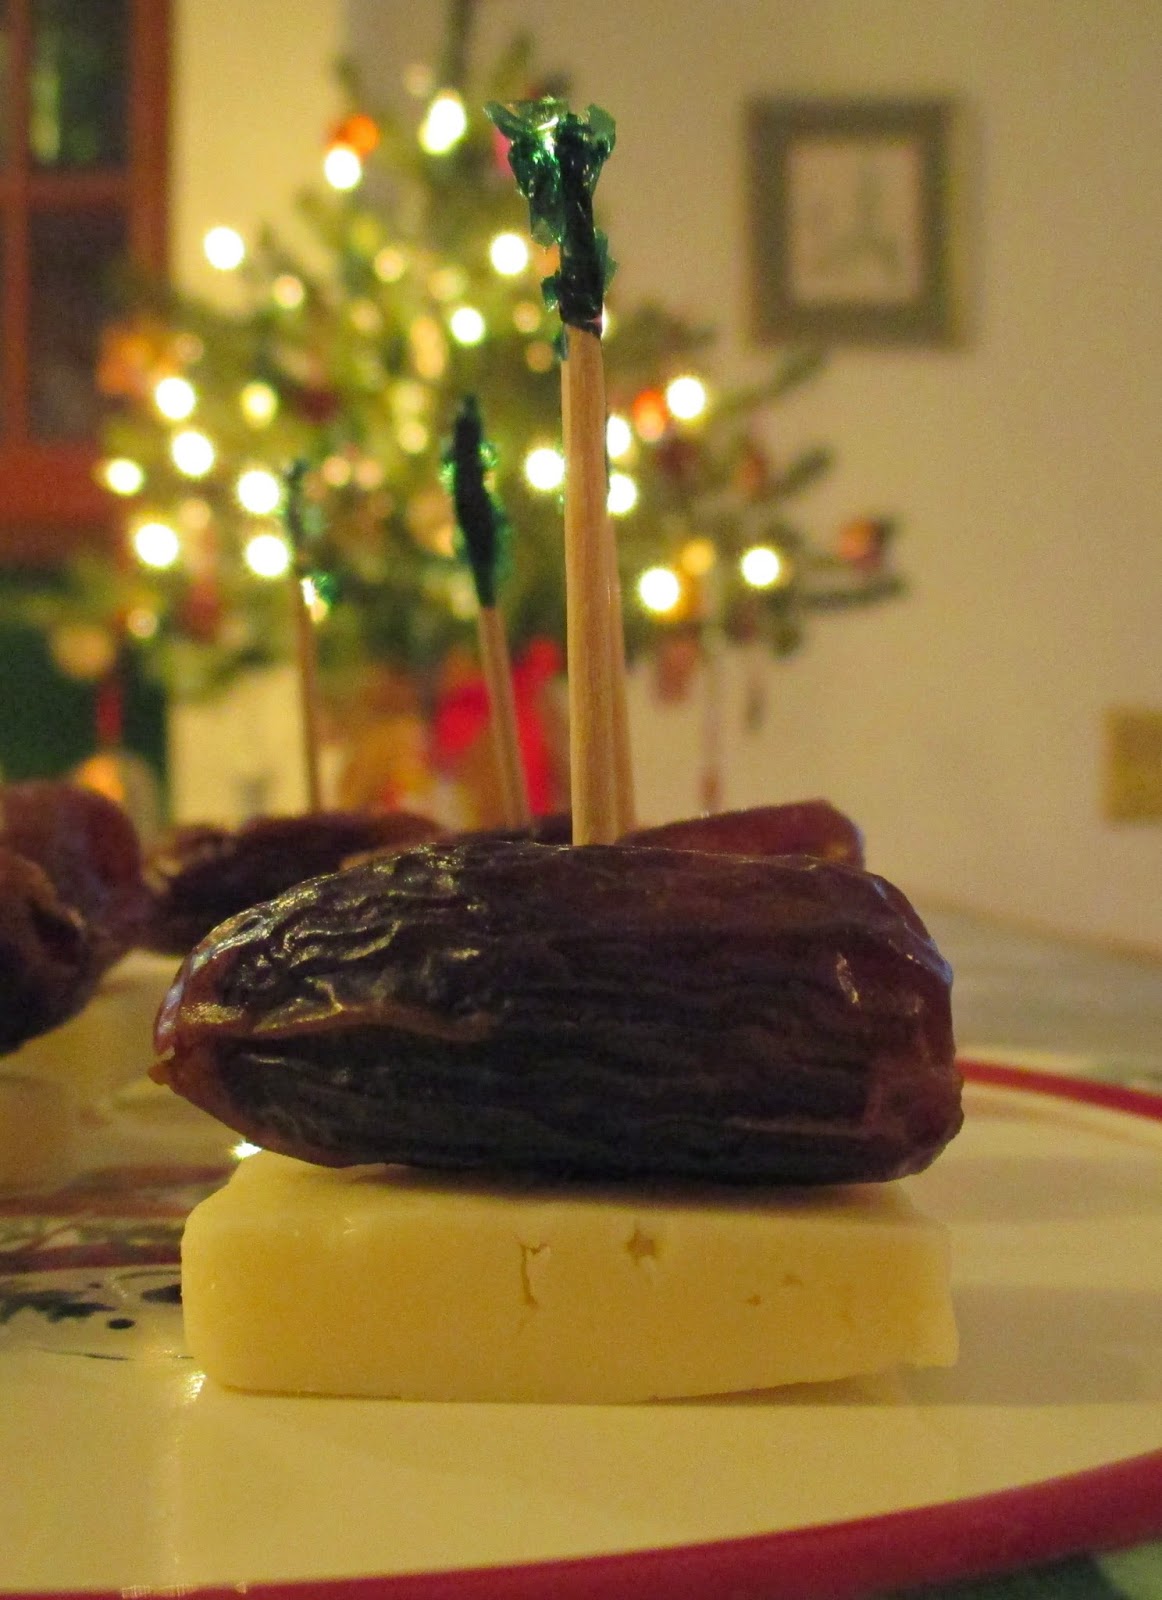
Cheese and Dates: Simple, yet effective. Again, the choice of cheese is yours—or make several kinds if you can't decide. Try using dried figs or apricots in addition to dates as well.


Pistachio Bars: Don't forget dessert! Use your favorite roasted, salted nuts in place of the pistachios, or a combination of nuts for even more flavor. Either way, the salty-sweet combination is sure to be a (dare I say it?) touchdown!


>o<

Monday, December 29, 2014

Just One More Thing: Cheese and Date Cocktail Nibbles

It's been a busy year: you've worked hard, the holidays have been hectic, and all you want to do now is relax. Still, you may yet have more guests to feed, more family to entertain, and possibly another party or two before the year is out—and the thought of making just one more thing is enough to tip you over the edge! But I'm here to help, with a simple, quick, and very tasty little nibble that can be thrown together in no time:

cheese date snack appetizer


Cheese and Date Cocktail Nibbles

Ingredients:
Cheese
Dates (pitted)

Slice cheese into pieces roughly the length and width of your dates, and about 1/4 inch thick. Skewer a date onto a toothpick, followed by a piece of cheese. Repeat until you have as many as you need, or until you run out of cheese and dates :-)

Notes: You can certainly stuff the cheese inside the dates by slicing the dates open along one side, and even add a pecan or walnut half as well. Use your favorite cheese for these, or try a variety—a good extra sharp cheddar goes extremely well with the sticky sweetness of the dates. If you don't like dates, use another kind of dried fruit like apricots or plums.

>o<

Friday, December 12, 2014

When Irish Eyes Are Smiling: Orange-Currant Shortbread Buttons

While making my Christmas cookie list this year, I realized my mind had somehow wandered ahead to St. Patrick's Day. I started dreaming of things like chocolate-stout cake, and had visions of soda bread dancing in my head. Since I like making my soda bread with orange zest and currants, I decided to bake them into a cookie for this holiday, too:

orange currant shortbread cookies


Orange-Currant Shortbread Buttons

Ingredients:
1 cup butter, softened
1/2 cup powdered sugar
1 teaspoon pure vanilla extract
1/4 teaspoon kosher salt
Zest of one orange
2 cups all-purpose flour
1/4 cup dried currants
2 Tablespoons (or so) granulated sugar, for sprinkling (optional)

Preheat oven to 350 degrees Fahrenheit.

In a large bowl, cream butter and sugar together until light and fluffy. Stir in vanilla, salt, and orange zest, then blend in the flour. Add the currants and mix until combined. Take about 1/2 Tablespoonfuls of dough and roll into balls, then flatten gently between your hands (buttons should be about 1/4 inch thick and an inch in diameter). Place on lined baking sheets and prick once in the center with a knife or skewer. Sprinkle with granulated sugar, if using. Bake for about 12-15 minutes, or until the buttons are set and lightly golden around the edges. Remove, let cool completely, and store in an airtight container.

Notes: The orange zest smells (and tastes) heavenly in these cookies, and the currants add a mellow, chewy sweetness without being overly fruity. The basic dough can also be used as a starting point for your favorite flavors, or left plain for classic, buttery shortbread.

>o<